TMG’s Role in Enhancing Muscle, Reducing Fat, and Promoting Longevity
In the quest for optimal health, longevity, and a physique that reflects our fitness aspirations, the supplement industry offers a myriad of options. Among these, one compound stands out not only for its body composition benefits but also for its potential to enhance longevity. This compound is TMG (trimethylglycine), also known as betaine, a nutrient that the body can produce and is also found in certain foods. However, to achieve the amounts necessary for significant health benefits, supplementation is often recommended.
What is TMG?
TMG is a methylated derivative of the amino acid glycine. In simpler terms, it’s glycine with three additional methyl groups. This might sound complex, but the process of methylation plays a crucial role in our body. It involves the donation of methyl groups to various processes, such as DNA repair, detoxification, and the expression of genes. TMG, as a potent methyl donor, supports these essential functions, facilitating a balance between methylation and demethylation, processes that are critical for cellular activity, healthy aging, muscle development, and fat metabolism.
TMG’s Impact on Body Composition
Fat Loss
Research, including a significant meta-analysis published in the journal Nutrients, sheds light on TMG’s impressive capacity to reduce fat mass and body fat percentage without affecting overall body weight or BMI. This indicates that TMG aids in fat loss while preserving muscle mass, a dual action that is typically only attributed to the use of performance-enhancing drugs.
Muscle Building
TMG’s benefits extend into muscle building. Studies have shown that individuals supplementing with TMG experience an increase in muscle mass. Remarkably, this increase does not come with the water weight gain often associated with muscle-enhancing supplements or steroids, suggesting TMG’s unique mechanism of action that promotes lean muscle growth.
Mechanisms Behind TMG’s Effects
The mechanisms through which TMG exerts its effects are multifaceted:
Inhibition of White Fat Production: TMG has been shown to inhibit the production of white fat, the type of fat we typically aim to reduce, through enhanced mitochondrial biogenesis and increased thermogenesis from brown fat.
Reduction in Fatty Acid Synthesis in Muscle: This leads to less fat accumulation within the muscles, contributing to a leaner body composition.
Decrease in Insulin Resistance: By improving insulin sensitivity, TMG facilitates better muscle protein synthesis, further aiding in muscle building and fat loss.
TMG for Longevity and Health
Beyond its body composition benefits, TMG stands out for its role in enhancing longevity. High homocysteine levels have been linked to an increased risk of various diseases, and TMG has been proven to significantly lower homocysteine levels. Furthermore, TMG serves as a counterbalance to potential methyl pool depletion caused by NAD+ boosting supplements like NMN, ensuring a healthy balance of cellular processes essential for aging.
Practical Tips for TMG Supplementation
When considering TMG supplementation, the following tips can be helpful:
Recommended Doses: For fat loss and muscle building, doses range from 2.5g to 6g per day. For longevity and reducing homocysteine levels, lower doses may still be effective.
Choosing TMG Supplements: Look for reputable brands and consider products that combine TMG with other synergistic nutrients for optimal health benefits.
Dietary Sources: Include beets, shrimp, spinach, and wheat bran in your diet as natural sources of TMG.
Food Source
TMG Content (mg per 100g)
Wheat Bran
1300+
Beets
200
Shrimp
Varies
Spinach
Varies
Conclusion
TMG offers a compelling combination of benefits for those looking to improve their body composition and invest in their long-term health. By supporting fat loss, muscle growth, and cellular functions related to longevity, TMG supplementation can be a valuable addition to your wellness regimen.
Call to Action
We encourage readers to share their experiences with TMG supplementation or to consider trying it as part of their health and fitness journey. Don’t forget to take advantage of the Thrive Market offer to explore the benefits of TMG and other healthful products. Together, let’s strive for optimal health, longevity, and a physique that reflects our hard work and dedication.
Maximizing Muscle Growth and Strength with the Perfect Push Workout: A Comprehensive Guide to the Push | Pull | Legs (PPL) Split series by Jeff Cavaliere
When we look at creating a perfect workout, no matter what it is, you have to understand there’s a lot of selections that go into that. I’m making my bold selections here and putting them into this workout for a reason because I believe it’s going to work to help you to build muscle. That being said guys, I want to break it down for you step-by-step and show you not just what we’re picking, but why we’re picking it so you can get the gains that you’re looking for.
Understanding the PPL Split
Before we dive into the details of the perfect push workout, let’s first understand the Push | Pull | Legs (PPL) split. This split is a popular and effective way of organizing workout routines. It involves dividing your training sessions into three main categories: push, pull, and legs.
On the push day, you focus on training the pushing muscles, which primarily include the triceps, shoulders, and chest. By dedicating a specific day to these muscles, you can ensure they receive proper attention and stimulation for growth and development.
The perfect push workout we’ll be discussing today is part of the PPL series, which means it complements the pull and legs workouts. This split allows for balanced and comprehensive training of all major muscle groups, leading to overall strength and physique improvements.
The PPL Split and Training Frequency
Day
Monday
Tuesday
Wednesday
Thursday
Friday
Saturday
Sunday
Option A
Pull
Push
Legs
Pull
Push
Legs
OFF
Option B
Pull
Push
Legs
OFF
Pull
Push
Legs
Option C (Asynchronous Split)
OFF
Pull
Push
Legs
OFF
Pull
Push
This weekly chart provides a structured plan for your training routine. It ensures that each major muscle group is targeted with adequate rest days in between to promote recovery and growth. Remember to adjust the sets, reps, and exercises according to your fitness level and goals. Stay consistent and enjoy your workouts!
Now that we have a comprehensive understanding of the perfect push workout, let’s take a moment to discuss the PPL split and training frequency options. The PPL split allows for organized and balanced training of all major muscle groups throughout the week.
In the PPL split, you have the option to follow a six-day training cycle, where you repeat the push, pull, and legs workouts for six consecutive days before taking a day off. This approach provides consistent stimulation to the muscles, promoting growth and progress.
Alternatively, you can opt for the asynchronous split, which involves incorporating rest days between the push, pull, and legs workouts. This split allows for more frequent rest and recovery, which can be beneficial for muscle growth and reducing the risk of overtraining.
The asynchronous split, as mentioned earlier, provides an additional rest day between each workout. For example, you can perform the push workout on day one, followed by a rest day on day two. Then, proceed with the pull workout on day three, followed by another rest day on day four. Finally, perform the leg workout on day five, followed by a rest day on day six. This pattern repeats for subsequent weeks.
While the asynchronous split may introduce an unpredictable off day, the additional rest days allow for enhanced recovery, potentially leading to better muscle growth and overall performance. However, it’s important to note that individual preferences and training goals may vary, so choose the frequency that suits your needs and allows for adequate recovery.
The Perfect Push Workout: Push One
Now, let’s dive into the details of the perfect push workout. We have carefully selected a set of exercises that target the triceps, shoulders, and chest to maximize muscle growth. In Push One, we will cover six exercises that work synergistically to help you achieve the desired results. Let’s explore each exercise in detail:
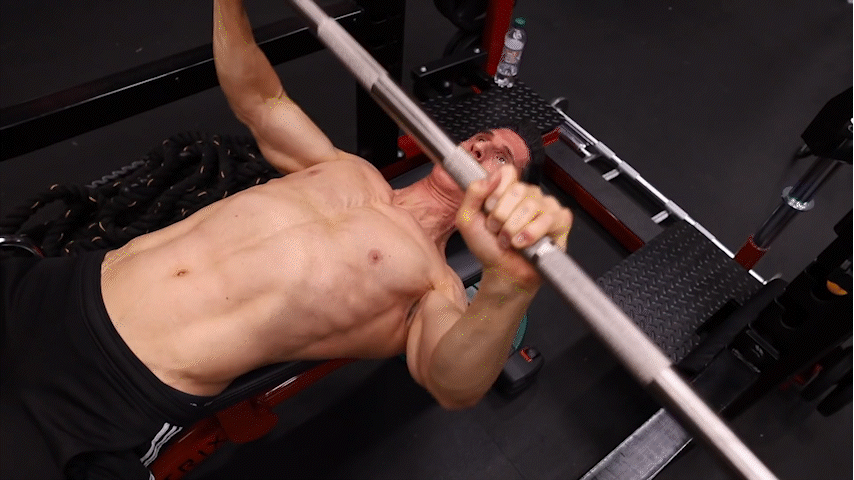
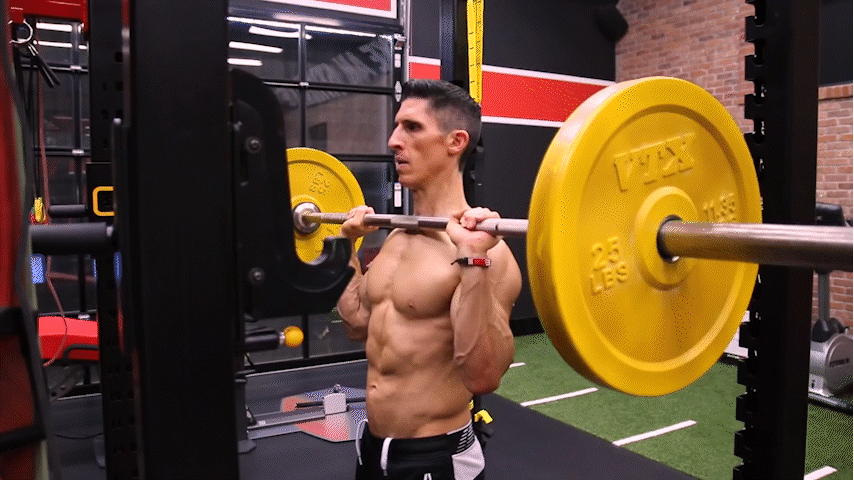
Exercise 1: Barbell Bench Press
The Barbell Bench Press is a classic exercise that forms the cornerstone of any effective push routine. It is an excellent compound movement that builds strength and muscle mass in the triceps, shoulders, and chest. When performing the Barbell Bench Press, aim for four sets of four to six reps. This rep range allows for sufficient intensity without pushing yourself to failure. Keep in mind that as fatigue sets in, you may need to adjust the weights to maintain proper form and stay within the prescribed rep range.
Exercise 2: Hi-to-Low Crossover
To complement the Barbell Bench Press, we incorporate the Hi-to-Low Crossover. This exercise provides a unique opportunity to fully contract the chest by bringing the arm across the body. By performing the crossover in a high-to-low motion, we target the lower chest fibers, particularly the abdominal fibers. Additionally, this exercise promotes full adduction of the hand across the chest, making it an effective hypertrophy exercise. Aim for three sets of 10 to 12 reps to maximize the benefits of this exercise.
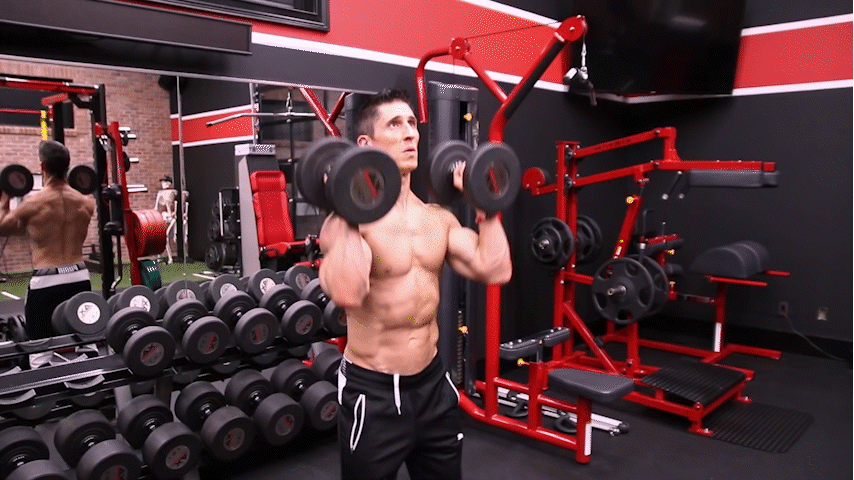
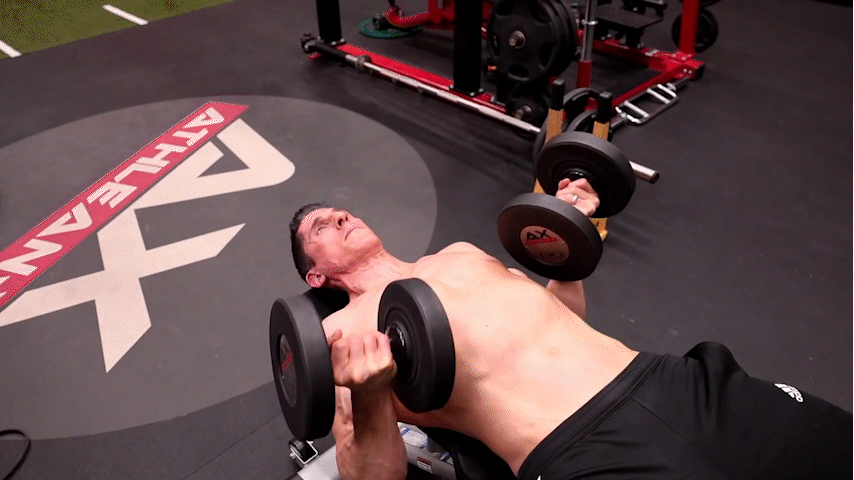
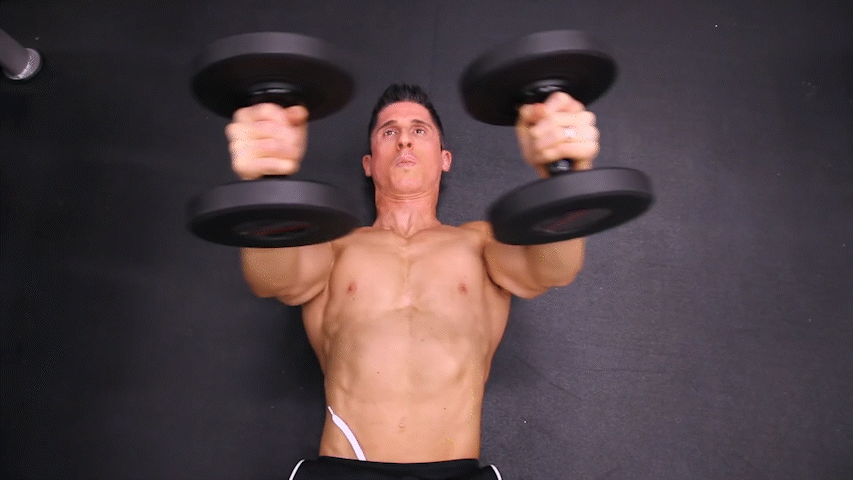
Exercise 3: Dumbbell Shoulder Press
Shifting our focus to the shoulders, we introduce the Dumbbell Shoulder Press. While the barbell variation is a viable option, we prefer the Dumbbell Shoulder Press for this workout. Performing the exercise in a standing position, as opposed to a seated position, allows for better shoulder mechanics and avoids unnecessary restrictions caused by pushing the scapula back into the bench. Aim for four sets of 8 to 10 reps, slightly higher than the previous exercise, to stimulate muscle growth in the shoulders.
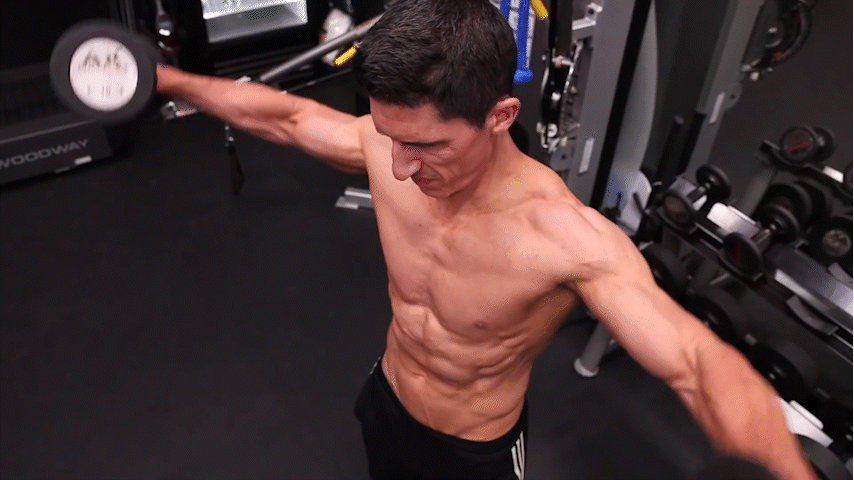
Exercise 4: 1 1/2 Side Lateral Raise
Next on our list is the 1 1/2 Side Lateral Raise, an exercise that specifically targets the middle deltoid. This exercise emphasizes hypertrophy by increasing the time under tension. The technique involves taking the weight up fully, coming down halfway, and then returning to the top position. By eliminating momentum and focusing on controlled contractions, we effectively engage the targeted muscle. Perform three sets of 12 to 15 reps to optimize the benefits of this exercise.
Exercise 5: Tricep and Bicep Superset
In this superset, we incorporate a tricep exercise alongside a bicep exercise, offering additional volume for both muscle groups without interfering with the primary push exercises. The first exercise is the Lying Tricep Extension, which primarily targets the long head of the triceps. Aim for three sets of 10 to 12 reps, taking the exercise to failure. Immediately following the tricep extension, move on to the Dumbbell Waiter’s Curl. This exercise provides a challenging workout for the biceps while maintaining a balance within the push routine. Perform three sets of 10 to 12 reps for both exercises.
Exercise 6: Rotator Cuff External Rotation
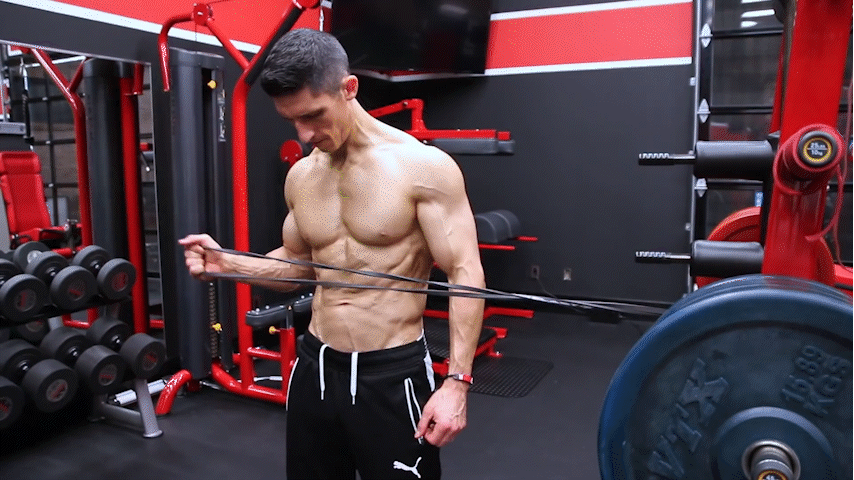
To complete the push workout, we need to pay attention to proper shoulder function and stability. The Rotator Cuff External Rotation exercise serves as a corrective exercise to strengthen the rotator cuff muscles and promote healthy shoulder movement. This exercise is simple yet crucial for preventing imbalances caused by the internal rotation involved in push workouts. Perform three sets of 15 to 20 reps with a resistance band to ensure proper activation of the external rotators.
Transition and Recap
Congratulations on completing the first push workout! Before moving on, let’s recap the exercises covered:
Exercise
Sets and Reps
Barbell Bench Press
4 sets of 4-6 reps
Hi-to-Low Crossover
3 sets of 10-12 reps
Dumbbell Shoulder Press
4 sets of 8-10 reps
1 1/2 Side Lateral Raise
3 sets of 12-15 reps
Tricep and Bicep Superset
3 sets of 10-12 reps (each exercise)
Rotator Cuff External Rotation
3 sets of 15-20 reps
Now that we have covered the first push workout in detail, it’s time to transition to the second push workout. In the next section, we will explore a new set of exercises designed to complement and build upon the foundation laid in the first workout. Stay tuned for an invigorating continuation of your push routine.
The Perfect Push Workout: Push Two
Exercise 1: Overhead Barbell Press
We begin Push Two with the Overhead Barbell Press. This exercise serves as a compound movement that focuses on building strength and driving hypertrophy in the triceps, shoulders, and chest. The Overhead Barbell Press allows for a greater load to be used compared to its dumbbell counterpart. Aim for four sets of four to six reps, leaving one to two reps in the tank. This rep range ensures sufficient intensity while avoiding failure. As you progress, remember to adjust the weights accordingly to maintain proper form and stay within the recommended rep range.
Exercise 2: Dumbbell Underhand Bench Press
Moving on to the next exercise, we introduce the Dumbbell Underhand Bench Press. This variation specifically targets the upper chest while reducing stress on the shoulders compared to the Incline Dumbbell Bench Press. Performing the exercise with an underhand grip engages the upper chest muscles effectively. Aim for four sets of eight to ten reps to optimize muscle growth in this area. Remember to maintain stability and control throughout the movement, focusing on the mind-muscle connection.
Exercise 3: Abduction Row
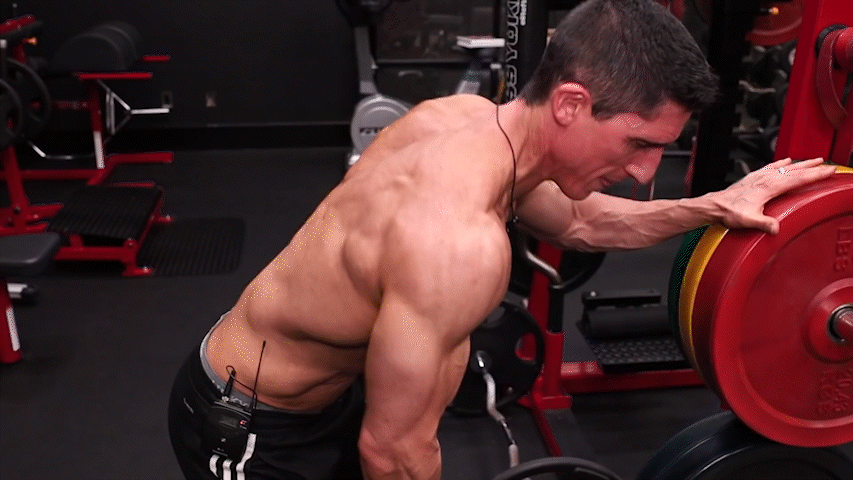
Now, we introduce a unique inclusion in the push workout—Abduction Row. Traditionally considered a pulling exercise, this movement is strategically incorporated on push day to target the middle and rear deltoids while offsetting accumulated fatigue. The Abduction Row involves driving the arm back and out, focusing on scapular abduction. Perform three sets of eight to ten reps, ensuring proper scapular control and tension in the targeted muscles. Maintain a slight forward lean to maximize the activation of the middle and rear deltoids.
Exercise 4: Dumbbell Floor Fly
The Dumbbell Floor Fly takes center stage in this push workout. This exercise offers several advantages over the unsupported version, providing a safer and more controlled environment. By performing the exercise on the floor, we ensure that the anterior shoulder capsule is not overextended, reducing the risk of injury. The Dumbbell Floor Fly also allows for eccentric overload, a key driver of hypertrophy. Aim for three sets of ten to twelve reps, focusing on a controlled range of motion and tempo throughout the exercise.
Exercise 5: Tricep and Bicep Superset (Heavier Focus)
Next, we delve into a superset that places a heavier focus on tricep and bicep exercises, allowing for additional volume and strength development. The first exercise in this superset is the Close Grip Bench Press. By narrowing the grip, we target the medial and lateral heads of the triceps, promoting their growth and strength. Perform three sets of six to eight reps, gradually increasing the weights as you progress. Immediately after each set of Close Grip Bench Press, move on to a dumbbell curl exercise of your choice. Select a weight that allows for three sets of ten to twelve reps, focusing on quality contractions and controlled movements.
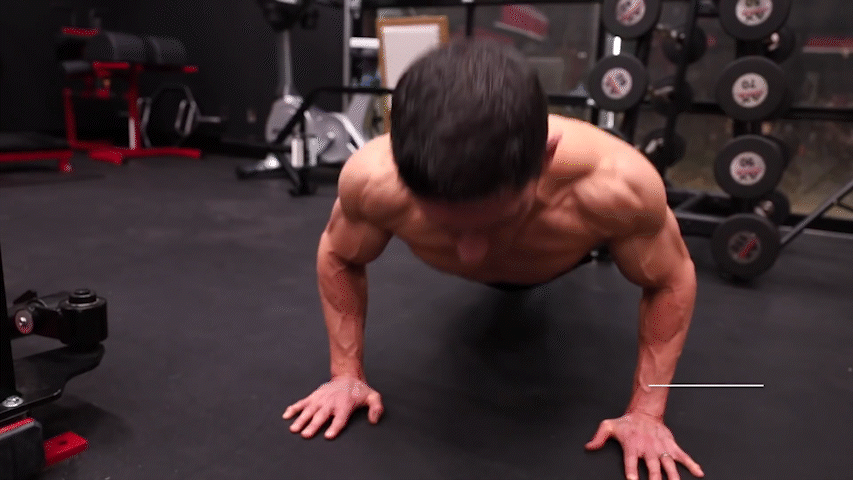
Exercise 6: Pushup Plus
To conclude Push Two, we introduce the Pushup Plus exercise. This exercise serves a dual purpose—it enhances scapular control and provides additional stimulation to the chest muscles. Start in a pushup position and proceed to push through as hard as you can, allowing your shoulder blades to wrap around your body into protraction. This movement engages the serratus anterior muscles and promotes stability. Perform three sets to failure, focusing on proper mechanics and maintaining tension throughout the exercise.
Transition and Recap
Congratulations on completing the second push workout! Before moving on, let’s recap the exercises covered:
Exercise
Sets and Reps
Overhead Barbell Press
4 sets of 4-6 reps
Dumbbell Underhand Bench Press
4 sets of 8-10 reps
Abduction Row
3 sets of 8-10 reps
Dumbbell Floor Fly
3 sets of 10-12 reps
Tricep and Bicep Superset
– Close Grip Bench Press
3 sets of 6-8 reps
– Dumbbell Curl
3 sets of 10-12 reps
Pushup Plus
3 sets to failure
These exercises are part of the Push Two workout and aim to target the triceps, shoulders, and chest while promoting muscle growth and strength.
Unleash Your Sleeve-Filling Potential: A Comprehensive Guide by Fitness expert Jeff Cavaliere
Did you know that the average medium-sized T-shirt has a 4.6 inch diameter sleeve? That means you need a minimum of a 14-inch unflexed arm to fill it! And if you’re wearing a large or XL shirt, you’ll need even bigger arms to prevent that ugly bagginess.
If you’re tired of your shirts looking too loose and you want to change the way your arms look, it’s time to revolutionize your arm training. In this article, I will guide you through five essential steps to transform the effectiveness of your biceps and triceps workouts, ensuring bigger and more impressive arms in just 30 days. And to make it even better, I’ll provide you with a step-by-step routine that removes all the guesswork. Let’s dive in!
Step 1: Understanding the Sleeve-Filling Requirement
Before we delve into the specific steps, it’s crucial to understand the sleeve-filling requirement. You need to measure your arm size accurately to determine the minimum size needed to fill different shirt sizes. For example, a medium-sized shirt requires a 14-inch unflexed arm, while a large size necessitates a 15-inch unflexed arm. If you’re sporting an XL shirt, you’ll need almost 16-inch arms to avoid baggy sleeves.
Knowing these measurements gives you a clear goal to work towards. So grab a measuring tape and find out your current arm size. This way, you can track your progress and ensure you’re on the right path to achieving sleeve-filling arms.
Step 2: Avoiding the 5 Big Mistakes in Arm Training
To see significant gains in arm size, it’s crucial to address the common mistakes many people make in their biceps and triceps training. One of the most critical points to understand is that building arm strength alone won’t necessarily lead to bigger arms. While strength is important, it’s equally vital to intensify your arm workouts.
Instead of focusing solely on the weight you’re lifting, emphasize taking your sets to failure. Push yourself beyond your limits, using techniques like drop sets, run the rack, and mechanical drop sets. By taking each set to the point of failure and even beyond, you’ll maximize the effectiveness of your workouts and experience substantial gains in arm size.
Step 3: Eccentric Overload for Muscle Growth
Now let’s discuss the power of eccentric overload, a concept that can revolutionize your arm training. Eccentric overload refers to emphasizing the lowering phase of each repetition. By slowing down and controlling the lowering portion, you provide additional tension and stress to your muscles, leading to greater muscle growth.
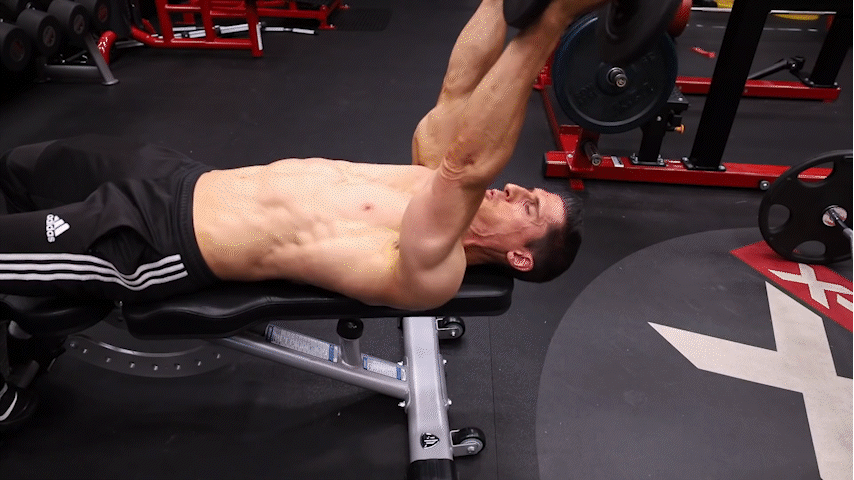
Contrary to popular belief, controlled eccentric movements are incredibly safe when performed correctly. For example, in a lying tricep extension, you can enjoy a slow eccentric movement on the way down and safely drop the weight behind you if needed. Applying eccentric overload stretches and damages the muscles, stimulating them to grow back stronger and bigger.
To incorporate eccentric overload into your arm training, choose exercises that allow you to focus on the eccentric portion. This can include exercises like dumbbell curls, tricep pushdowns, or skull crushers. Remember, controlling the eccentric phase is key to maximizing muscle growth and achieving those coveted bigger arms.
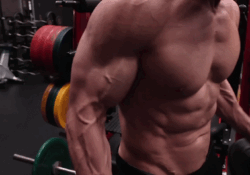
Step 4: Don’t Forget the Brachialis Muscle
When it comes to arm training, many people solely focus on their biceps and neglect an essential muscle—the brachialis. The brachialis is a separate muscle located beneath the biceps, and developing it is crucial for achieving maximum arm size.
The brachialis plays a vital role in pushing up the biceps, contributing to the peak and overall width of the arm. If you want those shirt sleeves to be filled out properly, it’s time to incorporate brachialis exercises into your routine. Sprinkling in the occasional brachialis exercise won’t be sufficient; you need to make it a consistent part of your arm training.
To target the brachialis effectively, consider exercises like hammer curls or reverse curls. These movements isolate the brachialis and provide the stimulus necessary for its growth. By incorporating specific exercises that focus on the brachialis, you’ll achieve not only impressive bicep size but also enhanced arm width and fullness.
Step 5: Maximizing Tricep Growth
While biceps often steal the spotlight, neglecting your triceps can hinder your progress towards bigger arms. The triceps play a significant role in arm size and shape, and it’s crucial to provide them with dedicated training for optimal growth.
Although triceps receive indirect work from chest and shoulder exercises, direct tricep training is necessary to achieve maximum growth. While the triceps have the capacity to handle more volume than the biceps, adjustments in training need to be made to stimulate their growth effectively.
Incorporating bodyweight exercises can be an excellent way to maximize tricep growth. Push-ups, bench dips, and tricep extensions can significantly increase tricep volume and provide a different stimulus compared to traditional weightlifting exercises. These exercises can target different heads of the triceps and help achieve a more complete contraction or stretch.
Remember, high repetition ranges combined with proper form and intensity are key to maximizing tricep growth. Don’t be afraid to push yourself to failure during these exercises, as metabolic fatigue and intensity are crucial for hypertrophy gains.
Step-by-Step 30-Day Plan for Bigger Arms
Now that we’ve covered the essential steps to bigger arms, let’s put it all together into a comprehensive 30-day plan. This plan will guide you through specific workouts for biceps, triceps, and what we’ll call the “missing pieces” to ensure a well-rounded approach to arm training.
Biceps Workout:
Incorporate exercises that emphasize intensity and eccentric overload. Perform exercises like incline dumbbell curls, concentration curls, or preacher curls. Use techniques such as drop sets, mechanical drop sets, or 21s to maximize the effectiveness of your sets. Aim for 3-4 sets per exercise, targeting the biceps from various angles.
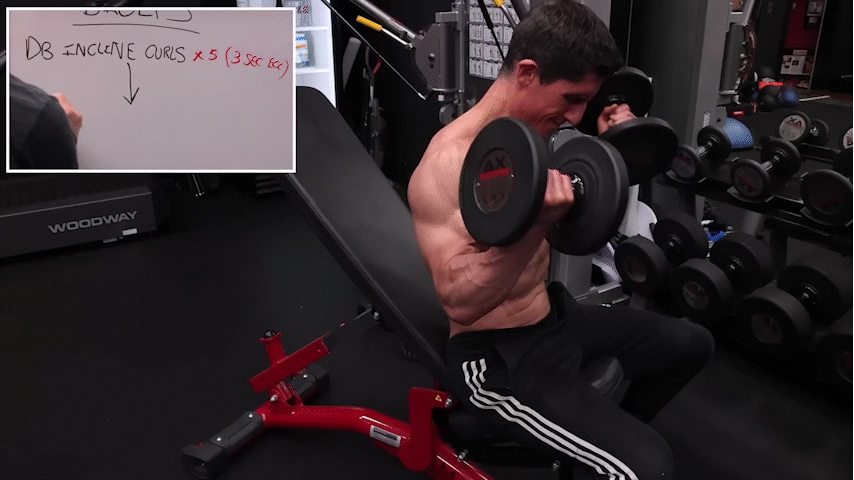
1A. DB Incline curls x 5 reps (20 seconds)
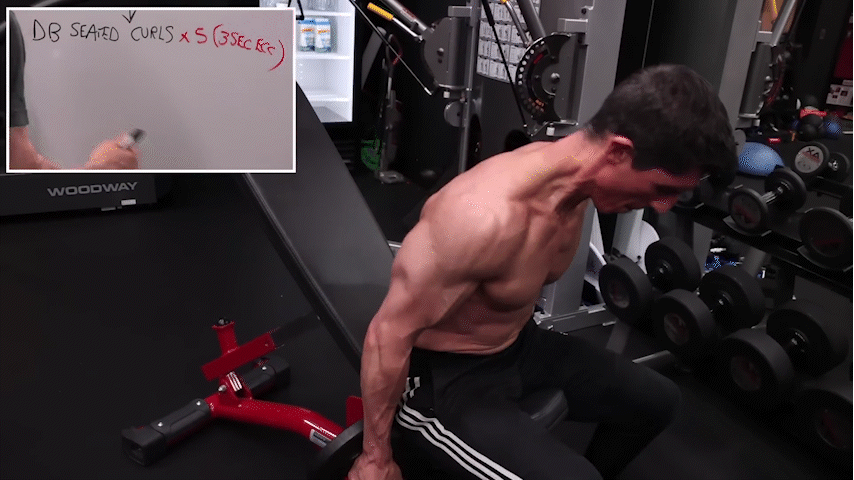
1B. Seated DB curls x 5 Reps (20 seconds)
1C. DB drag curls X 5 Reps (20 seconds)
Triceps Workout:
Focus on exercises that maximize the contraction and extension of the triceps. Include exercises like lying dumbbell extensions, tricep pushdowns, or dips. Utilize techniques like 21s to divide the range of motion into different sections. Perform 3-4 sets per exercise, aiming for a complete triceps workout.
1A. DB Incline extensions x 21*
1B. Incline DB kickbacks x 1 minute
1C. Eccentric only DB skull crushers x 1 minute
*Performed in 21 style (7 top rom/ 7 bottom rom/ 7 full rom
Missing Pieces Workout:
Incorporate exercises that target the brachialis and other supporting muscles. Include hammer curls, reverse curls, or brachialis-specific exercises. Perform 2-3 sets of brachialis exercises, ensuring a proper stimulus for growth.
Bodyweight triceps variation – 2-3 x F
Hammer curl variation – 3-4 x 10-12 rep failure
Conclusion
By following these five steps and implementing the 30-day plan, you are guaranteed to see noticeable gains in your arm size. Remember, consistency and dedication are key to achieving your desired results. Measure your progress, track your arm size, and continue to challenge yourself throughout the process.
Say goodbye to loose shirt sleeves and hello to sleeve-filling arms. With proper arm training techniques, you’ll achieve the impressive arm size you’ve always desired. So, roll up your sleeves, commit to the journey, and get ready to showcase your bigger and stronger arms to the world!