Best Balance Boards and Stability Tools for Older Adults: Improve Mobility and Prevent Falls

Best Balance Boards and Stability Tools for Older Adults: Improve Mobility and Prevent Falls

Last updated: August 16, 2026

Quick Answer

The best balance boards and stability tools for older adults are low-profile rocker boards, foam balance pads, and inflatable wobble cushions, used 5 to 10 minutes, three times per week, near a countertop or sturdy chair for hand support. Peer-reviewed research shows structured 4 to 9 week balance-board programs improve standing balance, mobility, and Timed Up and Go scores, and can cut fall risk by roughly 23 to 28 percent when combined with strength work.[1][5][10] Start with the most stable tool that still challenges you, and progress slowly over weeks, never days.

Key Takeaways

  • Foam pads and wobble cushions are the safest entry points; rocker boards suit intermediate users; multi-axis wobble boards are for confident, mobile seniors only.[4][11]
  • 10 minutes, 3 times per week is the evidence-supported dose for measurable balance gains on a wobble board.[9][10]
  • Structured 4 to 9 week programs improve Berg Balance Scale and Timed Up and Go scores in older adults.[1][13][15]
  • Multicomponent training (strength + aerobic + balance board) prevents falls better than any single tool.[3]
  • Always train near a countertop, sturdy chair, or grab rail, and skip balance boards entirely if you have active vertigo or a recent fall.[2][7]
  • A basic home kit (foam pad, wobble cushion, half-dome trainer, grab rail) typically runs $150 to $250.[14]
  • Consult a physician or physical therapist before starting if you have arthritis, neuropathy, or a history of falls.[7]

What Is a Balance Board and How Does It Help Older Adults?

A balance board is a flat platform mounted on an unstable base, a curved rocker, a rounded dome, or a spherical pivot, that forces small stabilizing muscles in the ankles, hips, and core to work continuously to keep the body upright. For older adults, this trains proprioception (the body's sense of position), reaction time, and postural control, all of which decline with age and are directly linked to fall risk.[1][15]

Peer-reviewed evidence shows that short, regular balance-board sessions improve standing balance, Timed Up and Go scores, and Berg Balance Scale results in seniors.[1][9][13] The Mayo Clinic notes these tools can enhance balance, coordination, and lower-limb strength, and may reduce fall risk when used correctly.[2]

What Is a Balance Board and How Does It Help Older Adults?

Types of stability tools covered in this guide:

Tool Instability level Best for Typical price
Foam balance pad Very low Beginners, arthritis, post-surgery $20,$35
Wobble cushion (disc) Low Seated core work, mild standing $25,$40
Rocker board (single-axis) Moderate Intermediate users $30,$55
Half-dome trainer (BOSU-type) Moderate, high Confident seniors $80,$130
Multi-axis wobble board High Advanced, no fall history $40,$70

Best Balance Boards for Seniors with Arthritis

For seniors with arthritis, the safest options are foam balance pads and inflatable wobble cushions, because they provide gentle instability without forcing sharp ankle or knee angles. A low-profile rocker board with a wide, non-slip surface is the next step up once joint pain is under control.

What to look for:

  • Wide platform (16 inches or more) so feet can sit shoulder-width apart
  • Low height (under 3 inches) to reduce the drop if balance is lost
  • Gentle curvature, steep rockers force painful ankle dorsiflexion
  • Non-slip textured top for bare or socked feet
  • Weight capacity clearly rated above your body weight

Avoid hard plastic multi-axis boards, small round wobble discs used standing, and any tool that requires deep knee bend to stabilize. Seated wobble-cushion work is an excellent arthritis-friendly starting point.[4][7]

Balance Board vs Stability Ball for Elderly Users

A balance board is generally safer and more practical than a stability ball for most older adults. Balance boards keep the feet on a stable floor and challenge ankle and hip stabilizers in a controlled range. Stability balls require sitting or lying on a large, rolling sphere, a setup with significantly higher fall risk for anyone with reduced grip strength, hip mobility, or reaction speed.

Use a balance board if the goal is standing balance and fall prevention. Use a stability ball only in seated form (as a chair alternative for core engagement) and only with a wall behind you or a chair frame around the ball. Never do bridges or supine exercises on a full-size stability ball without supervision.

How Often Should Older Adults Use Balance Boards?

Three sessions per week of 10 minutes each is the evidence-supported dose. A 2026 analysis of multi-axis Indo Balance Board training found this schedule produced significant Berg Balance Scale improvements in older adults.[9][10] A separate review recommends roughly 30-minute sessions 2 to 3 times weekly for at least 3 weeks to see measurable gains, aligning with American Geriatrics Society falls-prevention guidance.[10]

Sample weekly schedule:

  • Monday: 10 min balance board + 10 min chair squats
  • Wednesday: 10 min balance board + short walk
  • Friday: 10 min balance board + light resistance band work

Gains are typically maintained for at least three months after a structured program ends, but stopping entirely leads to gradual loss of balance improvements.[1][15]

Balance Board Exercises for Fall Prevention

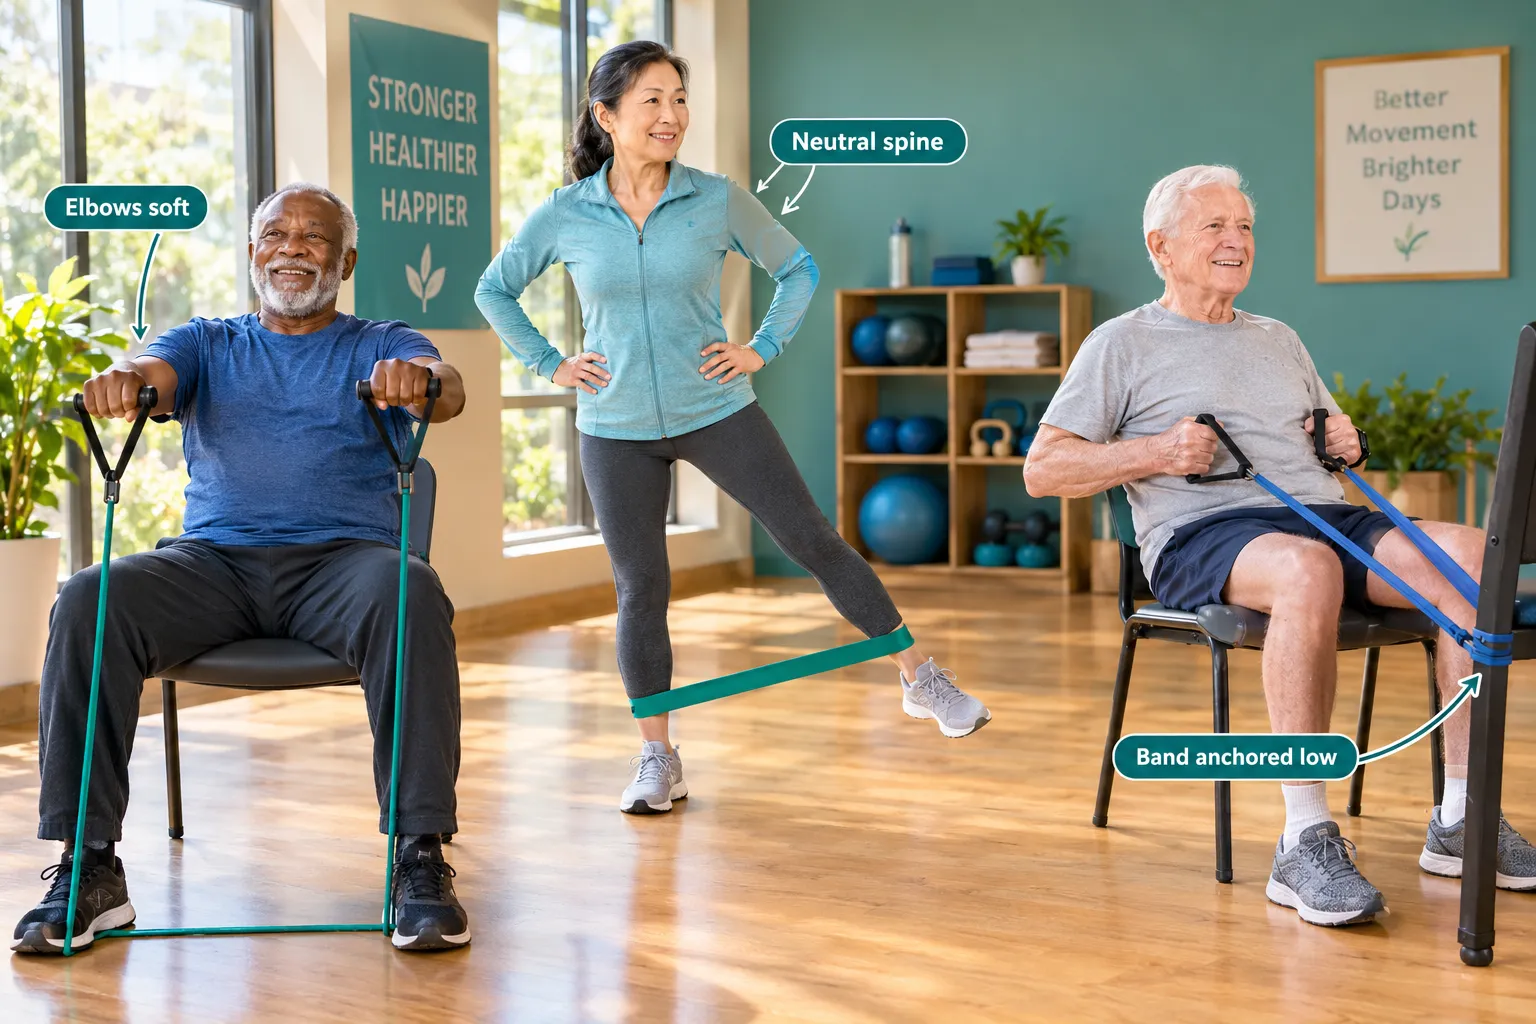
Start every session near a countertop or sturdy chair. Do each exercise for 30 to 60 seconds, rest, and repeat two to three times.

  1. Two-foot static hold, stand on the board with feet shoulder-width, one hand on support, hold steady.
  2. Weight shifts, slowly rock side to side, then front to back, controlled.
  3. Mini squats, bend knees 15 to 20 degrees while keeping the board level.
  4. Single-hand support, progress from two hands to one hand to fingertip support.
  5. Head turns, while balanced, slowly turn head left and right to train vestibular integration.
  6. Heel-to-toe rock, deliberate small tilts to train ankle strategy.

Balance Board Exercises for Fall Prevention

Progression rule: advance only when the current exercise feels easy for a full week. Fall-prevention programs including wobble-board work have been associated with 23 to 28 percent lower fall risk when performed consistently.[5][3]

Can Balance Boards Help with Vertigo in Seniors?

Balance boards are generally not recommended as a self-treatment for active vertigo. Their intentionally unstable surface can worsen dizziness and increase fall risk in people with vestibular disorders.[2] Mayo Clinic-affiliated guidance is explicit: unstable-surface training may itself trigger falls in those with significant balance problems or dizziness.[2]

That said, a physical therapist may prescribe carefully progressed foam-pad exercises as part of vestibular rehabilitation once acute vertigo resolves. This should always be clinician-supervised, never self-directed. If you have BPPV, Meniere's, or unexplained dizzy spells, get medical clearance before touching any stability tool.[7]

Balance Boards for People with Limited Mobility

For seniors with limited mobility, seated stability training on a wobble cushion is the highest-value starting point. Place an inflatable disc on a sturdy dining chair and sit on it during daily activities, reading, meals, TV. This activates core stabilizers without any standing risk.

Options for limited mobility:

  • Wobble cushion on chair, passive core training, zero fall risk
  • Foam pad while holding parallel bars or a walker, supervised only
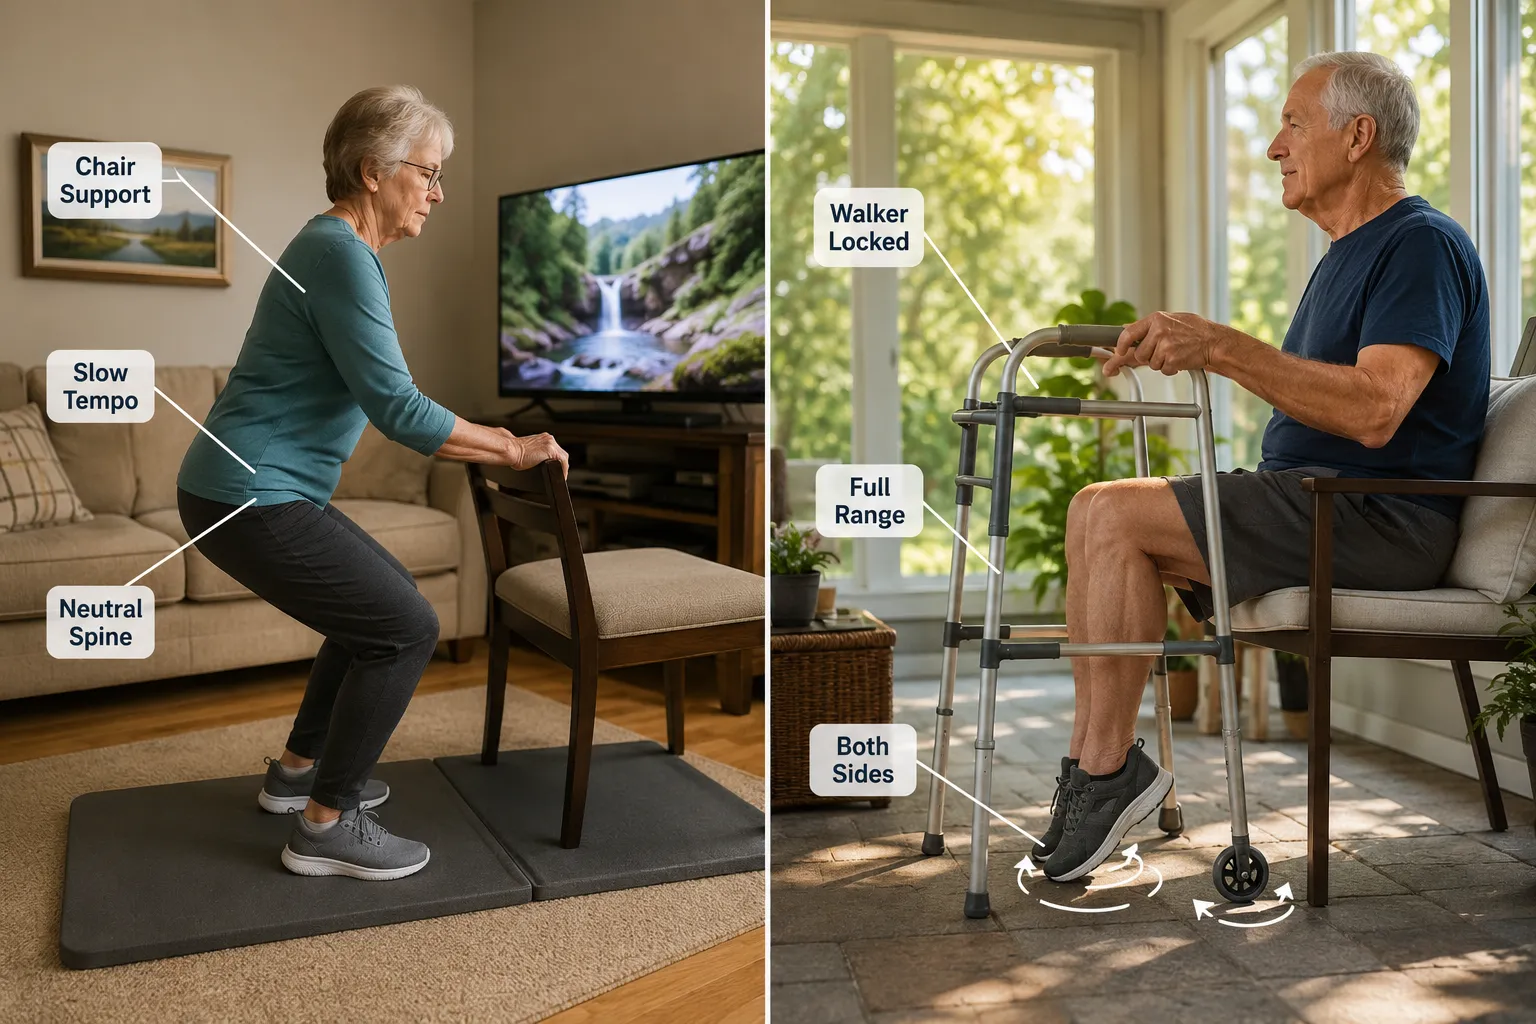
  • Seated foot-on-board work, sit in a chair, place feet on a rocker board, tilt slowly to train ankle mobility
  • Half-dome trainer flat side up, provides a slightly unstable but very controlled standing surface

A physical therapist can adapt any of these to wheelchair users or those recovering from hip or knee surgery.[13]

How Much Does a Good Balance Board Cost?

A quality senior-friendly balance board costs $30 to $70. Foam pads run $20 to $35, wobble cushions $25 to $40, rocker boards $30 to $55, and half-dome trainers $80 to $130. A complete home fall-prevention kit, foam pad, wobble cushion, half-dome trainer, and grab rail, typically totals $150 to $250.[14]

One 2026 industry analysis estimates such a kit can reduce fall risk by roughly 24 percent over 12 months when used at least 10 minutes daily, though this estimate reflects program outcomes rather than any single device.[14] Spending more than $100 on a single board rarely produces better outcomes for a senior beginner.

Are Balance Boards Safe for People Over 70?

Balance boards can be safe for people over 70, but only with the right tool, setup, and medical clearance. The Mayo Clinic notes the same instability that trains balance can also cause falls if misused.[2] A 2025 medical-alert advisory recommends consulting a physician or physical therapist first, avoiding boards after a recent fall, wearing sturdy shoes, and always training near a grab bar or countertop.[7]

Safety checklist before your first session:

  • Medical clearance obtained
  • Board placed on carpet or a non-slip mat
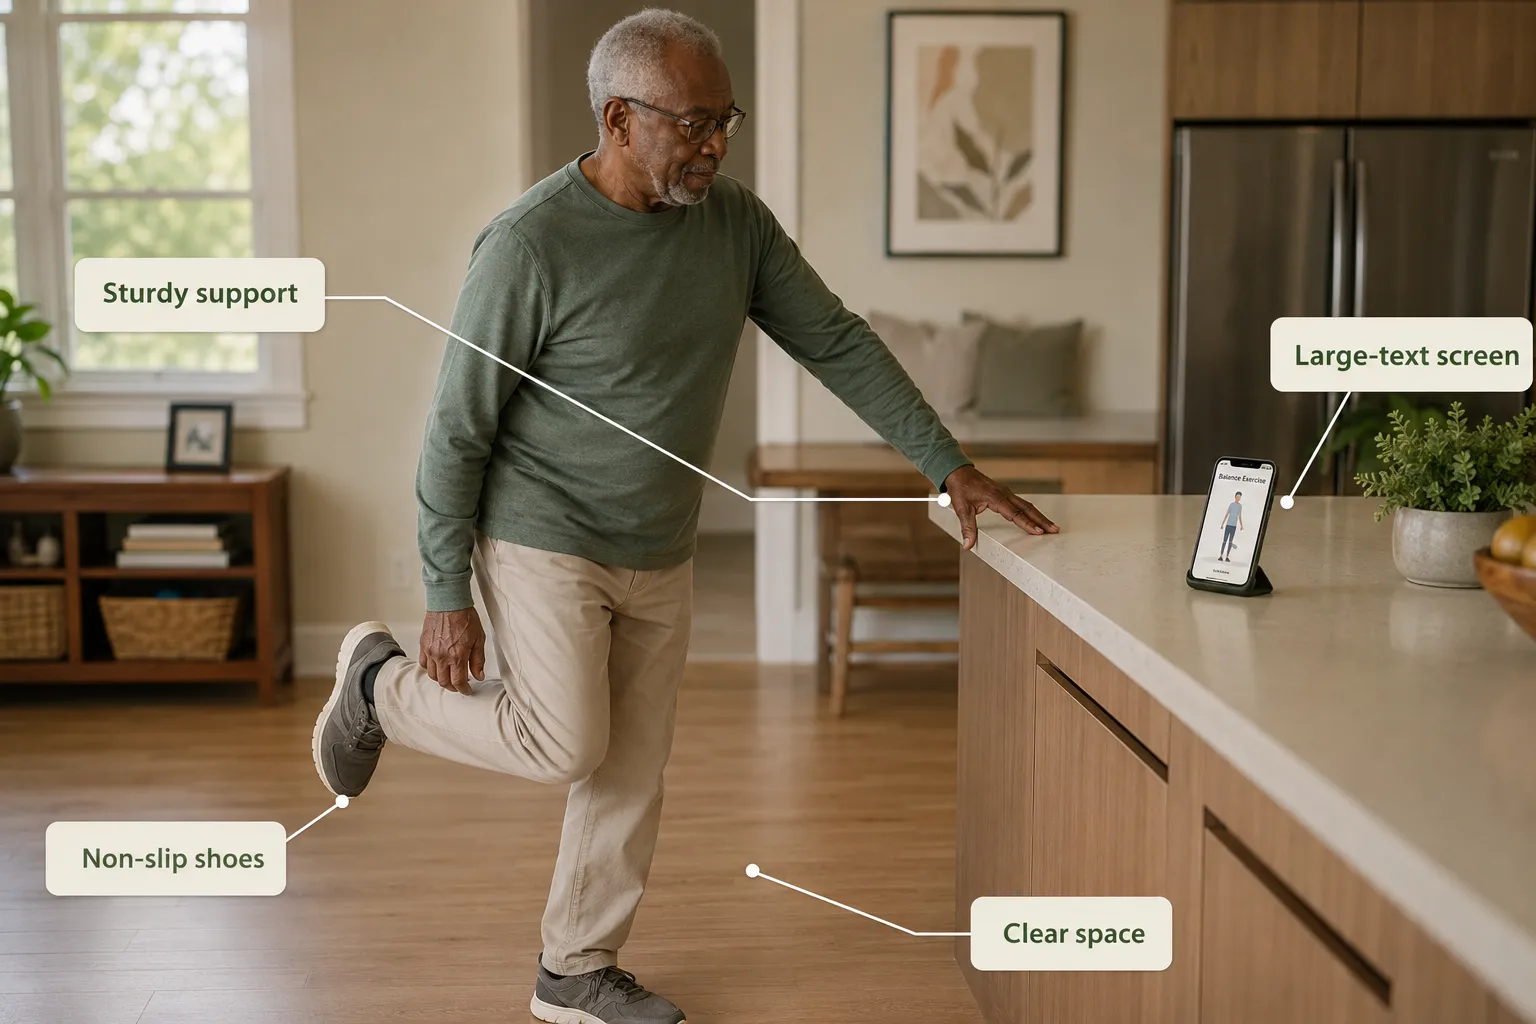
  • Sturdy countertop, chair back, or grab rail within arm's reach
  • Sturdy closed-toe shoes with grip soles
  • Someone else in the home during initial sessions
  • Session limited to 5 minutes on day one

Seniors with peripheral neuropathy, severe osteoporosis, or recent joint replacement should get therapist guidance before starting.[7]

Balance Board Alternatives for Seniors

Not every older adult needs, or should use, a balance board. Effective alternatives include:

  • Tai chi, strong evidence for fall reduction, no equipment needed
  • Standing yoga, chair-supported variations are widely accessible
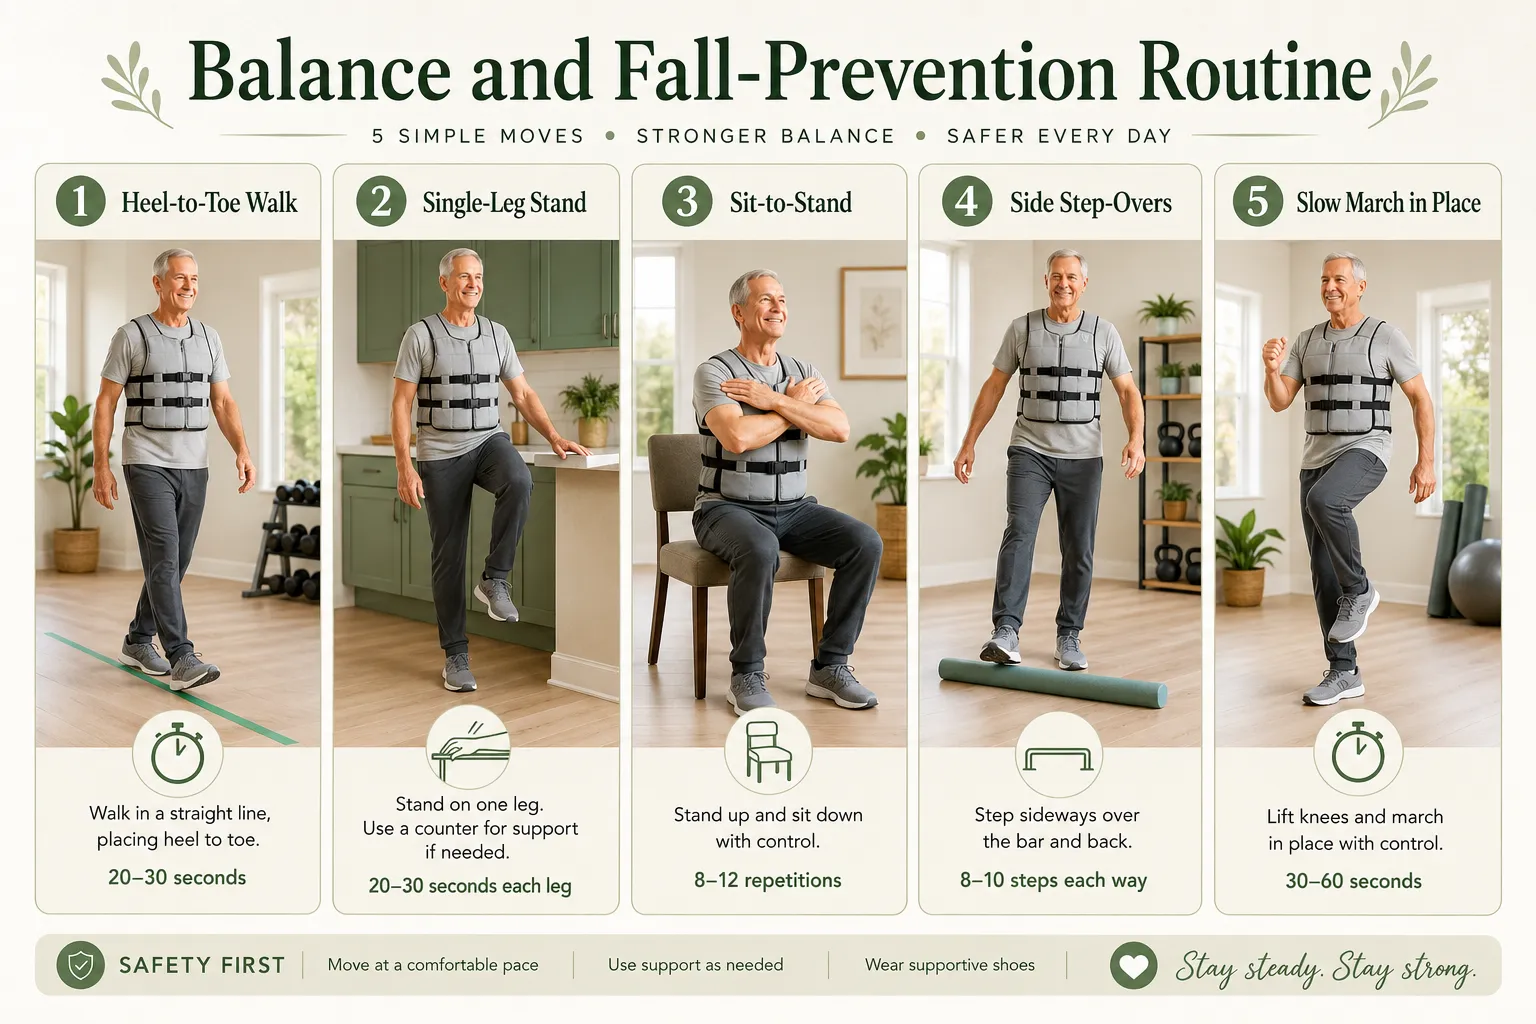
  • Heel-to-toe walking along a hallway with wall support
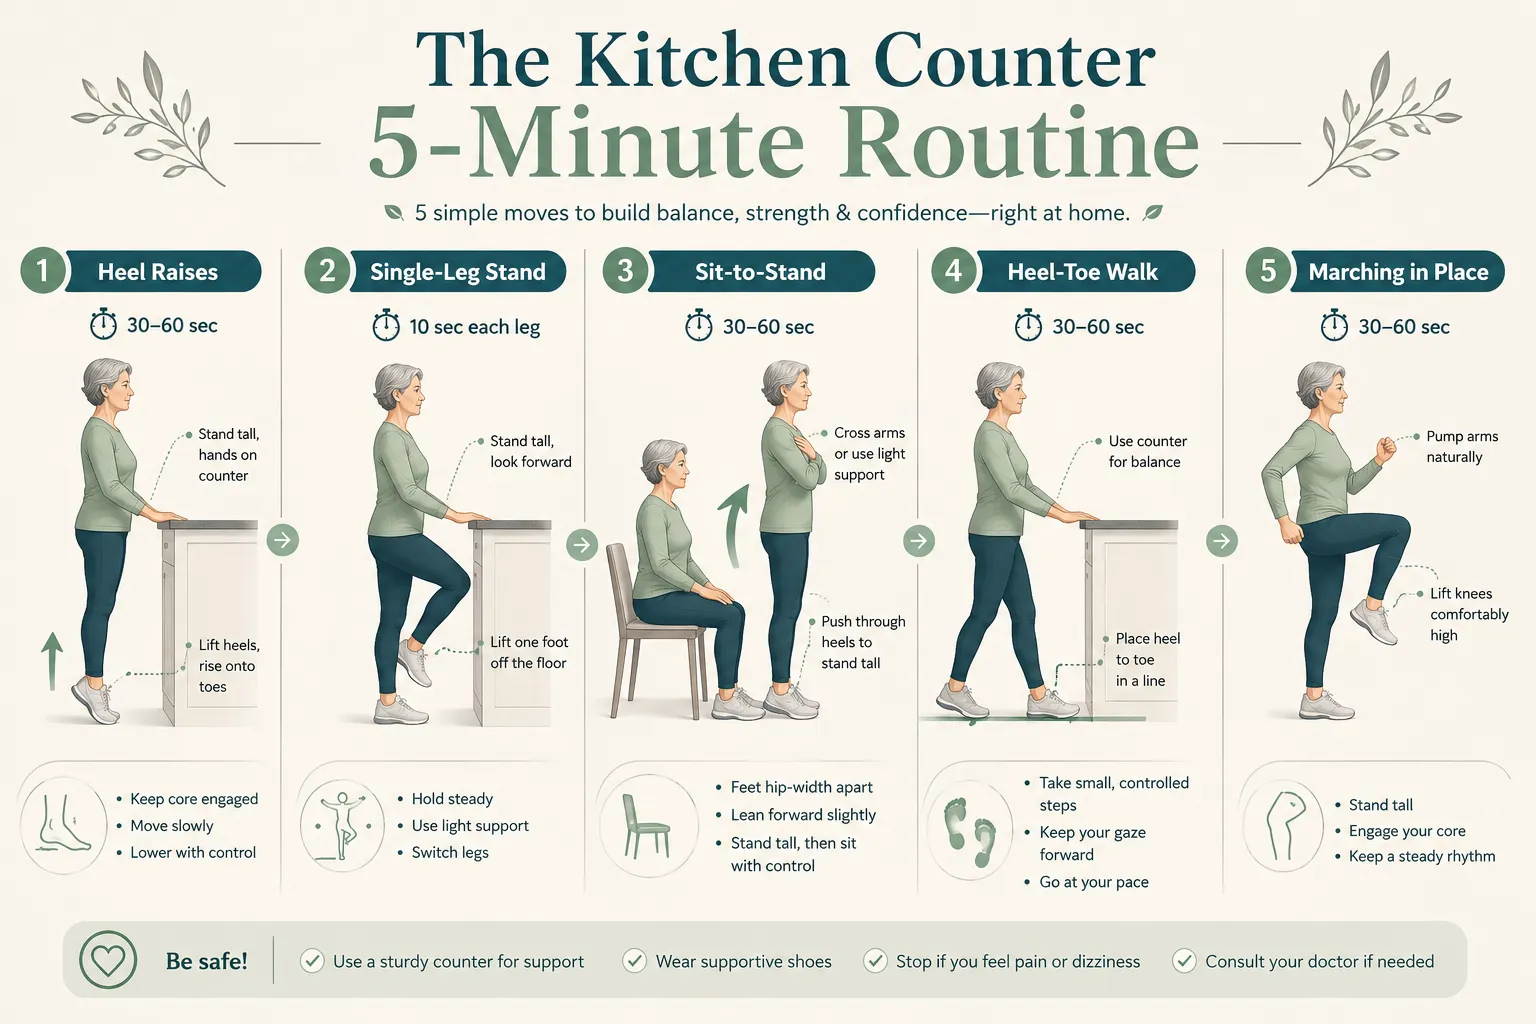
  • Single-leg stands at a kitchen counter
  • Resistance band lower-body work, builds the strength that balance depends on
  • Aquatic exercise, low-fall-risk environment with resistance

The strongest evidence for fall prevention supports multicomponent programs combining strength, aerobic exercise, and balance challenge, not any single tool.[3]

Do Balance Boards Actually Prevent Falls?

Yes, when used in structured programs, but not on their own. Peer-reviewed evidence shows 4 to 9 week balance-board programs improve standing balance, functional mobility, and Timed Up and Go scores in older adults.[1][13][15] Fall-prevention programs incorporating wobble-board training report roughly 23 to 28 percent lower fall risk with consistent use.[5][3]

However, the most reliable falls-prevention effect comes from multicomponent training, strength, aerobic work, and proprioceptive challenge together.[3] A balance board alone, used sporadically, produces modest gains. A balance board used three times weekly alongside squats, walking, and resistance work produces measurable fall-risk reduction.

Best Balance Boards for Small Spaces

A round wobble cushion or a 15-inch square foam pad works in any room and stores under a couch. Rocker boards with a 16 to 18 inch footprint fit beside most dining chairs. Avoid large half-dome trainers (24 inches or wider) if floor space is tight.

Space-saving picks:

  • Inflatable wobble disc, 14 inches, deflates for travel
  • Square foam pad, stacks flat against a wall
  • Wooden rocker board, 17 x 6 inches, stores vertically
  • Small round pivot board, 15 inch diameter, but higher instability

Train in a doorway or beside a kitchen counter to combine hand support with a small footprint.

Balance Board Training Programs for Older Adults

A structured program beats random practice. Below is an evidence-informed 9-week progression combining findings from wobble-board and multi-axis balance research.[1][9][10][13]

Balance Board Training Programs for Older Adults

Weeks 1-2: Seated wobble cushion, 5 minutes daily. Standing foam pad with two-hand support, 3 min, 3x/week.

Weeks 3-4: Rocker board with two-hand support, 10 min, 3x/week. Add slow weight shifts.

Weeks 5-6: Rocker board with one-hand support. Add mini squats and head turns.

Weeks 7-8: Reduce to fingertip support. Introduce 30-second single-leg attempts on a foam pad.

Week 9+: Consider a multi-axis board only if all prior weeks felt controlled. Continue 3x/week indefinitely, gains regress if training stops.[1][15]

Community centers, senior fitness classes, and physiotherapy clinics increasingly offer supervised versions of these programs.[6][15]

What to Avoid When Using a Balance Board as a Senior

The instability that makes a balance board effective is the same instability that can cause a serious fall. Respect the tool.

Avoid these mistakes:

  • Training alone during the first two weeks, have someone nearby
  • Barefoot on slippery hardwood, always use grip or a mat
  • Skipping hand support too early, progress support reduction over weeks
  • Long sessions, more than 15 minutes increases fatigue-related falls
  • Multi-axis boards as a beginner, start with foam or rocker
  • Training when tired, dizzy, or on new medication, postpone
  • Ignoring pain, sharp knee, hip, or ankle pain means stop
  • Using the board on stairs or near sharp furniture edges

Never use a balance board within 48 hours of a fall, and get clearance from a physician before restarting.[7]

Frequently Asked Questions

Can I use a balance board if I use a cane?
Only with therapist guidance. Cane users typically start with seated wobble-cushion work rather than standing on a board.[7]

How long until I see improvement?
Peer-reviewed programs show measurable gains at 4 to 9 weeks with 3 sessions per week.[1][13]

Should I close my eyes on the board?
Not as a beginner. Eyes-closed training is an advanced progression that should only be attempted with full hand support and after weeks of stable practice.

Are cheap balance boards safe?
Look for a weight rating well above your body weight, a non-slip surface, and a wide base. Inexpensive foam pads and rocker boards from reputable brands are generally safe.[11]

Can balance boards help after a hip replacement?
Only under a physical therapist's direction, and typically not within the first several months post-surgery.[7]

Do I need shoes on the board?
Sturdy closed-toe shoes with grip soles are recommended for standing work. Bare feet may be acceptable on foam pads with therapist approval.[5]

Will a balance board help with knee pain?
It can strengthen supporting muscles, but active knee pain should be evaluated first. Start with seated or very stable options.[4]

Is a BOSU ball better than a balance board?
Not for beginners. Half-dome trainers are moderately unstable and better suited to confident, mobile seniors. Start with a foam pad or rocker.

Can I use a balance board daily?
Yes, in short sessions. Most evidence supports 3 dedicated training days weekly, with light seated wobble-cushion use on other days.[9][10]

What if I feel dizzy on the board?
Stop immediately, sit down, and don't retry that day. Persistent dizziness needs medical evaluation before continuing.[2]

Conclusion

Balance boards and stability tools work, but only when matched to ability level and used consistently within a structured plan. Start with a foam pad or wobble cushion, train three times per week for 10 minutes near a countertop, and progress to a rocker board only when the basics feel controlled. Pair balance work with strength training and walking, get medical clearance if you have any fall history or vestibular issues, and treat every session with the respect an intentionally unstable device deserves.

Your next steps:

  1. Talk with your physician or physical therapist this week
  2. Order a low-profile foam pad or wobble cushion (under $40)
  3. Set up a safe training spot near a countertop or sturdy chair
  4. Follow the 9-week progression, three sessions per week
  5. Re-evaluate at week 4 and week 9 with your Timed Up and Go time or Berg score

Balance is trainable at any age. The tools are inexpensive, the time commitment is small, and the payoff, staying on your feet, independent, and mobile, is enormous.

References

[1] Balance Board Seniors Fall Prevention – https://www.bellenae.com/blogs/news/balance-board-seniors-fall-prevention
[2] Maintaining Equilibrium: The Benefits of Balance Boards – https://mcpress.mayoclinic.org/nutrition-fitness/maintaining-equilibrium-the-benefits-of-balance-boards/
[3] Physical Activity Programs for Balance and Fall Prevention in Elderly – https://pmc.ncbi.nlm.nih.gov/articles/PMC6635278/
[4] Balance Board For Seniors – https://neverleavetheplayground.com/balance-board-for-seniors/
[5] Fall Prevention Exercises – https://slides.neverleavetheplayground.com/fall-prevention-exercises.html
[6] Balance Boards For Seniors: A Fun And Effective Way To Improve Stability – https://fallpreventionfoundation.org/2025/02/07/balance-boards-for-seniors-a-fun-and-effective-way-to-improve-stability/
[7] Balance Boards For Seniors: Can They Reduce Fall Risk – https://www.medicalalertadvice.com/articles/balance-boards-for-seniors-can-they-reduce-fall-risk/
[8] Wobble-board training in older adults – https://pubmed.ncbi.nlm.nih.gov/10470668/
[9] Indo Balance Board Program in Older Adults – https://pmc.ncbi.nlm.nih.gov/articles/PMC6189151/
[10] Wobble-Board Training in Older Adults: Review – https://www.tandfonline.com/doi/full/10.1080/10833196.2021.1987042

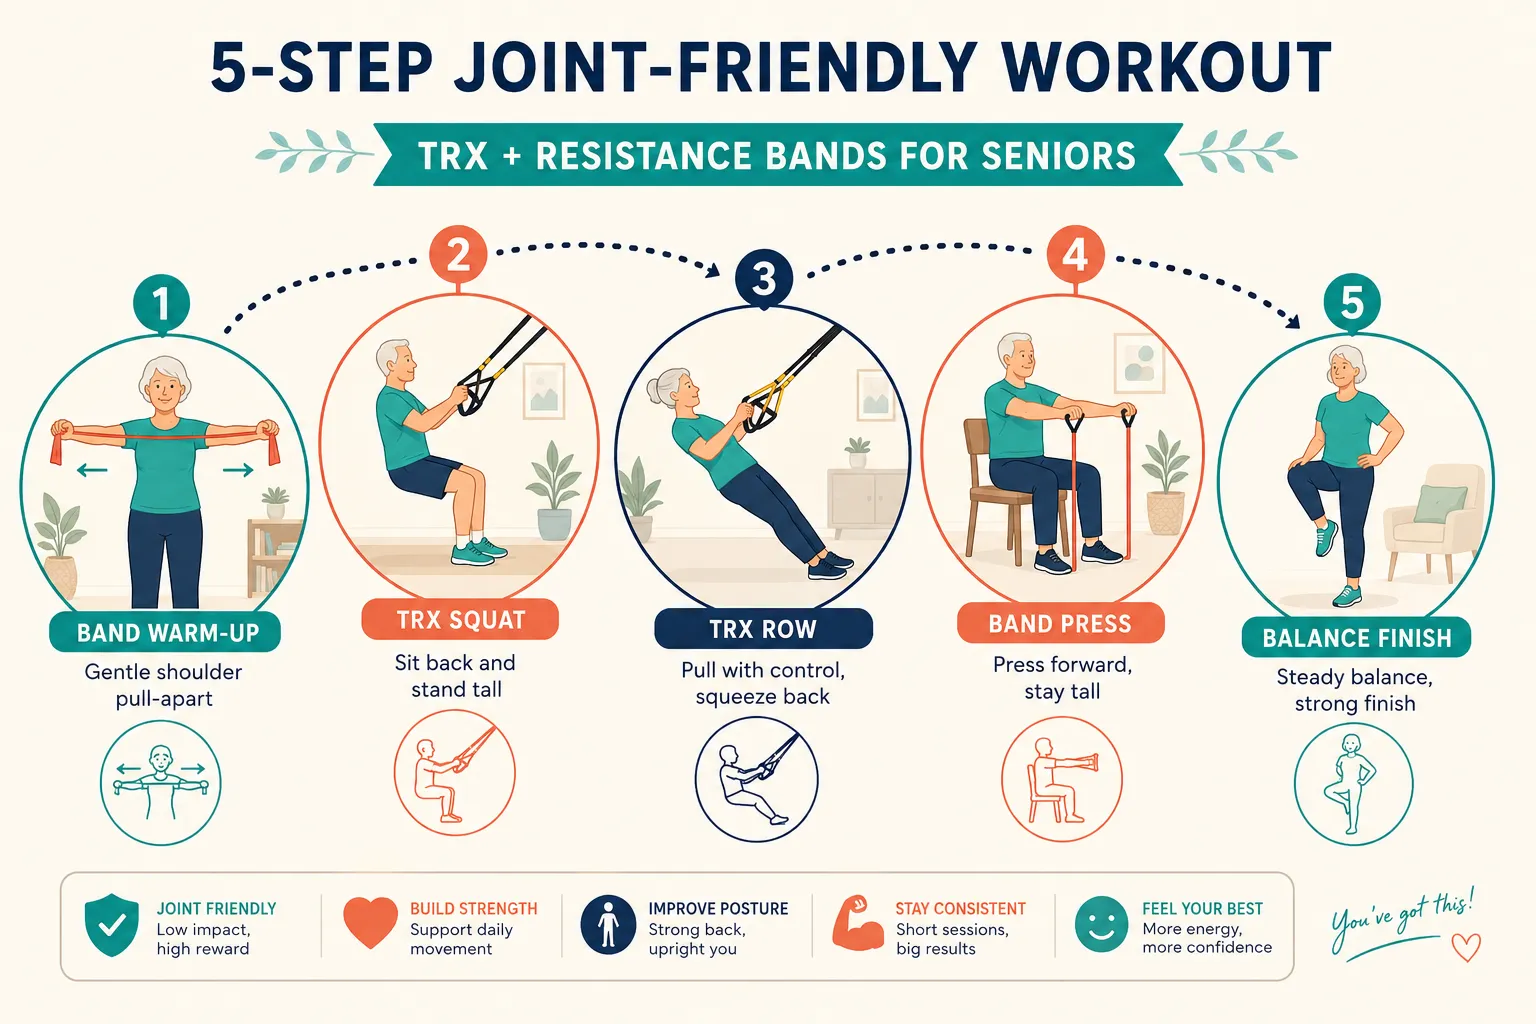
Best Home Strength Training Equipment for Seniors: Safe, Space-Saving Options Reviewed

Best Home Strength Training Equipment for Seniors: Safe, Space-Saving Options Reviewed

Last updated: August 15, 2026

Quick Answer

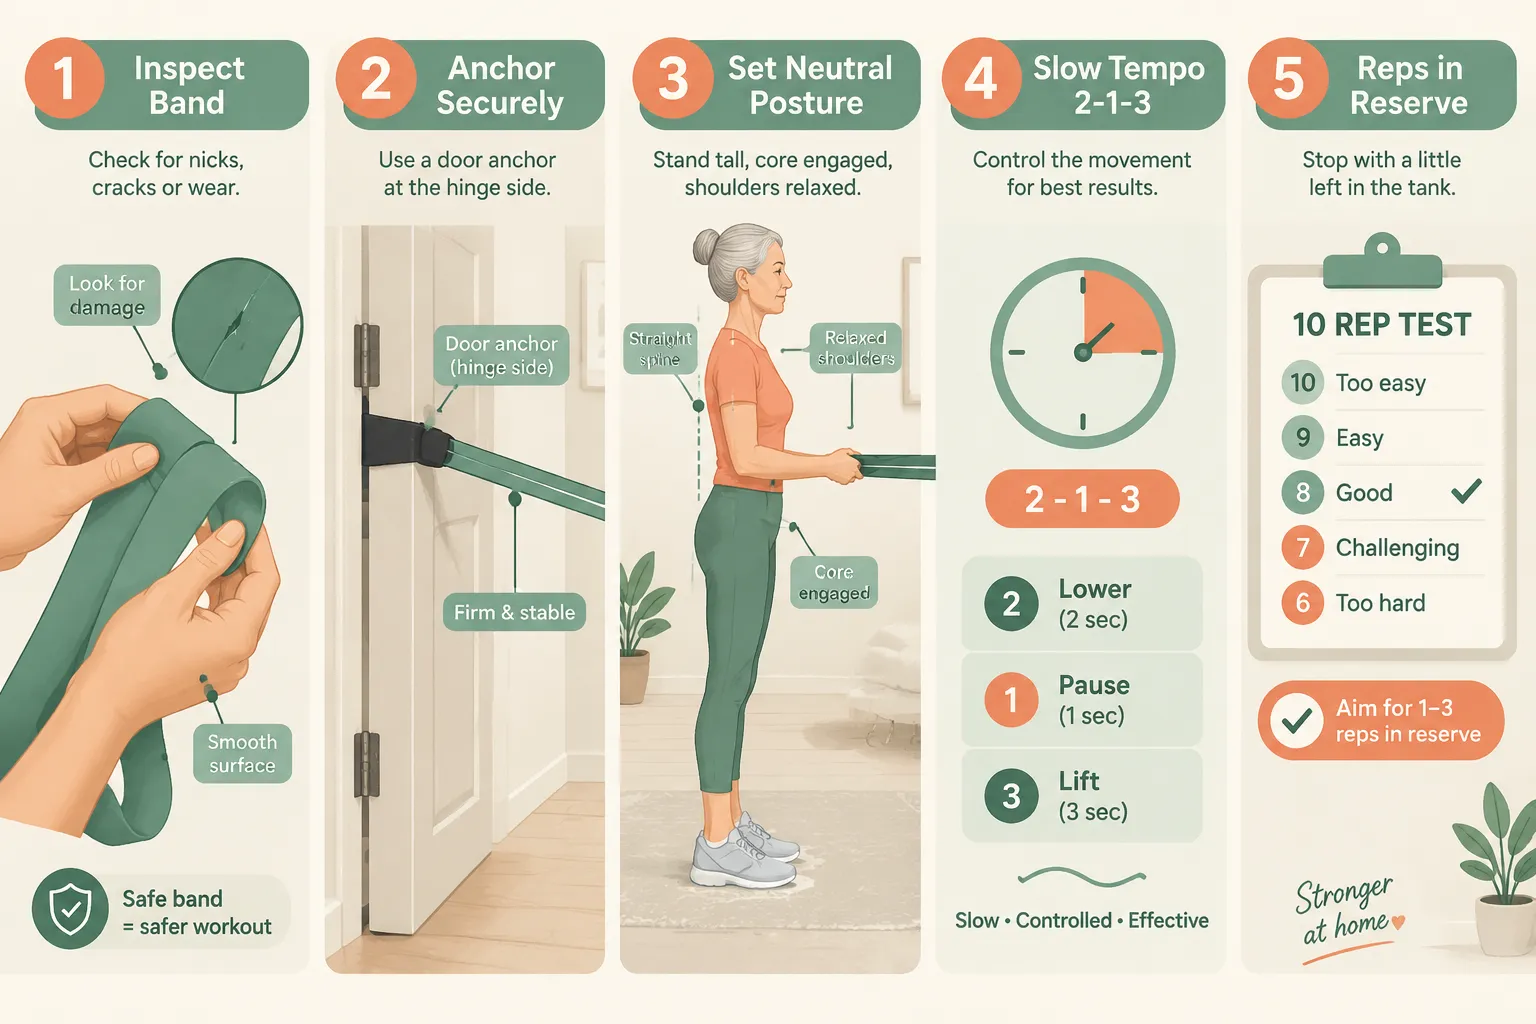
The best home strength training equipment for seniors combines safety, low joint impact, and small footprint. For most older adults, a starter kit of fabric resistance bands, light dumbbells (1-5 lb), a thick yoga mat, and a sturdy chair covers 90% of needs for under $55 [5][8]. Add adjustable dumbbells, a suspension trainer, or a compact cable system as strength improves. Resistance bands are widely called the "gold standard" for senior strength work because they're joint-friendly, scalable, and take up almost no space [10].

Key Takeaways

  • Start small: Bands + mat + light dumbbells cost $30,$55 and support strength, balance, and flexibility [5][8].
  • Bands beat dumbbells for most beginners due to gentler joint load and no drop risk [10].
  • Train 2 days a week minimum, hitting all major muscle groups [10].
  • Adjustable dumbbells (PowerBlock, Bowflex SelectTech) save the most space if you outgrow fixed weights [6].
  • Fabric bands over rubber, less snap risk and more comfort on skin [8].
  • Seated equipment (pedal exercisers, mini-ellipticals) works well for limited mobility [9][14].
  • Suspension trainers offer bodyweight resistance that scales with foot position, ideal for balance-focused strength.
  • Budget $150,$300 for a fully equipped senior home gym [8].
  • Consult a doctor before starting if you have heart, joint, or balance conditions [8].

What Strength Training Equipment Is Safe for Seniors?

The safest strength equipment for seniors shares three traits: low fall risk, controlled resistance, and forgiving joint load. Resistance bands, light dumbbells (1-5 lb), suspension trainers, and seated cable machines top the list because they let older adults build muscle without heavy loads dropping on feet or awkward barbell positions [1][10].

Safest categories for most seniors:

  • Fabric resistance bands, no snap risk, gentle on skin, scalable tension [8]
  • Light neoprene or hex dumbbells, coated grip, stable when set down [6]
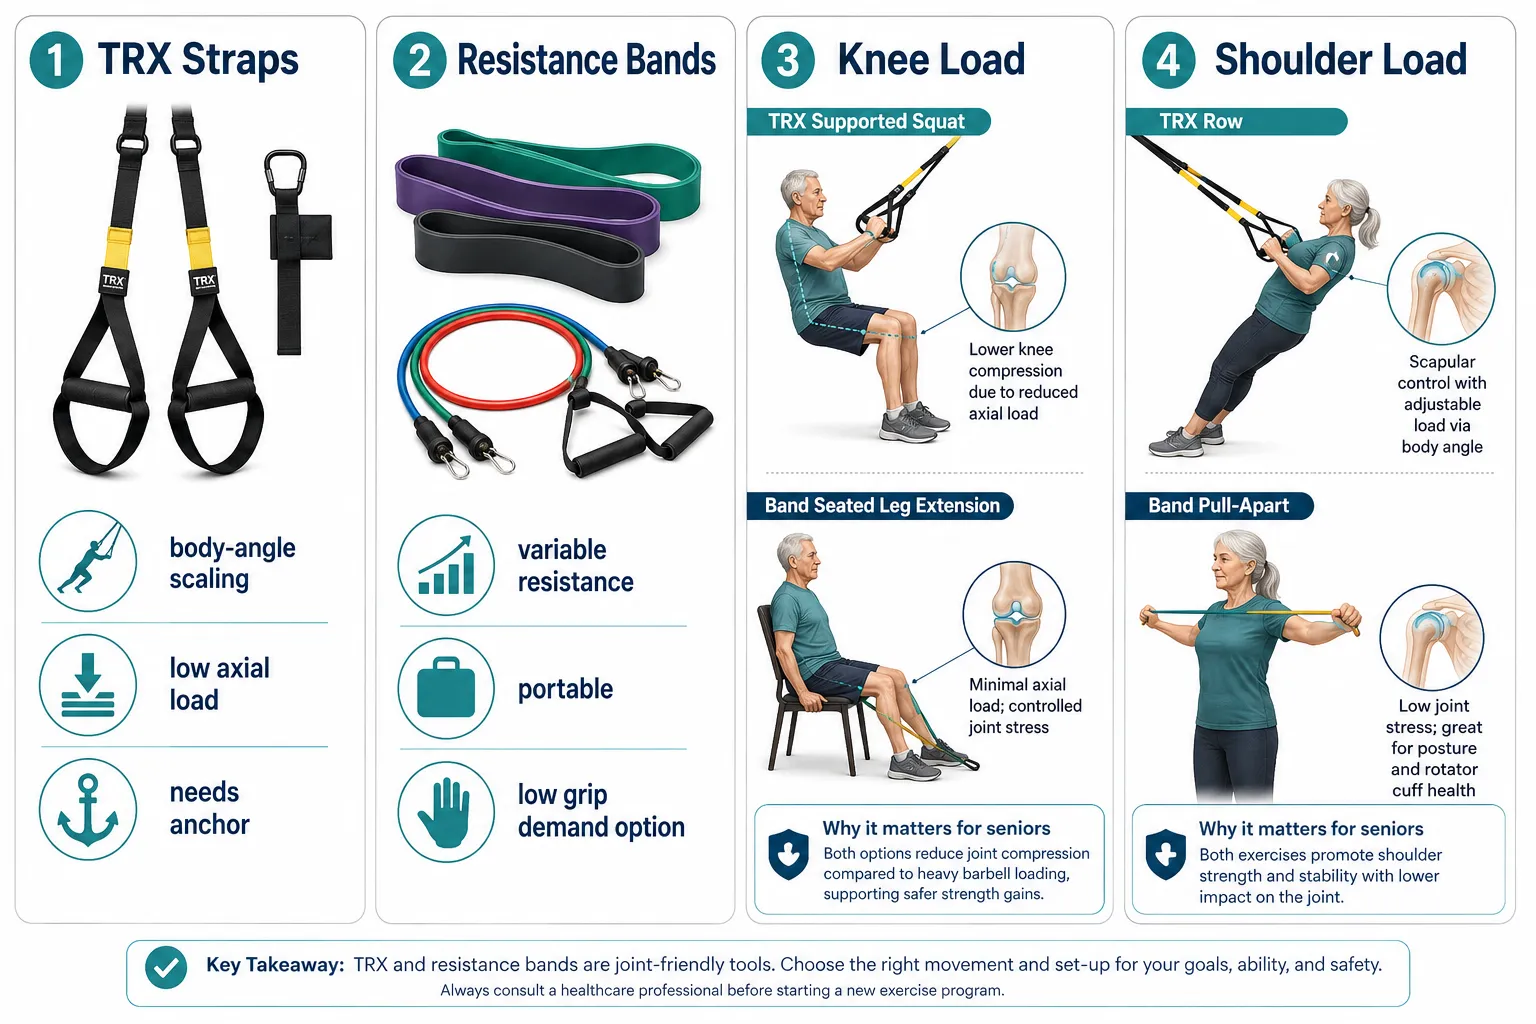
  • Suspension trainers (TRX-style), resistance changes with body angle, no free weights overhead
  • Seated pedal exercisers and mini-ellipticals, zero fall risk, foldable [9][14]
  • Compact cable/functional trainers, guided motion path prevents form breakdown [3]

Avoid or delay: Olympic barbells, kettlebell swings, and plyo boxes over 12 inches unless you already train with a coach. The injury risk outweighs the benefit for most beginners over 65.

Best Compact Home Gym Equipment for Small Spaces

The best space-saving options for seniors fit in a closet or under a bed and still enable full-body strength work. Fabric bands, adjustable dumbbells, and door-anchored suspension trainers deliver the highest strength return per square foot [3][6].

Best Compact Home Gym Equipment for Small Spaces

Top compact picks for 2026:

Equipment Footprint Price Best For
Fabric resistance band set Drawer-size $15,$25 Beginners, arthritis [8]
Amazon Basics neoprene dumbbells Shelf ~$35 Fixed light weights [6]
Yes4All adjustable dumbbells Small floor space ~$79 Progressing lifters [6]
PowerBlock Elite adjustable 1 sq ft ~$299 Serious home gym, small space [6]
Bowflex SelectTech 552 1 sq ft ~$349 Convenience-focused [6]
Compact cable trainer Corner unit $400,$900 Full-body variety [3]

If you have less than 20 square feet, prioritize bands and one pair of adjustable dumbbells. That combo covers curls, presses, rows, squats, and deadlifts without ever needing a rack.

How Much Does Home Strength Training Equipment Cost?

Expect to spend $30,$50 to start and $150,$300 for a well-equipped senior home gym [8]. You do not need to spend more than that for excellent results.

Cost breakdown by tier:

  • Bare essentials ($30,$55): 3-4 fabric bands, yoga mat, light ankle weights [5][8]
  • Starter kit ($75,$150): Add fixed dumbbells (1, 3, 5 lb pairs) and a sturdy chair
  • Complete home gym ($150,$300): Add adjustable dumbbells or a suspension trainer, plus a stability ball [8]
  • Premium compact ($300,$700): PowerBlock or Bowflex adjustables, a foldable bench, and a mini cable system [6]

Decision rule: Spend on resistance tools first, cardio second. A June 2026 budget guide called dumbbells, bands, and racks the "big rocks" that deliver the most strength benefit per dollar [13].

Resistance Bands vs Dumbbells for Seniors: Which Is Better?

For most seniors, resistance bands win on safety and cost; dumbbells win on measurable progress. The right answer for you depends on grip strength, joint health, and how you like to track progress.

Choose resistance bands if you:

  • Have arthritis, weak wrists, or grip pain
  • Live in a very small space
  • Are new to strength training
  • Want the lowest injury risk [10]

Choose dumbbells if you:

  • Have healthy joints and good grip
  • Like seeing pound-by-pound progress
  • Prefer classic exercises (curls, presses, rows)
  • Already have a sturdy shelf for storage [1]

Most experts recommend using both. Bands handle rotator cuff work, lateral raises, and rehab-style moves. Dumbbells handle heavier compound lifts as strength grows [15].

Pull quote: "Resistance bands are the gold standard for senior strength training because they are joint-friendly, scalable, and space-saving." [10]

What Weight Should Seniors Lift at Home?

Most seniors should start with 1-5 lb dumbbells and light-to-medium resistance bands, then progress based on the "last 2 reps rule": the final two reps of a set should feel challenging but doable with good form [1][15].

Starter loads by exercise:

  • Biceps curls: 2-5 lb
  • Shoulder press: 1-3 lb
  • Triceps extensions: 1-3 lb
  • Bent-over rows: 3-8 lb
  • Squats (holding weight): bodyweight first, then 3-5 lb

Progress by adding 1-2 lb only after you can do 12-15 clean reps for two sets. There is no reward for lifting heavy at the cost of form, the goal is muscle preservation and function, not a personal record.

Can Seniors Build Muscle With Bodyweight Exercises?

Yes. Seniors can absolutely build muscle with bodyweight alone, especially in the first 6-12 months of training. Sit-to-stands, wall push-ups, step-ups, glute bridges, and modified planks stimulate the same muscle fibers that dumbbells do, just at a lower absolute load.

High-value bodyweight moves for seniors:

  • Sit-to-stand from a chair (functional squat)
  • Wall push-ups (chest, shoulders, triceps)
  • Step-ups on a low, stable step (legs, balance)
  • Glute bridges on the floor or mat
  • Bird-dog (core stability)

Add a $15 resistance band to any of these and you effectively double the training options. Bodyweight is the smartest starting point when equipment budget is zero.

Best Home Strength Training Equipment for Arthritis

For seniors with arthritis, the best equipment reduces gripping force, avoids impact, and allows partial ranges of motion. Fabric bands with padded handles, foam-covered light dumbbells, and seated cable machines top the list [2][8].

Best Home Strength Training Equipment for Arthritis

Arthritis-friendly gear:

  • Fabric resistance bands with soft handles, no white-knuckle gripping
  • Neoprene-coated dumbbells, softer than iron, easier on hands [6]
  • Wrist and ankle weights, attach without gripping [5]
  • Pedal exercisers, seated, uses foot straps, not hands [14]
  • Foam rollers and stability balls, supported mobility work [2]

Skip: Kettlebells (thumb strain), thick barbell grips, and pull-up bars if you have shoulder or hand arthritis.

How to Set Up a Small Home Gym for Seniors

Setting up a senior home gym takes about 6 by 6 feet of floor space, good lighting, and one sturdy anchor point. Prioritize a non-slip surface and a chair for stability before adding any equipment [8].

How to Set Up a Small Home Gym for Seniors

Five-step setup checklist:

  1. Clear a 6×6 ft area with no rugs, cords, or clutter
  2. Add a non-slip mat (thick enough for floor exercises)
  3. Place a sturdy chair nearby for balance and seated exercises
  4. Install one wall hook for hanging bands and a suspension trainer
  5. Keep water and a phone within reach for hydration and safety

Lighting matters: Poor lighting causes falls. If your space is dim, add a lamp before you add equipment.

Best Home Strength Training Equipment for Seniors: Safe, Space-Saving Options Reviewed

Below are the top-rated space-saving picks for 2026, organized by budget and skill level.

Under $50, Beginner essentials:

  • Fabric resistance band set (3-4 tensions): $15,$25 [8]
  • Thick yoga mat: $20
  • Ankle weights (1-2 lb pair): $15 [5]

$50,$150, Intermediate additions:

  • Amazon Basics neoprene dumbbells (2, 3, 5 lb pairs): ~$35 [6]
  • Yes4All adjustable dumbbells: ~$79 [6]
  • CAP Barbell coated hex dumbbell set: ~$99 [6]
  • Stability ball: $25

$150,$400, Complete senior home gym:

  • PowerBlock Elite adjustable dumbbells: ~$299 (best for space saving) [6]
  • Bowflex SelectTech 552: ~$349 [6]
  • BalanceFrom foam plyo box (for step-ups): ~$100 [7]

$400+, Premium compact systems:

  • Compact cable/functional trainer: $500,$900 [3]
  • Foldable weight bench + adjustable dumbbells combo [4]

For most seniors, the best home strength training equipment for seniors: safe, space-saving options reviewed here comes down to a $150 kit, fabric bands, one pair of adjustable dumbbells, a mat, and a stability ball. That covers strength, balance, and flexibility for years.

Is Strength Training Safe for Seniors Over 70?

Yes, strength training is not just safe, it's essential, for adults over 70, provided you start light and get medical clearance if you have heart, joint, or balance issues [8][10]. Research consistently shows resistance training helps preserve independence, reduce fall risk, and maintain bone density into the 80s and beyond.

Safety rules for 70+:

  • Warm up 5 minutes before every session (marching in place works)
  • Never hold your breath during a lift, exhale on effort
  • Use a chair or wall for balance during standing exercises
  • Stop immediately if you feel chest pain, dizziness, or sharp joint pain
  • Rest 48 hours between sessions targeting the same muscles

Common Mistakes Seniors Make With Home Workouts

The most common home-workout mistakes among seniors are skipping warm-ups, choosing weights that are too heavy or too light, and training inconsistently. Each one blunts progress or invites injury.

Top mistakes to avoid:

  • Skipping warm-ups, cold muscles tear more easily
  • Ego-lifting, using 10 lb when 3 lb would be better form
  • Under-loading forever, sticking with 1 lb bands for months without progression
  • Ignoring the legs, arms get all the love, but legs prevent falls
  • Training once a week, below the 2x/week minimum for results [10]
  • No rest days, muscles grow during recovery, not during the workout
  • Poor form on squats, knees caving in, back rounding

How Often Should Seniors Do Strength Training at Home?

Seniors should strength train at least 2 days per week, targeting all major muscle groups, with 48 hours between sessions on the same body part [10]. Three sessions a week is ideal for most; four is fine if you split upper and lower body.

Sample weekly schedule:

  • Monday: Full-body strength (30 min)
  • Tuesday: Walk + balance work
  • Wednesday: Full-body strength (30 min)
  • Thursday: Rest or gentle stretching
  • Friday: Full-body strength (30 min)
  • Weekend: Active recovery (walk, garden, swim)

Each session should include 6-8 exercises, 2 sets of 10-15 reps. That's it. More is not better at this stage, consistency is.

Alternatives to Expensive Home Gym Equipment

You do not need a $2,000 rack to build strength at 65+. Effective alternatives cost under $100 combined and use household items you already own.

Household strength "equipment":

  • Full water bottles (1 liter ≈ 2.2 lb), DIY dumbbells
  • Canned goods, light hand weights for shoulder work
  • A sturdy kitchen chair, squats, step-ups, tricep dips
  • A backpack loaded with books, weighted squats and rows
  • Bath towels, DIY sliders for core work on hard floors
  • Stairs, the best free cardio and leg trainer

Pair these with a $20 band set and you have a functional home gym for under $40.

What if I Have Limited Mobility? Can I Still Strength Train at Home?

Yes. Seniors with limited mobility can build meaningful strength using seated equipment and supported exercises. Pedal exercisers, mini-ellipticals, resistance bands anchored to a chair, and light dumbbells performed while seated are all effective [9][14].

Best equipment for limited mobility:

  • RYGEO pedal exerciser (~4 lb, 5 resistance levels, arms or legs) [14]
  • Sunny or MERACH foldable mini-ellipticals (12-16 resistance levels, 300 lb capacity) [14]
  • Seated resistance band routines anchored under chair legs
  • Light dumbbells for seated curls, presses, and rows [1]

Focus on frequency over intensity. Even 10 minutes twice a day of seated resistance work preserves muscle and improves circulation.

FAQ

Q: What is the single best piece of strength equipment for a senior beginner?
A: A fabric resistance band set. It's under $25, joint-friendly, scalable, and enables 30+ exercises [8][10].

Q: Are adjustable dumbbells worth it for seniors?
A: Yes, if you plan to train for more than 6 months. PowerBlock or Bowflex adjustables replace 5-8 pairs of fixed dumbbells and save closet space [6].

Q: How long until seniors see results from home strength training?
A: Most seniors notice strength gains in 4-6 weeks and visible muscle tone in 8-12 weeks with 2-3 sessions per week.

Q: Do I need a weight bench?
A: No. A sturdy chair covers 90% of what a bench does for seniors. Add a foldable bench only if you outgrow chair-based exercises.

Q: Are smart home gyms like Tonal good for seniors?
A: They can work well for tech-comfortable seniors, but the $3,000+ price is hard to justify when a $150 kit produces similar strength results.

Q: Can I strength train if I have osteoporosis?
A: Yes, and you should, with medical clearance. Focus on controlled resistance band work and light dumbbells; avoid heavy loaded spinal flexion [8].

Q: How much space do I really need?
A: A 6×6 foot area is enough for a complete senior home gym setup.

Q: Are ankle weights safe for walking?
A: Only for exercise sets, not for daily walking. Continuous walking with ankle weights can strain hips and knees.

Conclusion

The best home strength training equipment for seniors is whatever you'll actually use twice a week. For most older adults, that starts with a $30,$55 kit of fabric bands, a mat, and light dumbbells, and grows only when you outgrow it. Adjustable dumbbells, suspension trainers, and compact cable systems are worthwhile upgrades, but they're not the entry point.

Your next steps:

  1. Clear a 6×6 ft area at home this week
  2. Order a fabric band set and one pair of light dumbbells (under $50)
  3. Schedule two 30-minute sessions on your calendar
  4. Get medical clearance if you have any chronic conditions
  5. Track your reps for 8 weeks, you'll be surprised what changes

Start light, stay consistent, and the equipment will earn its keep many times over.

References

[1] The Best Home Workout Equipment For Seniors – https://sonoffood.com/2026/04/16/the-best-home-workout-equipment-for-seniors/
[2] Best – https://www.theseniorlist.com/exercise/best/
[3] The Best Home Gym Equipment For Seniors In 2025 – https://gym-mikolo.com/blogs/home-gym/the-best-home-gym-equipment-for-seniors-in-2025
[4] Best Home Gyms – https://www.garagegymreviews.com/best-home-gyms
[5] Best Fitness Equipment Seniors – https://silverbloomhealth.com/supplements/fitness/best-fitness-equipment-seniors/
[6] 7 Best Home Gym Equipment For Seniors – https://homefitnessspace.com/7-best-home-gym-equipment-for-seniors/
[7] 14 Best Home Gyms For Older Adults In 2026 – https://babazam.com/vetted/14-best-home-gyms-for-older-adults-in-2026/
[8] Exercise Equipment For Seniors – https://vitalspage.com/articles/exercise-equipment-for-seniors
[9] Best Core Workout Equipment For Seniors – https://rebootedbody.com/best-core-workout-equipment-for-seniors/
[10] Best Home Fitness Equipment For Seniors – https://www.senioreaseguide.com/best/best-home-fitness-equipment-for-seniors

Top Home Exercise Equipment for Seniors Who Want Strength, Not Impact

Top Home Exercise Equipment for Seniors Who Want Strength, Not Impact

Last updated: August 13, 2026

Quick Answer

The best home exercise equipment for seniors who want strength without impact is a small, focused kit: resistance bands, adjustable dumbbells, a sturdy bench, a balance pad, and a compact cable or selectorized machine. This setup builds functional muscle, protects joints, and supports fall prevention, the three goals that matter most after 60. Most older adults can start well-equipped for under $300, and national guidelines back moderate-to-heavy resistance training as core to healthy aging [6][8].

Key Takeaways

  • Resistance bands and adjustable dumbbells are the highest-value tools for senior strength training at home, cheap, quiet, and joint-friendly [1][4].
  • Seniors can and should lift heavier than "light toning weights." Position statements from the NSCA endorse moderate-to-vigorous loads for older adults when progressed safely [6][8].
  • A balance pad and mini-step turn a strength routine into a fall-prevention routine at almost no cost [9].
  • Skip high-impact equipment like plyometric boxes, heavy barbells without a rack, and treadmills used for running [3].
  • A complete senior home gym costs roughly $150,$800 depending on whether you add a cable machine or bench [1][3].
  • Train strength 2-3 days per week, with 8-12 reps per set, using a load that feels challenging by the last two reps [5].
  • Recumbent bikes and ellipticals support cardio and joint health, but they don't replace resistance work for muscle [7].
  • Common mistakes: going too light forever, skipping warm-ups, and buying equipment that requires floor work every session [4].

What home exercise equipment is best for seniors building strength

The best equipment for seniors building strength at home is adjustable dumbbells, resistance bands with handles, and a stable bench, in that order. These three tools cover every major muscle group, allow gradual progression, and keep impact on knees, hips, and spine to a minimum [1][4].

What home exercise equipment is best for seniors building strength

Ranked by how well they support functional strength, mobility, and fall prevention:

  1. Adjustable dumbbells (5-50 lb range), the single best purchase. One pair replaces an entire rack and lets you progress from very light to genuinely challenging loads.
  2. Loop and tube resistance bands, near-zero joint stress, ideal for shoulders, hips, and rotator cuff work.
  3. Sturdy adjustable bench, unlocks seated presses, supported rows, and step-ups.
  4. Balance pad + mini-step, direct fall-prevention training.
  5. Compact cable machine or functional trainer, smooth, guided resistance for anyone with shoulder or wrist issues [10].
  6. Ankle weights (1-5 lb), for hip and glute work that protects the lower back.

Choose adjustable dumbbells if you only buy one thing. Choose bands first if you have grip issues, arthritis in the hands, or a very tight budget.

Low impact strength training equipment for older adults

Low-impact strength equipment for older adults is anything that loads muscle without loading joints through jarring, jumping, or ballistic motion. The core categories are resistance bands, dumbbells used in controlled tempo, cable machines, and selectorized weight-stack machines [8][10].

What makes equipment low-impact:

  • Smooth resistance curves (cables and bands) instead of sudden drops.
  • Seated or supported positions that remove balance risk from the movement itself.
  • Adjustable range of motion so painful angles can be avoided.
  • No airborne phase, feet stay planted.

Selectorized machines (pin-loaded stacks) are having a moment in 2026 senior home gyms because they combine guided paths with instant load changes, no plates to lift onto a bar [10]. Compact versions like wall-mounted functional trainers fit in a spare bedroom.

How do resistance bands compare to weights for seniors

Resistance bands and dumbbells both build strength for seniors, but they excel at different jobs. Bands are best for shoulder health, warm-ups, travel, and joint-friendly high-rep work. Dumbbells are best for building real muscle mass and bone density because they load bones under gravity [4][6].

Feature Resistance Bands Adjustable Dumbbells
Cost $15,$60 $150,$400
Joint stress Very low Low with good form
Bone-loading effect Modest Strong
Progression Change band Turn dial
Best for Shoulders, hips, mobility Chest, back, legs, arms
Storage Drawer Small footprint

Decision rule: Own both. Bands for warm-ups and shoulders, dumbbells for the main lifts. If forced to pick one, choose adjustable dumbbells for anyone who can safely grip them.

Best home gym setup for seniors with arthritis

The best home gym setup for seniors with arthritis prioritizes grip-friendly handles, seated support, and machines with smooth, guided motion. Cable machines, bands with padded handles, and selectorized equipment all reduce hand and wrist strain compared to Olympic barbells [10].

Recommended arthritis-friendly setup:

  • Compact cable machine with rotating handles
  • Neoprene-coated dumbbells (softer grip than steel)
  • Resistance bands with thick foam handles
  • Recumbent bike for cardio without wrist load [7]
  • Non-slip mat and padded bench

Avoid: fixed-grip Olympic barbells, kettlebells with narrow handles, and pull-up bars. These force your wrists and fingers into positions inflamed joints don't tolerate.

Can seniors build muscle without high impact exercise

Yes, seniors can absolutely build muscle without any high-impact exercise. Muscle grows in response to progressive tension, not impact. Studies summarized by the National Strength and Conditioning Association confirm that older adults training with machines, dumbbells, and bands at moderate-to-vigorous intensity build meaningful muscle and reverse sarcopenia [6][8].

Can seniors build muscle without high impact exercise

The mechanism is simple: muscle fibers respond to being challenged near their limit, whatever the source of resistance. A slow, controlled 12-rep set of dumbbell rows produces adaptation similar to any traditional strength method, without a single jump or drop landing.

"The old advice to stick with light weights after 50 has been replaced. Current guidance says older adults benefit from heavier loading, safely progressed." [5][6]

What equipment should seniors avoid for joint safety

Seniors should generally avoid equipment that demands impact, extreme range of motion, or unsupported balance under load. This isn't about age fear, it's about risk-to-reward ratio [3][4].

Skip or use with caution:

  • Plyo boxes and jump ropes, high impact on knees and ankles
  • Treadmills used for running (walking is fine)
  • Heavy barbell back squats without a rack and spotter
  • Ab wheels and roman chairs, hard on the lumbar spine
  • Cheap vibration plates, poor evidence for strength
  • BOSU balls loaded with heavy weights, fall risk outweighs benefit

The pattern: anything that combines heavy load with unstable base, or that requires airborne landings, belongs in an athlete's gym, not a senior's.

How much does a home gym for seniors cost

A functional senior home gym costs $150 to $800 depending on how far you go. Bare essentials, bands, a mat, ankle weights, can come in under $55 as of April 2026 [9]. A complete setup with adjustable dumbbells, bench, and a balance pad lands around $400,$600 [1][3].

Tiered budgets:

  • Starter ($55,$150): Resistance band set, yoga mat, 2 lb ankle weights, balance pad
  • Standard ($300,$600): Add adjustable dumbbells (5-50 lb), foldable bench, mini-step
  • Premium ($800,$2,500): Add a compact cable machine or selectorized multi-station [10]

A quality adjustable dumbbell pair often replaces $500+ worth of fixed dumbbells and saves square footage, usually the best single line item on the receipt.

Stationary bikes vs recumbent bikes for senior strength

Neither bike is primarily a strength tool, but recumbent bikes win for seniors because the seated, back-supported position removes pressure from the lower spine and wrists [7]. Upright stationary bikes work fine for fit seniors with no back issues.

For actual leg strength, though, bikes are a supplement, not the main event. Loaded step-ups, banded squats to a chair, and dumbbell deadlifts build far more functional lower-body strength than pedaling. Use the recumbent bike for warm-ups, cardio days, and joint-friendly conditioning, not as a replacement for resistance work [7].

Does a rowing machine work for seniors with back pain

A rowing machine can work for seniors with back pain, but only if the person has good hip mobility and is coached on form. The row is a hip-hinge, not a lower-back pull. Poor form turns it into repeated lumbar flexion under load, exactly what most back-pain sufferers should avoid [4].

Does a rowing machine work for seniors with back pain

Safer alternatives for back-pain seniors:

  • Seated cable rows (chest supported)
  • Banded rows with feet against a wall
  • Chest-supported dumbbell rows on an incline bench

If you love rowing, use a magnetic-resistance rower, keep the damper low, and stop the moment form breaks.

What weight should seniors start with for home training

Seniors should start with a weight that lets them complete 8-12 clean reps with 2 reps still in reserve. For most healthy older beginners, that's 3-8 lb dumbbells for shoulder work and 8-20 lb dumbbells for rows, presses, and squats to a chair [5].

The 2026 Harvard Health resistance prescription for older adults is straightforward:

  • 2-3 sessions per week
  • 8-12 reps per set
  • 2-3 sets per exercise
  • Rest 60-90 seconds between sets
  • Increase weight when 12 reps feels easy

The mistake isn't starting too heavy, it's staying too light forever. Progress the load every 2-3 weeks [5][6].

How often should seniors do strength training at home

Seniors should strength train two to three non-consecutive days per week, with each session lasting 30-45 minutes. This frequency is enough to build muscle and preserve bone density without overloading recovery [6][8].

A sample week:

  • Monday: Full-body strength (dumbbells + bench)
  • Tuesday: Balance + recumbent bike, 20 min
  • Wednesday: Rest or gentle walk
  • Thursday: Full-body strength (bands + cable)
  • Friday: Balance pad work + mobility
  • Saturday: Optional light strength or walk
  • Sunday: Rest

Balance training deserves its own slot 2-3 times a week, it's the single biggest fall-prevention lever [9].

Cable machines vs free weights for senior safety

Cable machines are generally safer than free weights for seniors because the resistance path is guided and the load can't fall on you. Free weights build more stabilizer strength but require better balance and technique [10].

Choose cable machines if you train alone, have shoulder impingement, or have any fall history.

Choose free weights if you have good balance, a training partner nearby, and want maximum functional carryover to daily life (carrying groceries, lifting grandkids).

Best of both worlds: a compact functional trainer at home covers 80% of what a commercial gym does, in a 4×4 ft footprint [10].

Common mistakes seniors make with home exercise equipment

The most common mistakes are buying too much, going too light, and neglecting warm-ups. Each one quietly kills results [4][5].

Top mistakes to avoid:

  • Buying a treadmill and calling it strength training. It isn't.
  • Sticking with 3 lb dumbbells for years. Muscle needs progressive challenge.
  • Skipping the 5-minute warm-up. Cold joints don't like sudden load.
  • Training the same muscles daily. Recovery is when muscle grows.
  • Ignoring the legs. Lower-body weakness predicts falls better than almost any other marker [9].
  • No balance work. Strength without balance still leaves fall risk on the table.

What if I have limited space for senior workout equipment

Limited space isn't a barrier, a full senior strength routine fits in 9 square feet. The key is choosing tools that stack, fold, or hide in a closet [3].

Small-space essentials:

  • One pair of adjustable dumbbells (footprint: 2 ft x 1 ft)
  • Resistance band set (fits in a drawer)
  • Foldable bench (stores vertically)
  • Balance pad (leans against the wall)
  • Wall-mounted cable trainer (uses zero floor space when folded)

Apartment dwellers should prioritize quiet gear. Bands, dumbbells on rubber mats, and cable machines make almost no noise, no dropped plates, no impact through the floor [1].

Conclusion

The strongest, safest home setup for older adults isn't a wall of machines, it's a focused kit built around adjustable dumbbells, resistance bands, a bench, and a balance pad. This is the top home exercise equipment for seniors who want strength, not impact, because every piece loads muscle without punishing joints. Add a compact cable machine if the budget allows and you want maximum arthritis-friendly versatility [10].

Actionable next steps:

  1. Start with a $150 kit: adjustable-tension bands, a mat, and a balance pad.
  2. Add adjustable dumbbells within 30 days once you know you'll stick with it.
  3. Train 2-3 days a week, 8-12 reps, and progress the weight every 2-3 weeks [5].
  4. Add balance-pad work to at least three sessions per week.
  5. Reassess your load every month, if 12 reps feels easy, it's time to go heavier.

Strength after 60 isn't optional, it's the closest thing there is to a longevity drug. The equipment above makes it accessible from a spare corner of any room.

FAQ

Is it too late to start strength training at 70 or 80?
No. Research consistently shows adults in their 70s, 80s, and 90s gain muscle and function from resistance training [6][8]. Start light, progress slowly, and see a doctor first if you have cardiac or orthopedic issues.

Are resistance bands enough on their own?
For beginners and anyone with joint issues, yes, for a while. Bands build real strength for the first 6-12 months. After that, most seniors benefit from adding dumbbells or a cable machine to keep progressing [4].

Do I need a personal trainer to start?
Not required, but 2-3 sessions with a senior-focused trainer or physical therapist to check form is one of the best investments you can make.

How long until I see results?
Most seniors feel stronger in daily tasks (stairs, groceries, getting up from chairs) within 4-6 weeks of consistent training [5].

What's the single best exercise for fall prevention?
Loaded step-ups combined with balance-pad standing work. They train the exact muscles and reflexes used to catch yourself [9].

Can I use household items instead of equipment?
Yes, water jugs, canned goods, and a sturdy chair cover basic movements. But adjustable equipment eventually becomes worth the cost because progression is smoother [1].

Should I do cardio or strength first?
For seniors focused on muscle and fall prevention, do strength first, cardio second. Cardio before heavy lifting fatigues the legs and increases fall risk during the strength session [7].

Is soreness normal?
Mild soreness for 1-2 days is normal for beginners. Sharp joint pain is not, stop and reassess form or load.

References

[1] Best Home Gym Equipment For Seniors – https://www.ritfitsports.com/blogs/article/best-home-gym-equipment-for-seniors
[2] Best – https://www.theseniorlist.com/exercise/best/
[3] Home Gym For Seniors – https://garagegymbuilders.com/guides/home-gym-for-seniors/
[4] Best Strength Training Equipment For Seniors – https://rebootedbody.com/best-strength-training-equipment-for-seniors/
[5] Strength Training After 50 Guidelines – https://dailycrunch.org/articles/strength-training-after-50-guidelines
[6] Resistance Training For Older Adults – https://www.nsca.com/about-us/position-statements/resistance-training-for-older-adults/
[7] Best Ellipticals For Seniors – https://barbend.com/best-ellipticals-for-seniors/
[8] Resistance Training For Older Adults Position.1 – https://www.nsca.com/contentassets/2a4112fb355a4a48853bbafbe070fb8e/resistance_training_for_older_adults__position.1.pdf
[9] Best Low Impact Senior Gym Gear – https://www.fuelingfitnessandfindingfocus.com/2026/04/best-low-impact-senior-gym-gear.html
[10] Best Resistance Training Machines For Seniors – https://www.ofzenandcomputing.com/best-resistance-training-machines-for-seniors/

Functional strength training for older adults at home

Functional strength training for older adults at home

{"cover":"Professional landscape format (1536×1024) editorial hero image with bold text overlay 'Functional Strength at Home' in crisp white sans-serif on a warm-toned semi-transparent panel, centered with 8% safe margins. Background: bright natural-light photograph of an active 70-year-old woman in athletic wear performing a sit-to-stand exercise from a sturdy wooden chair in a sunlit living room, resistance band nearby on hardwood floor, houseplants and large window with soft morning light, warm color grade, magazine cover polish, shallow depth of field, inspiring and dignified mood.","content":["Bright editorial photograph in landscape format (1536×1024) of a diverse group of three older adults (Asian man in his 70s, Black woman in her 60s, white man in his 80s) doing bodyweight squats and wall push-ups in a sunlit home living room, wearing casual athletic clothing, resistance bands and light dumbbells on a yoga mat nearby, natural window light streaming in, warm neutral palette, high editorial quality, candid and encouraging atmosphere, shallow depth of field","Split-screen editorial landscape image (1536×1024): left half shows an older woman in her late 60s carrying grocery bags up porch steps with confident posture in bright outdoor daylight; right half shows the same style of woman performing a farmer's carry with two small dumbbells in a bright home kitchen, symbolizing how functional training translates to daily life; warm natural lighting, magazine editorial polish, no text overlays, clean composition","Flat vector infographic in landscape format (1536×1024) showing a weekly functional training schedule for seniors: seven day-of-week icons across the top, with small illustrated exercise icons (chair squat, wall push-up, heel raise, band row, single-leg stand) mapped to three training days, rest and walking icons on other days; soft sage green, cream, and terracotta palette, short labels max 3 words each, generous 8% safe margins, clean modern design, save-worthy Pinterest infographic quality"}

Professional landscape hero image () with a reading "Functional Strength Training for Older". CRITICAL TYPOGRAPHY RULES:

Last updated: August 11, 2026

Strength-focused programs for seniors have climbed into the top worldwide fitness trends this year, and most of that momentum is happening in living rooms, not gyms. The reason is simple: home-based routines using resistance bands, light dumbbells, and bodyweight moves deliver the same fall-prevention and independence benefits as commercial gym programs, without the commute, cost, or intimidation factor.

Quick Answer

Quick Answer

Functional strength training for older adults at home means practicing movements that mirror real daily tasks, standing up from a chair, climbing stairs, carrying groceries, reaching overhead, using bodyweight, resistance bands, or light dumbbells. Most adults over 60 should aim for 2 to 3 sessions per week, 20 to 40 minutes each, targeting the legs, hips, core, and upper body. Done consistently, it reduces fall risk, protects independence, and produces visible strength gains within 6 to 12 weeks.

Key Takeaways

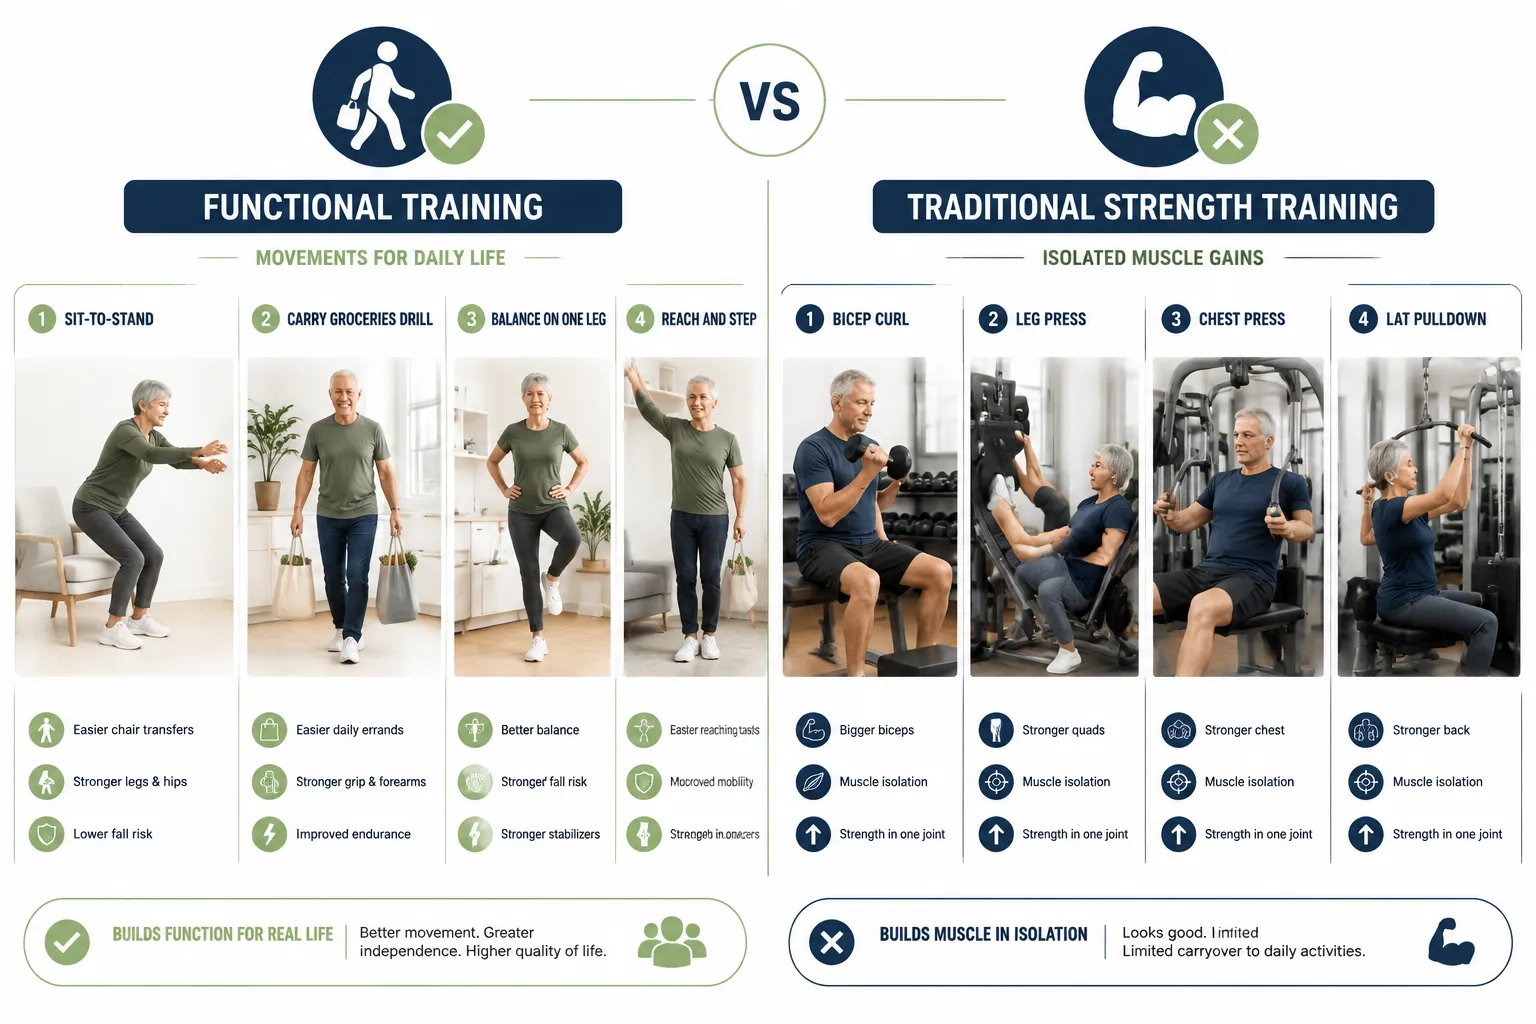
  • Functional training beats traditional lifting for seniors because it trains movement patterns used in daily life, not isolated muscles.
  • 2 to 3 non-consecutive days per week is the sweet spot for most older adults.
  • A sturdy chair, a wall, and a set of resistance bands are enough to start, no gym required.
  • Fall risk drops significantly when programs include balance work alongside strength (backed by decades of research from the CDC and WHO guidelines).
  • Arthritis is not a reason to avoid strength training, in most cases, it's a reason to start.
  • Expect noticeable strength gains in 6 to 8 weeks and functional improvements (easier stairs, better balance) within 4 weeks.
  • Progression matters more than intensity, small weekly increases work better than pushing hard once.
  • A physical therapist is ideal for anyone recovering from injury or surgery; a trainer is optional for healthy beginners.

)

What Is Functional Strength Training and Why Does It Matter for Seniors

Functional strength training is exercise designed around real-world movements, squatting, pushing, pulling, hinging, carrying, and rotating, rather than isolated muscle work like bicep curls. For older adults, it matters because it directly protects the abilities that keep people independent: getting off the toilet, climbing into a car, catching yourself when you trip, lifting a grandchild.

After age 30, adults lose roughly 3-8% of muscle mass per decade, and that rate accelerates after 60. This loss (called sarcopenia) is the single biggest predictor of losing independence in later life. Functional training slows and often reverses it while also training the nervous system to coordinate movement, the piece that pure weight machines miss.

The goal isn't to look strong. It's to still be able to do what you love at 85.

Functional Strength Training vs Regular Weight Lifting for Older Adults

The short answer: Functional training is usually the better default for adults over 60, but traditional lifting still has a place, especially for building raw strength in specific muscles.

Here's how they compare:

Feature Functional Strength Training Traditional Weight Lifting
Movement pattern Multi-joint, real-life motions Often single-joint, isolated
Equipment needed Minimal (bands, bodyweight, light weights) Machines, barbells, gym access
Balance component Built-in Usually absent
Injury risk (untrained) Lower Higher
Best for Daily independence, fall prevention Peak strength, bodybuilding goals
Home-friendly Excellent Limited

Choose functional training if your goal is staying independent, preventing falls, or moving better in daily life. Add traditional lifting if you already have a strength base and want to target specific weak areas (like grip or shoulder strength).

Best Functional Strength Exercises You Can Do at Home Without Equipment

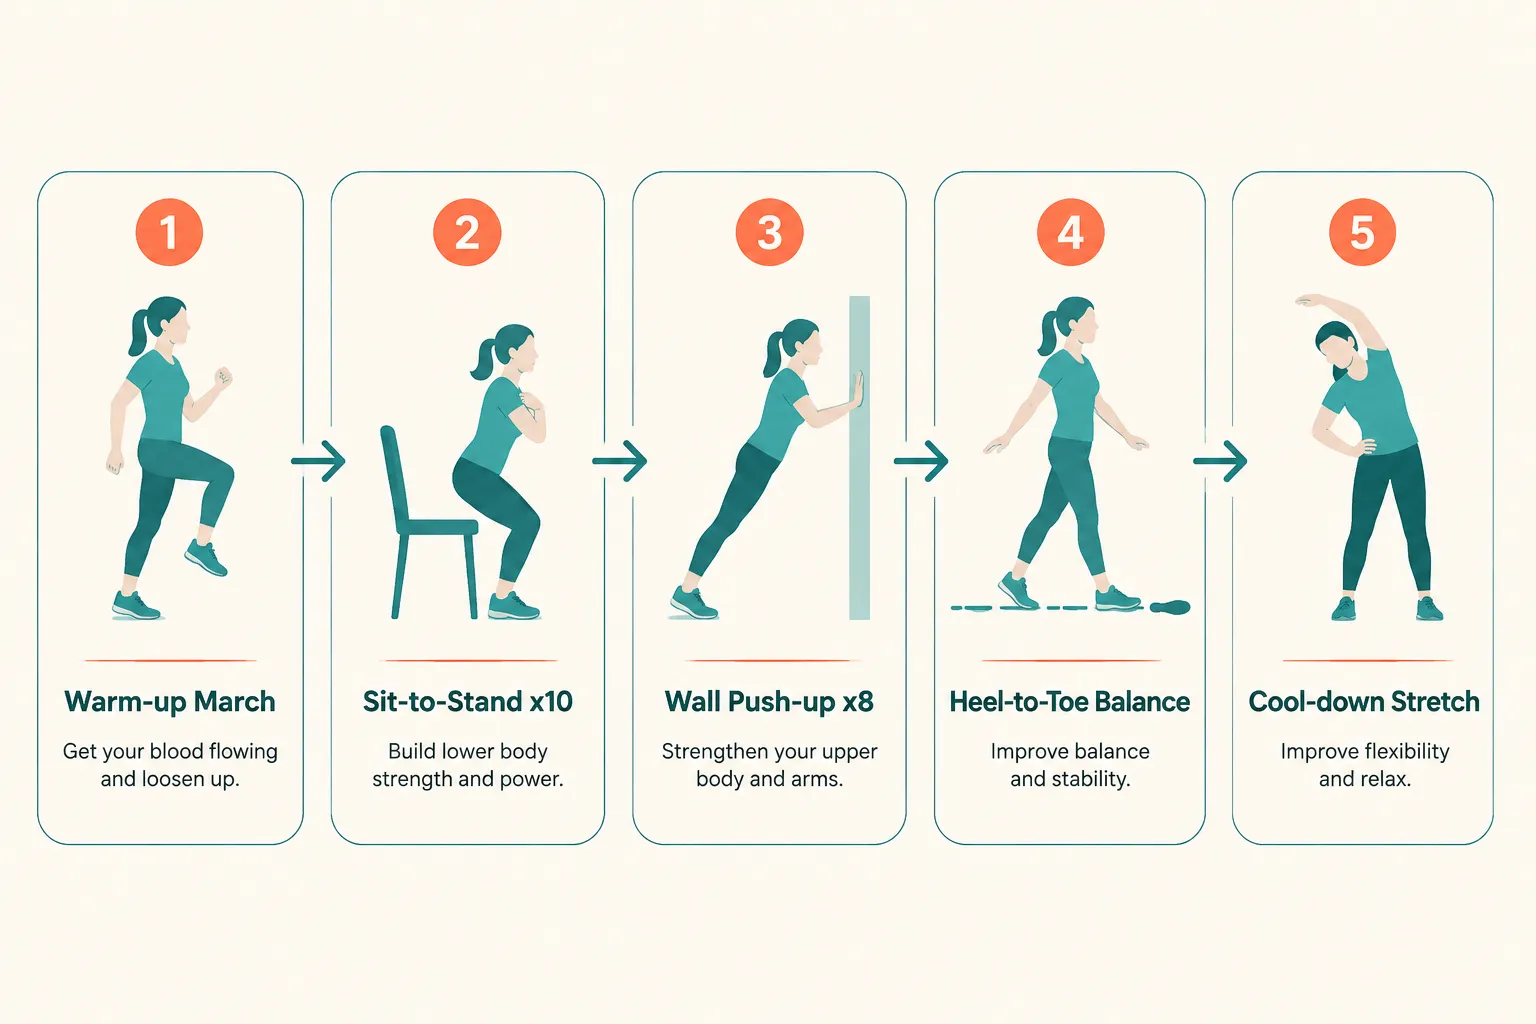
The most effective home routine covers five movement patterns. Start with these bodyweight versions:

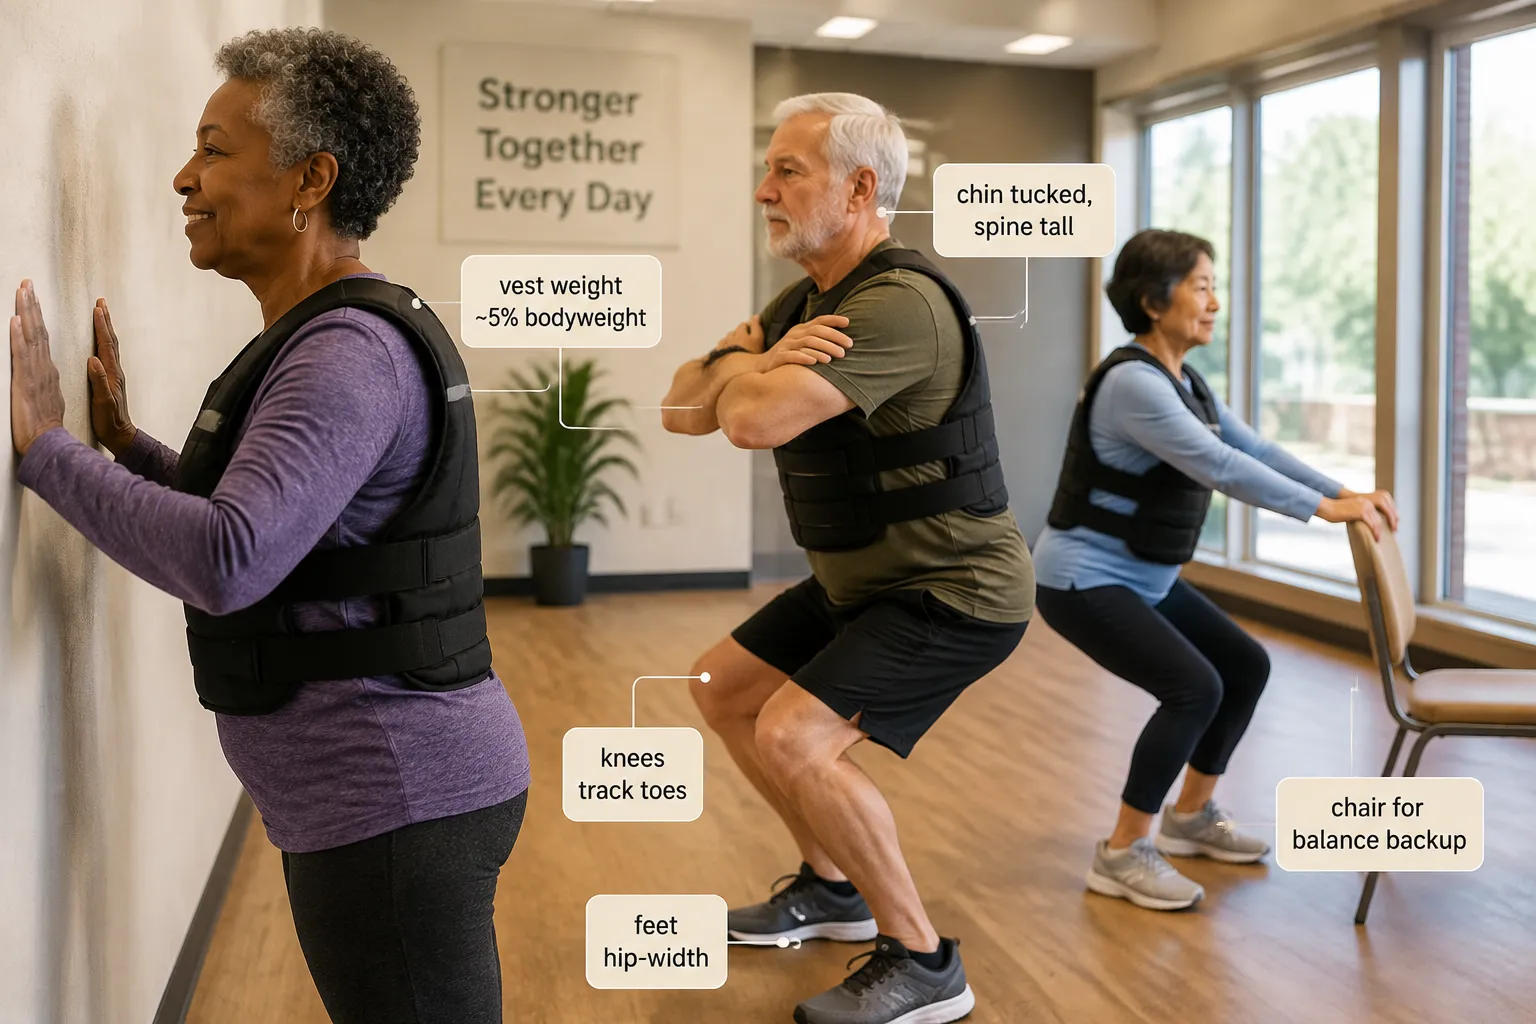
1. Sit-to-stand (chair squat), Sit on a sturdy chair, feet flat, arms crossed. Stand up without using hands. Sit back down with control. Trains the same muscles used to get off the toilet or out of a car. Start with 2 sets of 8-10.

2. Wall push-up, Stand arm's length from a wall, hands at shoulder height. Bend elbows to bring your chest toward the wall, then push back. Builds pushing strength for getting up from the floor. 2 sets of 8-12.

3. Heel raises, Stand behind a chair, hold the back for balance. Rise onto the balls of your feet, then lower slowly. Strengthens calves and ankles for stairs and walking. 2 sets of 12-15.

4. Standing hip hinge, Stand tall, hands on hips. Push hips back like closing a car door with your rear, keeping your back flat. Return upright. Trains the pattern for picking things up safely. 2 sets of 10.

5. Single-leg stand, Hold a counter, lift one foot slightly. Balance for 10-30 seconds. Switch sides. The single best fall-prevention drill. 3 times per leg.

Do the whole circuit 2-3 times per week. Add 1-2 reps per week as it gets easier.

How Often Should Older Adults Do Functional Strength Training

Two to three sessions per week, on non-consecutive days. That's the standing recommendation from the World Health Organization and the American College of Sports Medicine for adults 65 and older.

A practical week looks like this:

  • Monday: 30-minute strength session
  • Tuesday: Walking or light activity
  • Wednesday: Rest or gentle stretching
  • Thursday: 30-minute strength session
  • Friday: Walking
  • Saturday: Optional third strength session or balance work
  • Sunday: Rest

Muscles need 48 hours to recover and rebuild, which is why back-to-back strength days aren't ideal for beginners. If you're feeling more energetic, add walking or gentle mobility on off days, not more lifting.

Can Functional Strength Training Help Prevent Falls in Seniors

Can Functional Strength Training Help Prevent Falls in Seniors

Yes, this is one of the most consistently supported findings in geriatric research. Programs that combine strength (especially lower body) with balance work reduce fall rates by roughly 20-30% in community-dwelling older adults, according to systematic reviews cited in WHO and CDC guidelines.

Falls happen when three things fail at once: leg strength, balance reactions, and ankle stability. Functional training hits all three. The exercises that matter most:

  • Sit-to-stands (leg strength)
  • Single-leg stands (static balance)
  • Heel-toe walking (dynamic balance)
  • Step-ups on a low step (reactive strength)
  • Heel and toe raises (ankle stability)

Include at least one balance-focused move every session. Progress by narrowing your base of support (feet together → tandem stance → single leg), then by closing your eyes briefly while holding a counter.

)

What Equipment Do You Need to Start Functional Strength Training at Home

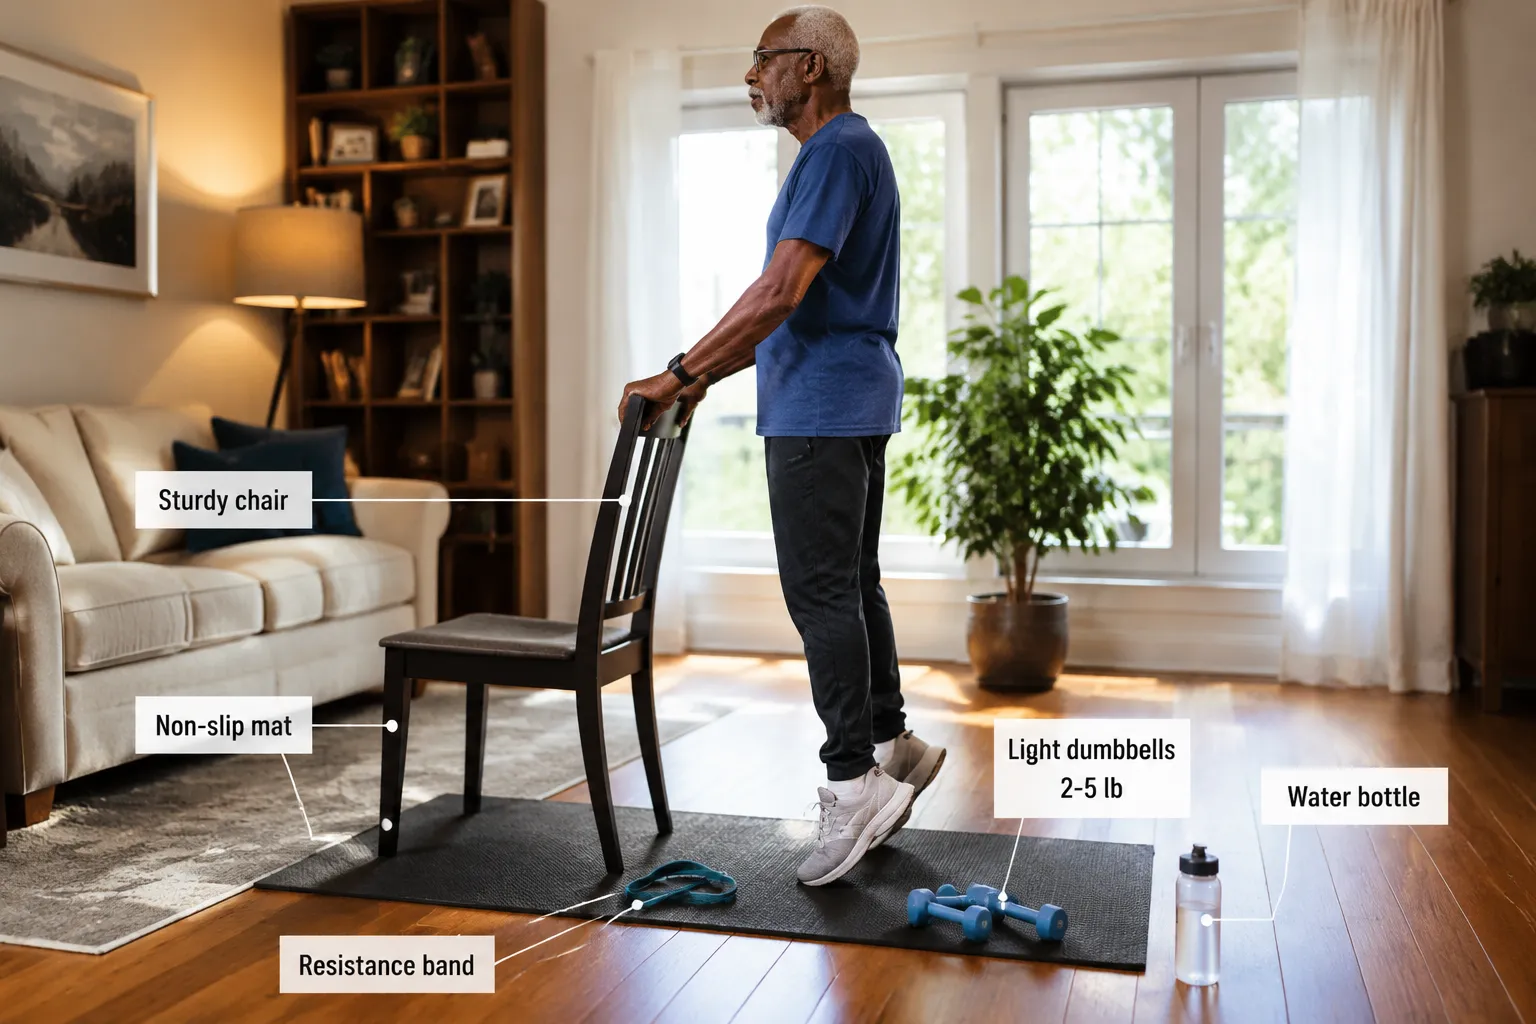
You need almost nothing to start. A sturdy chair, a wall, and enough floor space to lie down cover 80% of a beginner program.

When you're ready to add resistance, buy in this order:

  1. A set of resistance bands (loop bands and long tube bands with handles), $15-30. Most versatile purchase you can make.
  2. Light dumbbells, start with a pair each of 2, 5, and 8 lbs. Adjustable dumbbells save space.
  3. A yoga mat for floor work, $20.
  4. A stable step (an actual exercise step or the bottom stair) for step-ups.
  5. A door anchor for bands, under $10, unlocks rowing and pulling movements.

Skip the vibration plates, ab rollers, and complicated machines. They're marketing, not fitness.

Is Functional Strength Training Safe for People With Arthritis or Joint Pain

Yes, and for most people with osteoarthritis, it's actively recommended. The Arthritis Foundation and every major rheumatology guideline lists resistance training as a first-line treatment for joint pain, because stronger muscles offload stressed joints.

The rules for training with arthritis:

  • Move through pain-free ranges only. If a squat hurts at the bottom, don't go as low.
  • Warm up longer, 5-10 minutes of walking or gentle mobility before strength work.
  • Expect stiffness, not sharp pain. A little discomfort during exercise is fine. Sharp, stabbing, or joint-line pain is a stop signal.
  • Slow tempo helps. Take 3 seconds to lower and 2 seconds to rise. This reduces joint stress.
  • Bad days happen. On flared-up days, do less volume or switch to gentle range-of-motion work.

If you have rheumatoid arthritis, a joint replacement, or severe joint damage, get clearance from your doctor or physical therapist before starting.

How Long Does It Take to See Results From Functional Strength Training

Most older adults notice functional improvements within 2-4 weeks and measurable strength gains within 6-8 weeks. The pattern typically looks like this:

  • Weeks 1-2: Better coordination, exercises feel less awkward. Not much visible change.
  • Weeks 3-4: Stairs feel easier. Getting up from chairs is smoother. Balance improves.
  • Weeks 6-8: You can do more reps or heavier resistance. Posture often improves.
  • Weeks 12+: Real muscle changes. Clothes may fit differently. Daily tasks feel notably easier.
  • 6 months+: Bone density improvements (especially with weight-bearing moves), significant fall-risk reduction.

The catch: results reverse quickly if you stop. Two weeks off is enough to lose noticeable strength after 60. Consistency beats intensity, three modest sessions per week for a year outperforms two hard weeks followed by quitting.

Functional Strength Training for Seniors With Limited Mobility

Limited mobility doesn't disqualify anyone from strength training, it just changes the starting point. Seated and supported exercises can build meaningful strength for people who can't stand for long, use a walker, or are recovering from surgery.

A seated functional routine:

  • Seated marches, lift knees alternately, 30 seconds
  • Seated leg extensions, straighten one knee, hold 2 seconds, lower
  • Seated overhead press with light dumbbells or soup cans
  • Seated rows with a resistance band anchored to a doorknob
  • Ankle circles and heel-toe pumps for circulation and ankle strength
  • Seated torso rotations, arms crossed, rotate side to side

If standing is possible with support, add supported sit-to-stands (using arms), counter-supported heel raises, and gentle marches while holding a counter. Progress by reducing how much you rely on the support, not by rushing to standing exercises.

Common Mistakes Older Adults Make When Doing Strength Training at Home

Common Mistakes Older Adults Make When Doing Strength Training at Home

The biggest errors are almost always about approach, not exercise choice:

  1. Going too easy for too long. If 12 reps feels effortless, it's not building strength. The last 2-3 reps should feel challenging.
  2. Skipping warm-ups. 5 minutes of walking or marching in place prevents most tweaks and pulls.
  3. Holding the breath. Exhale on effort (the hard part), inhale on the easier part. Breath-holding spikes blood pressure.
  4. Ignoring the lower body. Legs and hips drive independence. Don't spend all your time on arms.
  5. No progression plan. Doing the same routine at the same difficulty for months stops producing results.
  6. Skipping balance work. Strength without balance still leaves fall risk on the table.
  7. Comparing to old fitness levels. The goal is progress from where you are today, not returning to age 40.

Should You Get a Trainer or Do Functional Strength Training on Your Own

A qualified trainer or physical therapist is worth the investment for the first 4-8 sessions if you're new, recovering from injury, or managing chronic conditions. After that, most healthy older adults can train independently using video guidance and a written program.

Get professional help if:

  • You've had a recent surgery, fall, or hospitalization
  • You have Parkinson's, MS, severe arthritis, or heart conditions
  • You've never done resistance training and want form checked
  • Your balance is already impaired

You can start solo if:

  • You're generally healthy and cleared by your doctor
  • You can follow along with reputable video programs (many senior-specific programs exist on YouTube from licensed physical therapists)
  • You start conservatively and progress slowly

The National Institute on Aging's free "Go4Life" workout materials are a solid starting point built specifically for older adults.

Functional Strength Training vs Yoga for Older Adults: Which Is Better

They solve different problems, and the best answer is often both. Strength training builds muscle and bone. Yoga builds flexibility, balance, and body awareness.

Functional Strength Training Yoga
Best at Building muscle, preserving bone, fall prevention Flexibility, balance, stress relief
Cardiovascular Moderate Low (except vigorous styles)
Muscle gains High Modest
Joint mobility Moderate High
Accessibility High High (chair yoga available)

Choose strength training first if you're losing muscle, worried about falls, or need to protect bone density. Add yoga for mobility, balance, and mental well-being. Two strength sessions plus one yoga session per week is an excellent combination for most adults over 60.

How to Modify Functional Strength Exercises if You Have Balance Issues

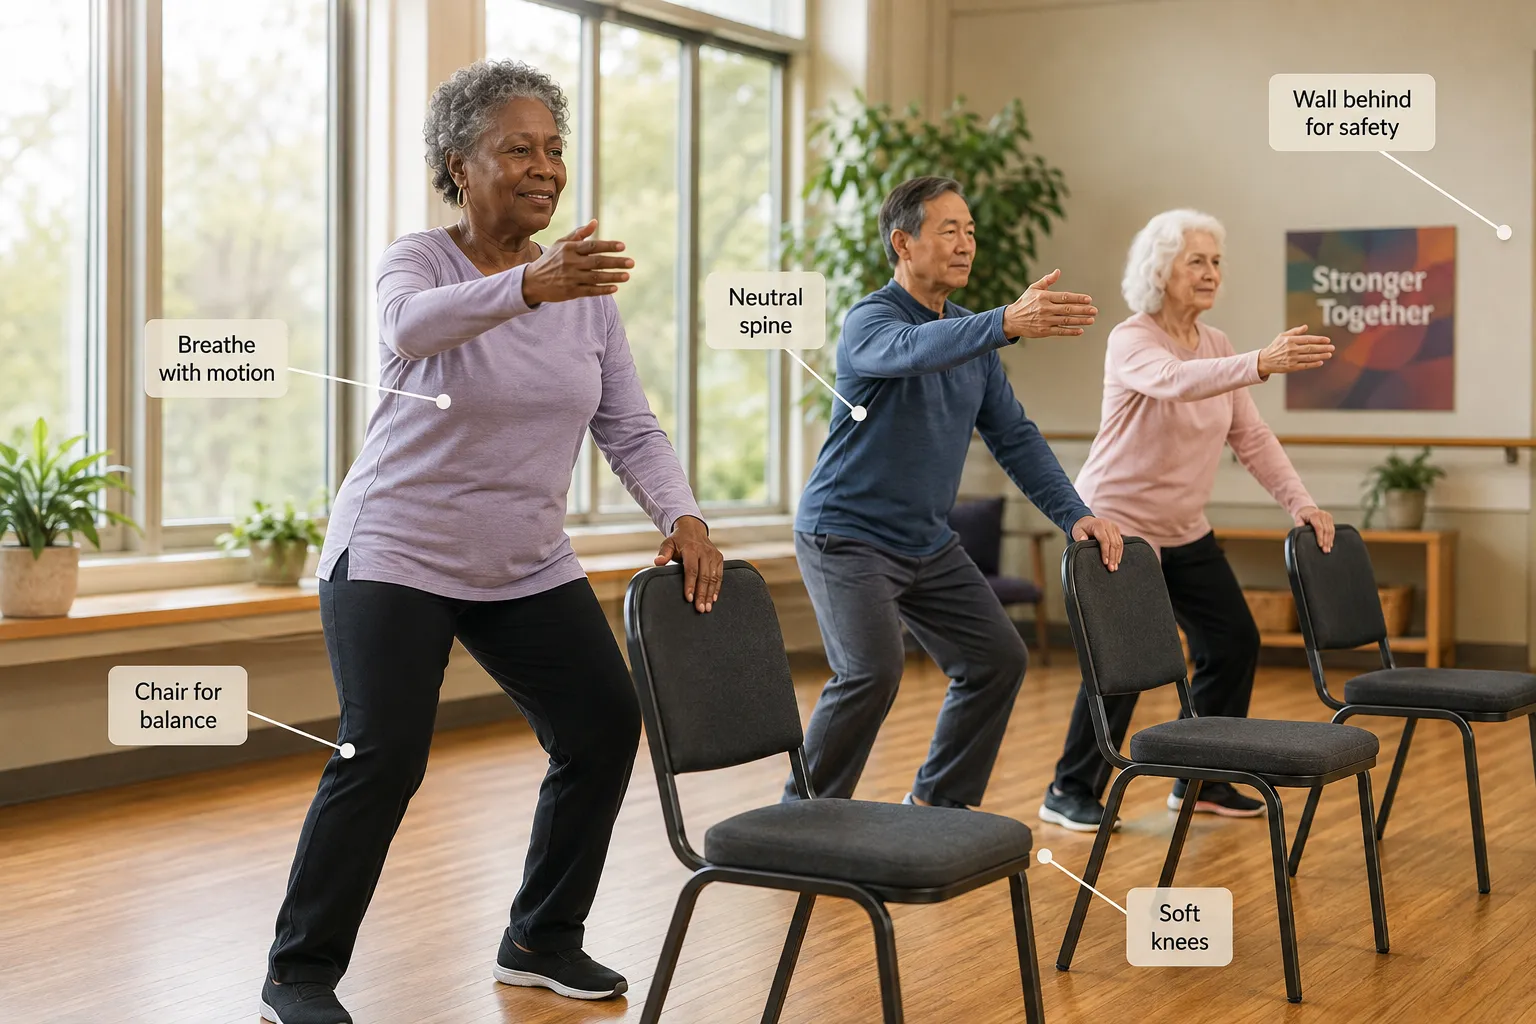
Every standing exercise can be modified by adding support, changing the base of support, or moving to a seated version. The rule: never train balance in a position where a real fall could happen.

Balance-friendly modifications:

  • For squats: Hold the back of a chair with both hands, then one hand, then fingertips as balance improves
  • For lunges: Do split squats holding a counter, or replace with step-ups
  • For single-leg stands: Start touching a wall with your hand, then a counter, then no support with a chair nearby
  • For overhead work: Sit in a chair with back support
  • For anything on the floor: Have a chair or sturdy furniture nearby to help you get up

Train balance in a safe corner (walls on two sides, a chair in front) so a stumble means grabbing furniture, not falling.

)

What's the Difference Between Functional Training and Physical Therapy for Seniors

Physical therapy treats specific medical problems; functional training builds general fitness. A physical therapist diagnoses movement issues, uses exercises as medicine to fix them, and is covered by insurance when prescribed. Functional training is a maintenance and improvement program you do on your own or with a trainer.

See a physical therapist for:

  • Recent injury, surgery, or fall
  • Persistent pain that limits daily activities
  • Neurological conditions (stroke recovery, Parkinson's)
  • Significant balance decline
  • After a hospitalization

Do functional training for:

  • Maintaining and building strength over years
  • Preventing decline before it starts
  • General fitness, weight management, energy
  • After you've been discharged from PT and want to keep gains

Many older adults benefit from a "PT graduation" model: work with a physical therapist to fix specific issues, then transition to an ongoing functional training program to maintain the gains.

FAQ

Is 70 too old to start strength training?
No. Research consistently shows adults in their 80s and 90s gain strength from resistance training. The benefits often show up faster in previously sedentary older adults because the starting point is lower.

How heavy should the weights be?
Light enough that you can do 10-15 reps with good form, heavy enough that the last 2-3 reps feel challenging. For most beginners, that's 2-8 lb dumbbells or light-resistance bands.

Do I need to warm up before functional training?
Yes. Five minutes of walking, marching in place, or gentle arm circles prepares muscles and joints and reduces injury risk.

Can I do this if I have osteoporosis?
Usually yes, and it's often recommended, but avoid heavy forward-bending or spinal-loading moves without medical clearance. A physical therapist can build a bone-safe program.

What if I miss a week?
Don't try to make it up. Resume at your previous level or slightly lighter. Missing occasional weeks is normal and won't undo progress.

Should I train on an empty stomach?
No need. A light snack (banana, toast, yogurt) 30-60 minutes before helps energy. Drink water during the session.

Is soreness after workouts normal?
Mild soreness for 1-2 days is normal, especially when starting or adding difficulty. Sharp pain, joint pain, or soreness lasting over 3 days means you did too much.

Can I combine this with walking?
Yes. Walking and strength training complement each other perfectly. Alternate days is the simplest schedule.

How long should each session be?
20-40 minutes is ideal. Beginners can start with 15-20 minutes and build up.

Do I need to stretch after?
Gentle stretching for 5 minutes after strength work is beneficial but not critical. Focus on the muscles you just trained.

Conclusion: Your Next Steps

Functional strength training at home is the highest-return investment older adults can make in their independence. It's cheap, backed by decades of research, and works for nearly every fitness level and health status.

Start this week:

  1. Pick 3 days on your calendar (e.g., Monday, Wednesday, Friday).
  2. Choose 5 exercises from the bodyweight list above. Do 2 sets of each.
  3. Time yourself, aim for 20 minutes total, including warm-up.
  4. Track it. A simple notebook works. Note reps done and how it felt.
  5. After 2 weeks, add one rep to each exercise, or add a third set.
  6. After 4 weeks, buy resistance bands and start adding them.
  7. After 8 weeks, reassess: are stairs easier? Getting up from chairs smoother? That's the real measure.

If you have any concern about health conditions, medications, or recent surgeries, get medical clearance first, but don't use that as an excuse to delay. Ask your doctor at your next visit and start with seated exercises in the meantime.

The strongest predictor of independence at 85 isn't genetics or luck. It's the habits you build now.

Daily mobility routines for injury prevention and long-term independence

Daily mobility routines for injury prevention and long-term independence

Last updated: August 9, 2026

Quick Answer

A daily mobility routine is 5-15 minutes of controlled joint movement through full range, hips, spine, shoulders, ankles, done most days to prevent injury and preserve independence. In 2026, updated guidance emphasizes short, structured sessions over long stretching marathons, because consistency beats duration for reducing pain, improving balance, and keeping you strong into later decades [1][3].

Key Takeaways

  • 10 minutes a day of targeted mobility work outperforms one long weekly session for injury prevention [1].
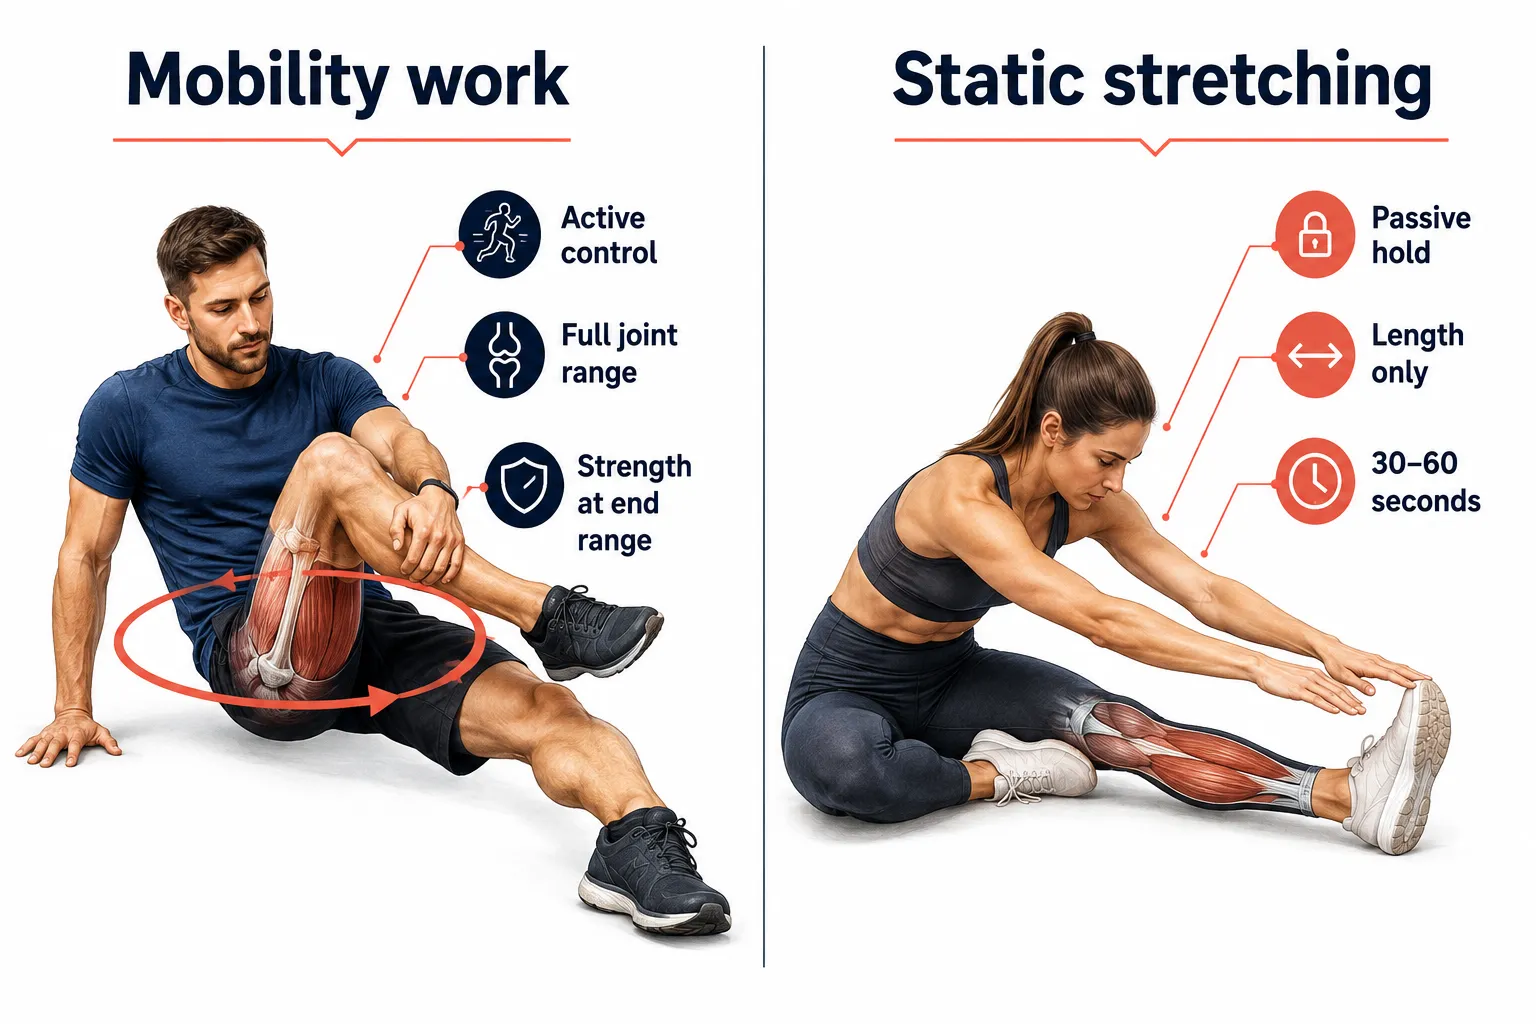
  • Mobility ≠ flexibility. Mobility is active control through a range; flexibility is passive length.
  • Falls are the leading cause of injury-related loss of independence in adults over 65, and mobility plus reaction training measurably reduces that risk [2][7].
  • Desk workers need hip flexor, thoracic spine, and neck priority. Athletes need sport-specific ranges plus recovery mobility.
  • Do dynamic mobility before workouts, longer holds after or on rest days.
  • No equipment required for a starter routine, a mat and a doorway are enough.
  • Results appear in 2-4 weeks with daily practice: less stiffness, better sleep posture, easier stairs.
  • Seniors benefit most from routines that combine mobility with balance and reaction drills [2][6].

Key Takeaways

What is a daily mobility routine and why does it matter?

A daily mobility routine is a short sequence of controlled joint movements, usually 5 to 15 minutes, that takes each major joint through its full active range. It matters because joints that don't move regularly lose range, and lost range is the quiet start of most non-traumatic injuries and age-related decline in independence [1][3].

Think of it as brushing your teeth for your joints. Skip it and problems build silently: tight hips lead to back pain, stiff ankles lead to knee pain, locked-up shoulders lead to neck issues. The 2026 guidance from clinical physios and strength coaches has shifted toward short daily sessions rather than infrequent long ones, because tissue adaptation responds to frequency [1][3].

Who this is for: Desk workers, parents, weekend athletes, anyone over 40, and seniors who want to keep climbing stairs and getting off the floor without help.

Who this isn't for (as a standalone fix): People with acute injuries, post-surgical patients, or anyone with unexplained pain, see a clinician first.

What's the difference between mobility and flexibility?

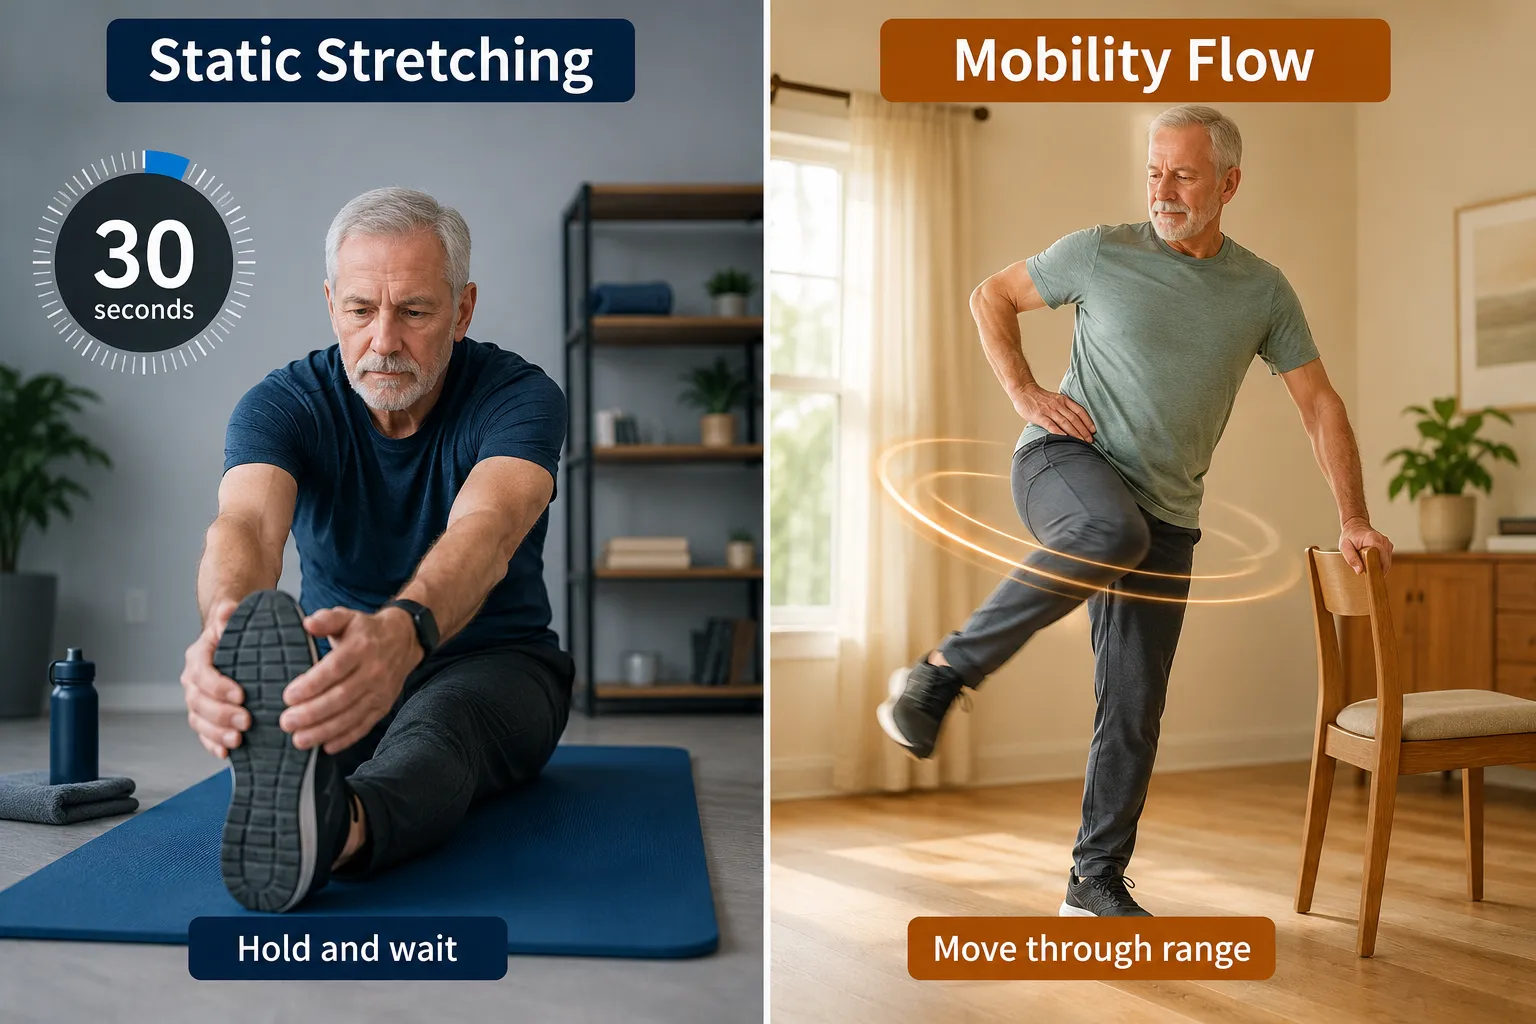
Flexibility is passive; mobility is active. Flexibility is how far a joint can be moved by an outside force (like a stretch). Mobility is how far you can move that joint under your own control, with strength and stability throughout the range.

A quick example: touching your toes with your hands is flexibility. Lifting one leg to hip height and holding it there is mobility. You need both, but mobility is what actually protects you when you slip on ice or catch a falling grocery bag.

Trait Flexibility Mobility
Control Passive Active
Requires strength No Yes
Protects against injury Partially Directly
Best training method Long static holds Dynamic controlled reps
Time to see gains 4-6 weeks 2-4 weeks

Best mobility exercises to prevent injuries

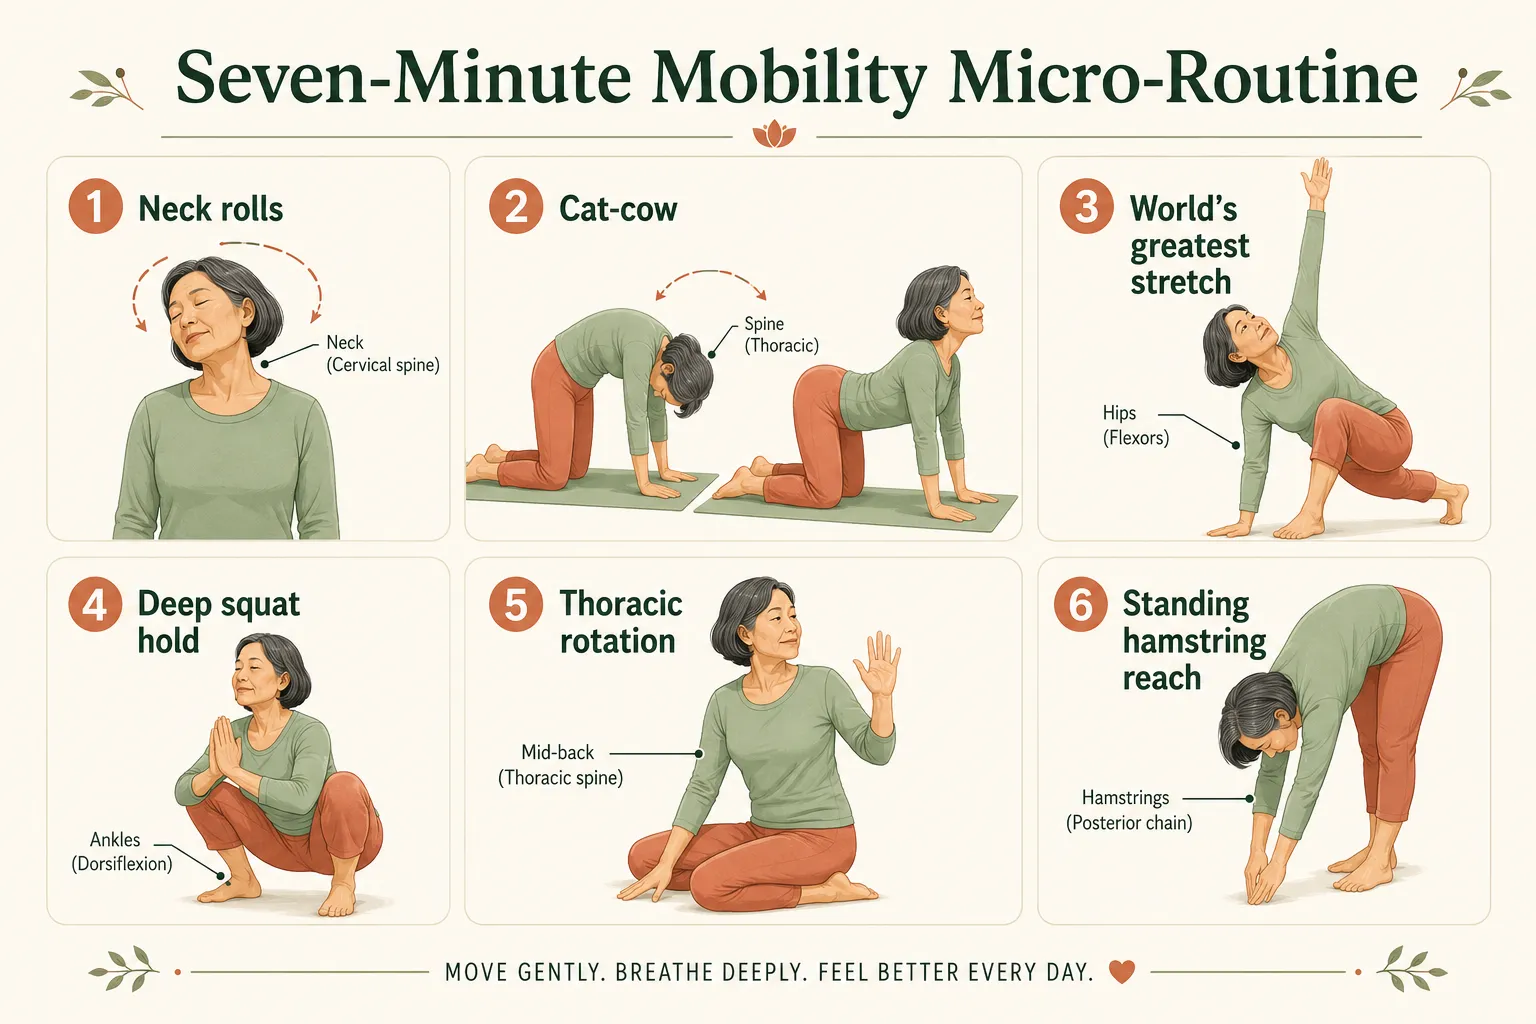
The best mobility exercises hit the joints that stiffen fastest under modern life: hips, thoracic spine, shoulders, and ankles. Do the following seven movements daily, the full sequence takes about 10 minutes [3][4].

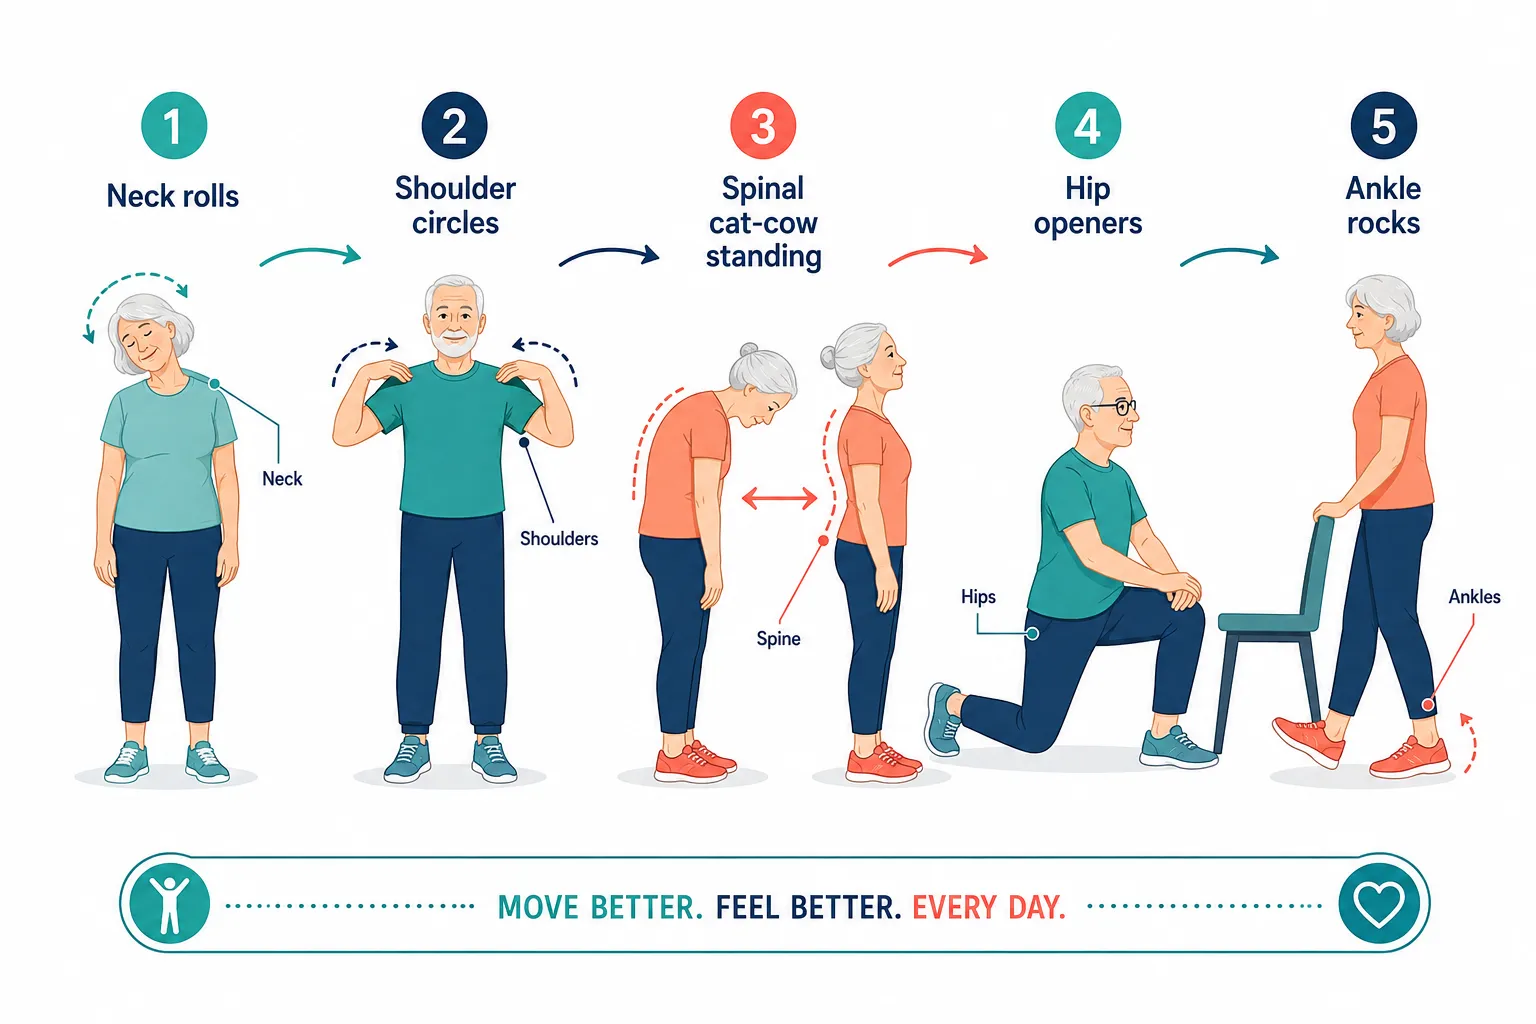
  1. Cat-cow (spine), 8 slow reps. Wakes up the whole back.
  2. World's greatest stretch, 5 per side. Hits hips, hamstrings, thoracic spine at once.
  3. 90/90 hip switches, 8 per side. Restores internal and external hip rotation.
  4. Thoracic rotations (bench or floor), 6 per side. Frees mid-back for shoulders and neck.
  5. Deep squat hold with reach, 30-60 seconds. The most underrated longevity drill.
  6. Wall shoulder slides (scapular Y-T-W), 8 reps. Rebuilds overhead range.
  7. Ankle rockers, 10 per side. Key for balance, running, stair-climbing.

Decision rule: If you only have 5 minutes, do the deep squat hold, 90/90 hips, and thoracic rotations. Those three cover 70% of the value.

How long should a daily mobility routine take?

10 minutes is the sweet spot for most people. That's enough to hit every major joint without becoming a chore you skip. Beginners can start at 5 minutes; experienced trainees or people recovering from injury may benefit from 15-20 [1][3].

  • 5 minutes: Bare minimum, hips, spine, one problem area.
  • 10 minutes: Full-body maintenance. This is the target.
  • 15-20 minutes: Rehab, athlete recovery, or catching up after a sedentary week.

More is not automatically better. Past 20 minutes, adherence drops sharply and returns diminish. Consistency at 10 minutes daily beats 45 minutes twice a week every time [1].

Mobility routine for desk workers vs athletes

Desk workers need to reverse chair posture; athletes need to restore ranges their sport shortens. The exercises overlap, but priorities differ.

Mobility routine for desk workers vs athletes

Desk worker priority (10 min):

  • Hip flexor stretch (couch stretch), 60 sec/side
  • Thoracic extension over foam roller, 90 sec
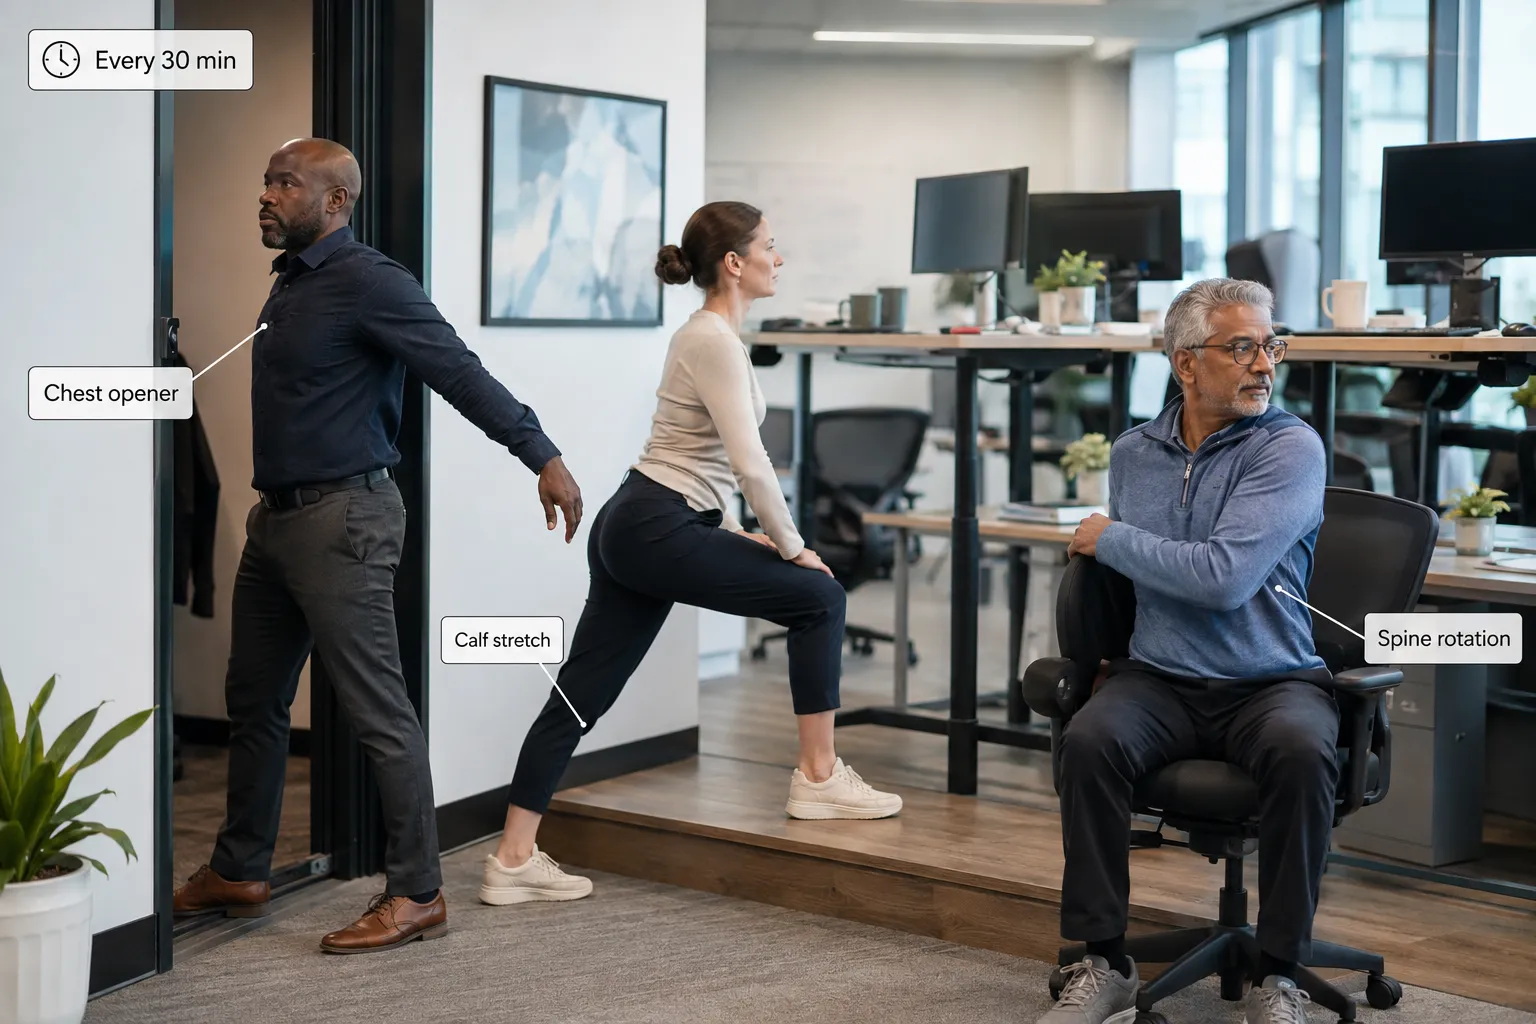
  • Chin tucks and doorway chest opener, 60 sec
  • Glute bridges, 10 reps
  • Ankle rockers, 10/side

Athlete priority (10-15 min):

  • Sport-specific dynamic warm-up (leg swings, arm circles)
  • Deep squat hold with reach, 90 sec
  • 90/90 hip transitions, 8/side
  • Cossack squats, 6/side
  • Shoulder CARs (controlled articular rotations), 5/side
  • Foam roll problem areas post-training

Common mistake: Desk workers copying athlete routines skip the postural resets they actually need. Athletes copying desk routines miss the loaded range work that protects them at competition intensity.

Can mobility work help you stay independent as you age?

Yes, and it's one of the highest-return habits after age 50. Loss of hip mobility, ankle range, and single-leg balance is the sequence that leads to falls, and falls are the leading cause of injury-related loss of independence in older adults [2][6][7].

A 2026 CNN health report highlighted that reaction-time and mobility training together measurably reduce fall risk in adults over 65 [2]. IU Health's fall prevention program similarly combines strength, balance, and mobility drills as the core intervention [7].

What preserves independence:

  • Getting off the floor without using hands (hip and ankle mobility)
  • Reaching overhead (shoulder and thoracic mobility)
  • Turning to look behind while walking (cervical and thoracic rotation)
  • Stepping over obstacles (hip flexion and single-leg balance)

Practice these movement patterns, not just isolated stretches. The goal isn't a party trick, it's still tying your own shoes at 85.

Mobility routine for lower back pain and knee issues

For lower back pain, mobilize the hips and thoracic spine, not the low back itself. For knee issues, mobilize the hips and ankles. Most chronic pain in these areas comes from the joints above and below being stiff, forcing the painful joint to compensate [4].

Lower back routine (daily, 8 min):

  • Cat-cow, 10 reps
  • 90/90 hip switches, 8/side
  • Thoracic rotations, 8/side
  • Glute bridges, 12 reps
  • Dead bug, 8/side
  • Avoid: aggressive spinal twists during flare-ups.

Knee routine (daily, 8 min):

  • Ankle rockers against wall, 10/side
  • Hip 90/90-8/side
  • Bodyweight step-downs, 8/side
  • Terminal knee extensions with band, 12 reps
  • Couch stretch, 60 sec/side

Edge case: Sharp, sudden, or swelling-related pain is not a mobility problem, see a clinician.

Should I do mobility work before or after workouts?

Do dynamic mobility before workouts and longer holds after. Dynamic movement primes joints and nervous system; static holds after training help restore length without blunting force output.

  • Pre-workout (3-5 min): Leg swings, arm circles, world's greatest stretch, CARs. Movement-based, no long holds.
  • Post-workout (5-10 min): Deep squat hold, couch stretch, chest opener, pigeon. Longer static positions where you can breathe and settle.
  • Off-day mobility (10-15 min): The full daily routine, done slowly.

Common mistake: Doing 5-minute static stretches before lifting or sprinting. Research since the early 2010s has repeatedly shown this can reduce power output and offers no injury-prevention benefit compared to dynamic prep [4].

Common mistakes people make with mobility training

The biggest mistakes are treating mobility like passive stretching, chasing extreme ranges, and doing it inconsistently. Fix these three and progress accelerates fast.

  • Bouncing through positions instead of controlling them. Slow beats fast.
  • Only stretching what's tight. Tight muscles are often protecting a weak joint, strengthen the surrounding area too.
  • Skipping the deep squat. It's uncomfortable at first, but it's the single most predictive movement of long-term hip and knee health [3].
  • Doing it once a week. Frequency drives adaptation. Ten minutes daily > 70 minutes weekly.
  • Ignoring breath. Holding your breath in a stretch signals your nervous system to guard. Long exhales unlock range.
  • Chasing pain. Discomfort is fine; sharp pain is a stop sign.

"Mobility is not about being bendy. It's about owning every degree of range you have with strength and control.", a principle echoed across 2026 clinical guidance [1][3].

Mobility routine for seniors to prevent falls

Seniors should combine mobility with balance and reaction drills, that combination is what actually reduces falls. Isolated stretching helps stiffness but doesn't prevent the loss-of-balance moment [2][5][6][7].

Mobility routine for seniors to prevent falls

Daily 10-minute senior routine:

  1. Seated marches, 20 reps. Warm-up hips safely.
  2. Ankle circles and pumps, 10 each direction, per side.
  3. Sit-to-stands from a sturdy chair, 8-12 reps.
  4. Heel-to-toe walking, 20 steps along a wall for support.
  5. Single-leg stand, 20 seconds per side, near a counter.
  6. Standing thoracic rotation, 6 per side.
  7. Wall shoulder slides, 8 reps.

Add weekly: Reaction drills like catching a tossed ball or stepping to unexpected cues. A 2026 CNN wellness report highlighted these as a top-tier fall prevention tool [2].

Safety rule: Always have a chair, wall, or counter within reach for balance work. Never train balance alone if you've fallen in the past year, start with a physical therapist [7][9].

How often do you need to do mobility work to see results?

Daily practice shows results in 2 to 4 weeks. Three times a week works but takes twice as long. Once a week maintains almost nothing.

  • Week 1: Less morning stiffness, easier bending to tie shoes.
  • Weeks 2-3: Improved sleep, better posture at your desk, deeper squat.
  • Week 4+: Noticeable strength in end-ranges, fewer minor tweaks and strains.
  • Month 3+: Structural changes, tissue and nervous-system adaptations that hold up under stress.

Miss a day? Fine. Miss a week? Restart at 70% intensity. The routine is a lifelong practice, not a program you complete.

Is a daily mobility routine necessary or just optional?

For long-term health and independence, it's necessary, not optional. If you sit for more than 4 hours a day, exercise hard, are over 40, or have any recurring pain, a daily mobility habit is one of the highest-leverage things you can do for future you [1][3][4].

You can skip it if: You're a manual laborer who moves through full ranges all day, you're under 25 with no pain, and you sleep well. Even then, a 5-minute check-in is smart insurance.

You absolutely need it if: You're desk-based, you strength train, you're a runner or cyclist, you're over 50, or you've had any injury in the last 3 years.

What equipment do I need for a basic mobility routine at home?

None. A mat and a doorway are enough to start. Equipment can add options but is never the barrier.

Starter (free): A yoga mat or carpet, a wall, a doorway, a sturdy chair.

Level up ($30-80):

  • Foam roller, for thoracic spine and calves
  • Resistance band (loop), for hip and shoulder activation
  • Lacrosse ball or massage ball, for targeted release

Advanced ($100+): Kettlebell for loaded mobility work (goblet squats, halos), a pull-up bar for hanging (excellent for shoulders and spine decompression).

Common mistake: Buying gadgets before building the habit. Do 30 days with zero equipment first.

Mobility exercises for people with limited range of motion

Start seated or supported, and work in the range you have, not the range you wish you had. Progress comes from consistent movement in small ranges, not from forcing depth [5][9].

Chair-based starter routine (8 min):

  • Seated cat-cow, 8 reps
  • Seated marches, 15 reps
  • Seated leg extensions, 10/side
  • Seated thoracic rotation, 6/side
  • Arm circles, 8 each direction
  • Ankle circles, 10 each direction
  • Neck half-circles, 4 each direction

Progression path: Chair → chair + standing (holding chair) → standing unsupported → floor-based work. Move to the next level only when the current one feels easy and safe.

Edge case: Post-surgical, neurological conditions, or severe arthritis, always work with a physical therapist to individualize the plan [9].

Sample 10-Minute Daily Mobility Routine

Here's a done-for-you template you can start today. No equipment. Repeat once through.

Time Exercise Reps/Duration
0:00 Cat-cow 8 slow reps
1:00 World's greatest stretch 5/side
3:00 90/90 hip switches 8/side
5:00 Deep squat hold + reach 45 sec
6:00 Thoracic rotations 6/side
7:30 Wall shoulder slides 8 reps
8:30 Ankle rockers 10/side
9:30 Standing forward fold + roll up 2 reps

FAQ

Is mobility training the same as yoga?
No. Yoga includes mobility but also emphasizes flexibility, breathwork, and philosophy. Mobility training is more targeted at joint control and injury prevention.

Can I do mobility work every day, even on rest days?
Yes. Daily low-intensity mobility is designed to be done every day, including rest days from lifting or running.

Will mobility work help my posture?
Yes, especially thoracic spine and hip flexor mobility, combined with strengthening the back and glutes.

How long until I can do a full deep squat?
Most people restore a comfortable bodyweight deep squat within 4-8 weeks of daily hip and ankle mobility work.

Is it normal to feel sore after mobility work?
Mild next-day tightness in worked areas is normal. Sharp pain is not, reduce range and re-evaluate.

Can mobility work replace strength training?
No. They complement each other. Mobility gives you range; strength gives you control of that range.

Are online mobility apps worth it?
They can help with consistency and progression, but a free 10-minute routine done daily beats an app used sporadically.

What time of day is best for mobility?
Whenever you'll actually do it. Morning wakes up the body; evening decompresses it. Both work.

Should kids do mobility routines?
Kids naturally maintain mobility through play. Structured routines aren't necessary unless they're competitive athletes.

Can mobility work help with sciatica?
Sometimes, hip and thoracic mobility often relieves referred symptoms. But sciatica warrants clinical evaluation first.

Conclusion

Daily mobility routines for injury prevention and long-term independence come down to one habit: 10 minutes, most days, moving every major joint through the range you own. It's the least glamorous fitness advice available, and also the most effective for how you'll feel at 50, 70, and 90.

Your next steps:

  1. This week: Do the 10-minute template above once a day. No equipment. No excuses.
  2. Week 2: Add one balance or reaction drill if you're over 50.
  3. Week 4: Reassess, deeper squat? Less back stiffness? Easier stairs? Keep going.
  4. Month 3: Make it as automatic as brushing your teeth.

Mobility is the quiet infrastructure of an active life. Build it daily, and you keep the freedom to move, work, play, and live on your own terms for decades longer.

References

[1] New Year New Mobility 5 Daily Habits To Keep You Moving In 2026 – https://thewoodfordphysio.com/new-year-new-mobility-5-daily-habits-to-keep-you-moving-in-2026/
[2] Train Faster Reaction Prevent Falls Wellness – https://www.cnn.com/2026/07/31/health/train-faster-reaction-prevent-falls-wellness
[3] Mobility And Stability For Long Term Health – https://www.legion.org/information-center/news/magazine/2026/august/mobility-and-stability-for-long-term-health
[4] Injury Prevention Tips 2026 – https://www.braceability.com/blogs/articles/injury-prevention-tips-2026
[5] Mobility Exercises For Seniors – https://www.healthline.com/health/senior-health/mobility-exercises-for-seniors
[6] Fall Risk Reduction – https://spectrumcs.org/senior-services/fall-risk-reduction
[7] Nr Iu Healths Fall Prevention Program For Seniors Returns – https://iuhealth.org/for-media/press-releases/nr-iu-healths-fall-prevention-program-for-seniors-returns
[8] Watch – https://www.youtube.com/watch?v=G1IgyQ8TuNE
[9] Healthy Aging Tips For Spring Senior Mobility Exercises That Support Independence – https://centershealthcare.com/media/healthy-aging-tips-for-spring-senior-mobility-exercises-that-support-independence/
[10] Watch – https://www.youtube.com/watch?v=zTJfBAFgHwQ

Hybrid home workouts combining strength, mobility, and recovery

Hybrid home workouts combining strength, mobility, and recovery

Last updated: August 8, 2026

Quick Answer

Hybrid home workouts combining strength, mobility, and recovery blend compound lifting, joint prep, and active recovery into one weekly plan, usually 3-5 focused sessions of 30-60 minutes. The goal is building muscle and staying pain-free without the burnout of daily high-intensity training. Most people need only a pair of adjustable dumbbells, a resistance band, and a mat to run a full program at home.[2][10]

Quick Answer

Key Takeaways

  • A standard hybrid week runs 3-5 strength days plus 1-2 mobility or active recovery sessions.[2][10]
  • Sessions of 30-45 minutes are enough when programmed well, longer isn't better.[8]
  • Mobility comes first as prep, foam rolling and stretching come after the strength block.[6]
  • Minimal gear works: adjustable dumbbells, a band, and a mat cover 90% of hybrid programming.[4][5]
  • Hybrid training beats CrossFit for joint health and sustainability, but CrossFit wins on community and pure intensity.[1]
  • You can train daily only if you rotate intensity, hard/easy/mobility, not hard every day.[10]
  • Beginners should start with 3 sessions a week for 4 weeks before adding volume.[4]

What's the Difference Between Hybrid Workouts and Regular Strength Training?

Regular strength training focuses on one goal, usually getting stronger or bigger, through lifting alone. Hybrid workouts fold in cardio conditioning, mobility drills, and recovery work inside the same weekly plan, so you build strength without losing endurance or joint range of motion.[1][10]

Traditional strength training looks like: bench, squat, deadlift, rows, 3-5 sets of 5-8 reps, rest days between. Nothing else.

Hybrid training looks like: those same lifts on 2-3 days, plus a conditioning day (kettlebell flows, sprints, tempo cardio), a dedicated mobility session, and one true recovery day. The point is a body that's strong, springy, and durable, not one that can only do one thing well.[10]

Choose hybrid if you want to lift heavy and hike, run, or play sports without feeling stiff. Choose pure strength if your only goal is maximum barbell numbers.

How Do You Combine Strength and Mobility Work in One Workout?

Put mobility at the start as targeted prep for the lifts you're about to do, then do strength, then finish with 5-10 minutes of static stretching or breathing. This sandwich structure warms tissue, loads it, then downshifts the nervous system.[6]

A clean 45-minute session looks like this:

  1. 5-8 min mobility prep, thoracic rotations, 90/90 hip switches, ankle rocks, band pull-aparts. Target the joints you're about to load.
  2. 25-30 min strength block, one main compound lift (squat, hinge, press, or pull) for 3-4 sets of 6-10 reps, then 2 accessory movements as a superset.
  3. 5-10 min finisher or conditioning, sled push, kettlebell swings, or bike sprints if you want conditioning; skip if it's a heavy day.
  4. 5 min cooldown, box breathing, hamstring stretch, hip flexor stretch, child's pose.

Common mistake: doing a 20-minute yoga flow before heavy squats. Long static stretching before lifting can temporarily reduce force output. Save the deep stretching for after.[6]

Best Hybrid Home Workout Routine for Beginners

Start with three full-body sessions a week on non-consecutive days (Mon/Wed/Fri), 35-45 minutes each. Each session includes mobility prep, two compound lifts, one carry or core drill, and a short cooldown.[4]

Beginner Week 1-4 template:

Day Focus Structure
Monday Lower + core Goblet squat, Romanian deadlift, suitcase carry
Wednesday Upper + mobility Push-up, one-arm row, band pull-apart, thoracic flow
Friday Full body Kettlebell swing, split squat, plank, farmer carry
Tue/Thu/Sat Optional 20-min walk or gentle mobility flow
Sunday Rest Full off

Use 3 sets of 8-10 reps for lifts, rest 60-90 seconds between sets. Add 2.5-5 lb every 1-2 weeks when the last set feels controlled. After four weeks, add a fourth training day.[4][10]

How Long Should a Hybrid Workout Be?

Most hybrid sessions should run 30-60 minutes, 30-45 for conditioning-heavy days, 45-60 for pure strength days. Anything under 25 minutes rarely leaves room for both mobility and quality lifting; anything over 75 tends to cut into recovery.[8]

A 2026 hybrid guide specifically recommends the 30-minute session as the sustainable sweet spot for busy adults: 5 minutes prep, 20 minutes work, 5 minutes cooldown.[8]

Decision rule: if you only have 30 minutes, drop the finisher and keep strength + mobility. Cutting the strength block to squeeze in cardio is the wrong trade.

Do I Need Equipment for Hybrid Home Workouts?

No, but a small kit dramatically expands what you can program. The minimum viable setup is a resistance band, one kettlebell or a pair of adjustable dumbbells, and a mat. That covers squats, hinges, presses, rows, carries, and every mobility drill.[4][5]

Tiered equipment list:

  • Bare minimum ($0): bodyweight, a backpack loaded with books, a sturdy chair.
  • Starter ($100-250): one 35-53 lb kettlebell, a mid-weight resistance band, a foam roller, a yoga mat.
  • Complete home gym ($400-900): adjustable dumbbells (up to 50 lb per hand), a doorway pull-up bar, a set of mini bands, a foam roller, a lacrosse ball.
  • Serious hybrid setup ($1,500+): power rack, barbell, plates, adjustable bench.

For most people, the starter tier runs a full hybrid program for years.[5]

Do I Need Equipment for Hybrid Home Workouts?

Hybrid Workout vs CrossFit: Which Is Better?

Hybrid training and CrossFit share DNA, both mix strength and conditioning, but they diverge on intensity, structure, and injury risk. Hybrid is better for long-term joint health, sport carryover, and sustainable progress. CrossFit is better for community, competitive drive, and maximum conditioning.[1]

Factor Hybrid Training CrossFit
Intensity Moderate, high, controlled Very high, often maximal
Session length 30-60 min 45-75 min
Injury risk Lower Higher (Olympic lifts under fatigue)
Progression Linear, individualized WOD-based, varied
Community Solo or small group Strong gym culture
Cost Low (home) $150-250/mo box fee

Choose CrossFit if you thrive on competition and coached intensity. Choose hybrid if you want to train forever without wrecking your shoulders and knees.[1][10]

Common Mistakes People Make with Hybrid Workouts

The biggest mistake is treating every session like it should crush you. Hybrid training only works when hard days are actually hard and easy days are actually easy.[10]

Top mistakes to avoid:

  • Turning mobility days into more cardio. Recovery days should feel restorative, not draining.
  • Skipping the warm-up because "it's just a home workout." Cold tissue plus loaded squats equals injuries.
  • Adding conditioning to every strength day. Two hard finishers a week is plenty.
  • Chasing variety over progression. Random workouts feel productive but don't build strength. Repeat the same lifts for 4-6 weeks and add load.
  • Ignoring sleep and food. Hybrid volume without 7+ hours of sleep and adequate protein produces fatigue, not results.[6][10]

"The point of hybrid isn't doing more, it's doing the right things in the right order so nothing breaks."

How Often Should You Do Hybrid Workouts Per Week?

Three to five sessions per week is the sweet spot for most adults, with at least one full rest day and one active recovery day. Beginners should stay at three; intermediate lifters do four; advanced athletes may run five with careful intensity rotation.[2][10]

Weekly frequency by level:

  • Beginner: 3 sessions, 2 walking days, 2 rest days.
  • Intermediate: 4 sessions (2 strength, 1 conditioning+mobility, 1 full-body power), 1 active recovery, 2 rest.
  • Advanced: 5 sessions rotating heavy/light/conditioning/power/skill, 1 mobility, 1 rest.[2]

Best Recovery Exercises to Add to Strength Training

Recovery isn't just lying on the couch. Active recovery, light movement that boosts blood flow without adding fatigue, accelerates soreness relief and joint health. Add 10-20 minutes on non-lifting days.[6]

Top recovery exercises:

  1. Foam rolling, quads, glutes, thoracic spine, lats. 60 seconds per area.
  2. 90/90 hip switches, 2 sets of 8 per side. Restores hip rotation lost from sitting.
  3. Cat-cow and thoracic openers, spinal decompression, 8-10 reps.
  4. Deep breathing (box or 4-7-8), 5 minutes to downshift the nervous system.
  5. Zone 2 walking, 20-40 minutes at conversational pace. Aids circulation without eating into recovery.
  6. Banded distractions, hip and shoulder capsule mobility, 30 seconds per position.

Do these on rest days and the last 5 minutes of every strength session.[6]

Can You Do Hybrid Workouts Every Day?

Yes, but only if you rotate intensity, you can't do heavy strength and hard conditioning seven days a week. Daily training works when you alternate hard, easy, and mobility-only days.[10]

Sustainable 7-day rotation:

  • Mon: Hard strength (lower)
  • Tue: Easy conditioning + mobility
  • Wed: Hard strength (upper)
  • Thu: Active recovery (walk + foam roll)
  • Fri: Full-body power + core
  • Sat: Optional play (hike, sport, easy bike)
  • Sun: Rest or gentle yoga

Edge case: if you're over 40, sleeping poorly, or dealing with high work stress, drop to 4 total sessions. Recovery capacity is finite.[6][10]

Hybrid Workouts for People with Limited Space

A 6-by-6-foot area is enough for a full hybrid program. You don't need a garage gym, you need one clear patch of floor, vertical space to press overhead, and a single anchor point (a door, a heavy couch leg) for band work.[5]

Space-efficient exercises that need almost no room:

  • Goblet squats, split squats, reverse lunges
  • Romanian deadlifts, single-leg deadlifts
  • Push-ups, dumbbell floor presses, pike push-ups
  • One-arm rows, banded rows, band pull-aparts
  • Kettlebell swings (need ~6 ft of clearance in front)
  • Plank variations, dead bugs, bird dogs
  • Every mobility drill

Skip: barbell overhead work, box jumps, sled pushes. Everything else fits.

How to Structure a Week of Hybrid Training

The standard 2026 hybrid template alternates strength days with conditioning/mobility days and includes at least one active recovery day.[2]

Proven weekly structure (intermediate):

Day Session Duration
Mon Lower-body strength (squat + hinge focus) 50 min
Tue Conditioning + mobility (20-min HIIT or tempo cardio + 10-min flow) 35 min
Wed Upper-body strength (push + pull focus) 50 min
Thu Active recovery / LISS walk 30 min
Fri Full-body power + core (kettlebell, med ball, carries) 45 min
Sat Optional play or mobility 20-40 min
Sun Rest or gentle movement ,

This template is the backbone of most 2026 hybrid programs and works for busy adults who want strength without losing conditioning.[2][10]

How to Structure a Week of Hybrid Training

Mobility Work Before or After Strength Training?

Both, but with different purposes. Do dynamic, targeted mobility before lifting to prep the specific joints you'll load. Do static stretching and foam rolling after to help nervous system downshift and reduce next-day tightness.[6]

Before lifting (5-8 min):

  • Leg swings, hip circles, thoracic rotations
  • Band pull-aparts, scap push-ups
  • 2 warm-up sets of the first lift at 40% and 60% load

After lifting (5-10 min):

  • Foam roll worked muscles
  • Static holds: hip flexors, hamstrings, chest doorway stretch (30-60 sec each)
  • Deep nasal breathing

Common mistake: long yoga before lifting. Static holds over 60 seconds pre-workout can temporarily reduce power output. Save deep stretching for post-session or off-days.[6]

Hybrid Workout Apps or Programs Worth Buying

The best hybrid programs in 2026 offer structured progression, video demos, and adjustable equipment options. Look for ones that program strength, conditioning, and mobility, not just workout libraries.[10]

Categories worth paying for:

  • Structured hybrid apps, Jefit, Ladder, Future, Fitbod. Give you weekly programming with mobility built in.[10]
  • Coach-led hybrid programs, Inov8 hybrid plans, individual coaches on Trainerize. Higher cost, more personalized.[4]
  • Mobility-specific apps, GOWOD, Pliability, Bodymotionlab routines pair well with any strength app.[6]

Decision rule: if you have to invent your own workouts, you'll stop in 6 weeks. Pay for programming.

FAQ

How long until I see results from hybrid training?
Strength gains show in 3-4 weeks; visible body changes in 8-12 weeks with consistent training and adequate protein.

Can hybrid training replace running for cardio?
Mostly, yes. Kettlebell flows, circuits, and Zone 2 walking cover general cardio. If you're training for a race, keep dedicated running.

Is hybrid training good for weight loss?
Yes. The combination of strength (preserves muscle) and conditioning (burns calories) with adequate protein is one of the most effective fat-loss approaches.

Do I need supplements?
No. Prioritize protein (0.7-1 g per pound of bodyweight), sleep, and creatine (5 g daily) if you want one add-on.

Should I train fasted?
Fine for short mobility or Zone 2 sessions. Eat something with protein and carbs 60-90 minutes before heavy lifting.

What if I miss a workout?
Skip it and continue with the next scheduled session. Don't double up, that spikes fatigue.

Can older adults do hybrid training?
Absolutely. Adults 50+ benefit most from the combination of strength (bone density) and mobility (fall prevention). Start with 3 sessions a week.

How much protein do I need?
Aim for 0.7-1 g per pound of bodyweight daily, split across 3-4 meals.

Conclusion

Hybrid home workouts combining strength, mobility, and recovery are the most sustainable way to build a body that lifts heavy, moves well, and doesn't fall apart at 45. The formula is boring on purpose: 3-5 focused sessions a week, mobility as prep, strength as the main course, recovery baked in.

Your next steps:

  1. Pick 3 days this week and commit to 40-minute sessions.
  2. Buy the starter kit, one kettlebell, a band, a mat, a foam roller.
  3. Run the beginner template above for 4 weeks. Don't change it.
  4. Track lifts in a notebook or app. Add 2.5-5 lb when the last set feels controlled.
  5. After 4 weeks, add a fourth day and one dedicated mobility session.

Consistency beats intensity. A 40-minute session done 3 times a week for a year will outperform a 90-minute killer session done twice before you quit.

References

[1] Hybrid Workouts Blending Strength And Mobility For Balanced Results – https://remix-fitness.com/blog/hybrid-workouts-blending-strength-and-mobility-for-balanced-results
[2] How To Build A Sustainable Hybrid Workout Routine Strength Cardio Mobility Recovery For Lasting Results – https://exerciseplease.com/how-to-build-a-sustainable-hybrid-workout-routine-strength-cardio-mobility-recovery-for-lasting-results/
[4] Hybrid Training For Beginners – https://www.inov8.com/us/blog/post/hybrid-training-for-beginners
[5] Hybrid Workouts How To Mix Strength Cardio And Mobility – https://fitnessworld.ca/blog/hybrid-workouts-how-to-mix-strength-cardio-and-mobility/
[6] Recovery Mobility Routine 2026 Strength Progress – https://bodymotionlab.com/blog/recovery-mobility-routine-2026-strength-progress
[8] Hybrid Training Strength Cardio 30 Minutes – https://runlovers.it/en/2026/hybrid-training-strength-cardio-30-minutes/
[10] Hybrid Training The Complete Guide To Combining Strength Cardio Mobility In 2026 – https://www.jefit.com/blog/hybrid-training-the-complete-guide-to-combining-strength-cardio-mobility-in-2026

Fall Prevention Exercises After 60: Evidence-Based Home Workouts for Balance and Stability

Fall Prevention Exercises After 60: Evidence-Based Home Workouts for Balance and Stability

Last updated: August 6, 2026

Quick Answer

Fall prevention exercises after 60 work best when they combine balance training, lower-body strength, and reactive stepping practiced at least 3 hours weekly. Evidence shows structured programs like Otago and Tai Ji Quan cut fall rates by 23-58%, while multimodal home routines reduce falls by roughly 34% [5][7]. Start with chair stands, progressive single-leg holds, and heel-to-toe walking three days a week, adding Tai Chi or resistance work as stability improves.

Key Takeaways

  • Multimodal training beats single exercises. Combining balance, strength, and functional movement reduces fall rates by 34% [7].
  • Tai Ji Quan is the single most effective modality, with 31-58% fall reductions in community-dwelling seniors [5].
  • Volume matters. At least 3 hours per week, sustained for 32+ weeks, produces the strongest results [1][7].
  • The Otago Program (balance + strength, 3x weekly) cuts falls by 23-40% [5].
  • Home-based programs work. Structured home routines reduce fall rates by 24% with high-certainty evidence [7][8].
  • Progression is essential. Move from feet-apart holds to feet-together, single-leg, and eyes-closed variations over weeks [2].
  • Reactive balance training (perturbation practice) improves recovery when balance is unexpectedly lost [5].
  • Most people feel steadier in 4-8 weeks with consistent practice; measurable strength gains take 8-12 weeks.

Key Takeaways

What Causes Falls in Older Adults Over 60?

Falls in adults over 60 usually result from a combination of muscle weakness, impaired balance, slowed reaction time, medication side effects, and environmental hazards, rarely a single cause. Vision changes, low blood pressure on standing, inner-ear problems, and reduced foot sensation also contribute.

The biggest modifiable risk factors are lower-body weakness (especially quads and hip abductors), poor postural control, and slow reactive stepping. That's why exercise-based prevention works: it targets exactly what age chips away at.

Common contributors:

  • Weak legs and hips (can't recover from a stumble)
  • Slower reflexes when balance is disrupted
  • Poor vision or bifocals on stairs
  • Medications causing dizziness or drowsiness
  • Home hazards: loose rugs, poor lighting, no grab bars
  • Fear of falling (which paradoxically increases fall risk)

Decision rule: If you've had a near-fall in the last 6 months, treat exercise as a medical intervention, not a hobby.

What Causes Falls in Older Adults Over 60?

Best Balance Exercises for Seniors at Home

The most effective home balance exercises for seniors are progressive stance work, chair stands, heel-to-toe walking, and single-leg holds, all doable with just a sturdy chair and wall access. These form the backbone of the evidence-based Otago and CDC-endorsed protocols.

Core home routine (start here):

  1. Chair stands, Sit to stand 10 times without using hands, twice daily. Progress to holding light weights [2].
  2. Progressive stance holds, Feet apart → feet together → tandem (heel-to-toe) → single-leg. Hold each 10-30 seconds, 5 reps twice daily [2].
  3. Heel-to-toe walking, 20 steps forward along a hallway, hand near wall for safety.
  4. Heel raises and toe raises, 10-15 reps, twice daily, holding chair for support.
  5. Sideways walking, 10 steps each direction, focusing on hip control.
  6. Eyes-closed standing (advanced), Only once feet-together stance is easy for 30 seconds.

"The safest way to progress is to reduce your base of support before you reduce your support. Feet-together with a hand on the counter is safer than single-leg in open space."

Common mistake: Skipping the easier stances because they feel too simple. The nervous system needs that foundation before advancing.

How Often Should I Do Fall Prevention Exercises?

Aim for at least 3 hours per week spread across most days, with dedicated balance work at least 3 days weekly. Meta-analysis of 38 studies shows programs done more than 5 times per week for over 32 weeks produce significantly greater fall reductions than shorter or less frequent routines [1].

Sample weekly schedule:

Day Focus Time
Mon Balance + strength 30 min
Tue Walking + heel raises 30 min
Wed Tai Chi or balance 30 min
Thu Strength (chair stands, bands) 25 min
Fri Balance + reactive stepping 30 min
Sat Walking or Tai Chi 30 min
Sun Gentle mobility / rest 15 min

The WHO recommends adults 65+ get at least 150 minutes of moderate activity weekly plus specific balance and strength work, this schedule hits both targets [6].

Can Fall Prevention Exercises Really Reduce Injury Risk?

Yes, the evidence is strong and consistent. Multimodal exercise programs reduce fall rates by 34% and cut the number of people who fall by 22%, based on moderate-certainty evidence from Cochrane-level reviews [7][10]. Home-based programs specifically reduce falls by 24% with high-certainty evidence [7][8].

What that means in plain numbers: If 100 sedentary adults over 60 would have 60 falls next year, a good exercise program brings that closer to 40 falls. For serious injuries like hip fractures, the reduction is even more meaningful because reactive stepping training helps you break falls better.

What doesn't work as well:

  • Walking alone (helpful, but not enough)
  • Generic gym classes without balance focus
  • Short programs under 12 weeks
  • Doing exercises 1x per week

Tai Chi vs Strength Training for Fall Prevention

Tai Ji Quan (Tai Chi) has the strongest single-modality evidence, with 31-58% fall reductions, while strength training alone shows smaller effects unless combined with balance work [5]. The best approach for most adults over 60 is to do both.

Head-to-head:

  • Tai Chi wins for: balance confidence, postural control, low-impact accessibility, group motivation.
  • Strength training wins for: climbing stairs, getting off the floor, carrying groceries, recovering from a trip.
  • Combined (multimodal) wins for: overall fall risk reduction, 34% rate reduction [7].

Choose Tai Chi if you have arthritis, are new to exercise, or dislike gym-style workouts. Choose strength-first if you've lost noticeable leg power (struggle to stand from a low couch). Do both if you can, this is what the Otago Program essentially does.

What Equipment Do I Need for Senior Balance Workouts?

Almost nothing. A sturdy chair, a wall, and non-slip footwear cover 90% of evidence-based fall prevention exercises after 60: evidence-based home workouts for balance and stability rely on bodyweight and progression, not gear.

Minimum kit:

  • A sturdy dining or kitchen chair (no wheels, no arms)
  • Clear wall space or countertop for hand support
  • Non-slip shoes or bare feet on a non-slip surface
  • Enough floor space to take 5 steps in a straight line

Optional upgrades:

  • Resistance bands (light, medium), under $15
  • 2-5 lb dumbbells for progression
  • Foam pad or folded towel for advanced balance surfaces
  • Timer or phone app

Skip these: Wobble boards and BOSU balls without supervision. They're too unstable for home practice without a trainer.

Are Fall Prevention Exercises Safe if I Have Arthritis?

Yes, and they're specifically recommended. Low-impact balance training, Tai Chi, and controlled strength work are safe and beneficial for most people with osteoarthritis. The American Geriatrics Society lists these as essential fall prevention components even for those with joint disease [8].

Arthritis-friendly modifications:

  • Warm up with 5 minutes of gentle marching in place
  • Use a chair for hand support during balance work
  • Reduce range of motion on painful joints, half a chair stand still counts
  • Skip deep squats; use partial range instead
  • Aquatic classes are excellent complements

Red flags, stop and call your doctor: sharp joint pain (not muscle soreness), swelling that lasts >48 hours, or any new numbness.

How Long Does It Take to See Improvement in Balance?

Most adults notice better steadiness within 4-8 weeks of consistent practice, with measurable strength and functional gains at 8-12 weeks. Full fall-risk reduction benefits typically show at 6+ months of continued training [1].

Realistic timeline:

  • Weeks 1-2: Exercises feel awkward; slight muscle soreness is normal.
  • Weeks 3-4: Balance holds get easier; can extend times.
  • Weeks 5-8: Noticeable confidence on stairs, curbs, uneven ground.
  • Weeks 9-12: Chair stands feel easy; can progress to weighted versions.
  • 6+ months: Meaningful reduction in fall risk backed by research [1][5].

If you plateau after 6 weeks, progress the difficulty, narrow your stance, close your eyes, or add head turns.

What's the Difference Between Balance and Stability Exercises?

Balance is your ability to stay upright when still or moving slowly (standing on one foot). Stability is your ability to control movement through a range, like squatting or reaching without wobbling. Both matter, and good fall prevention exercises after 60: evidence-based home workouts for balance and stability train them together.

  • Balance exercise example: Single-leg stance for 30 seconds.
  • Stability exercise example: Chair stand with a slow 3-second descent.
  • Combined example: Step-up onto a low platform with a pause at the top.

Simple test: If you can hold single-leg stance for 30 seconds but wobble climbing stairs, you need more stability work. If you're strong but shaky on one foot, you need more balance work.

Can I Do These Exercises If I've Already Fallen Before?

Yes, and you should. Having fallen once doubles your risk of falling again, which makes structured exercise more important, not less. Start with a supervised program if possible (physical therapist evaluation, EnhanceFitness, or Otago through a local aging services agency) [4].

Post-fall starting protocol:

  1. Get medical clearance, especially if head or hip was involved.
  2. Ask about a physical therapy referral, Medicare typically covers it.
  3. Start seated exercises: seated marching, ankle pumps, chair-supported leg lifts.
  4. Progress to standing holds with both hands on a counter.
  5. Add reactive stepping practice (safely, with a spotter) once stable.

Fear of falling itself is a risk factor. Gentle, successful exercise breaks the fear-immobility-weakness cycle.

Which Exercises Work Best for People With Vertigo?

For vertigo (especially BPPV or vestibular disorders), start with vestibular-specific rehabilitation rather than generic balance work, see a physical therapist trained in vestibular rehab first. Once cleared, gaze stabilization and gradual balance progression are safe and effective.

Vertigo-safe starting exercises:

  • Seated gaze stabilization (focus on a spot while turning head slowly)
  • Standing with feet apart, eyes open, hand on counter
  • Slow marching in place
  • Walking with head still (add head turns only when stable)

Avoid initially: Eyes-closed exercises, quick head movements, and any position that reproduces symptoms. Progress only when a session doesn't trigger vertigo.

How Do I Know if I'm Doing Balance Exercises Correctly?

You're doing it right when the exercise feels challenging but controlled, you can maintain the position with some effort, occasional micro-corrections, but without lurching or grabbing support constantly. If it's easy, progress. If you're catching yourself repeatedly, regress.

Self-check list:

  • ✅ Breathing normally (not holding breath)
  • ✅ Standing tall, not hunched or leaning
  • ✅ Eyes forward, not staring at feet
  • ✅ Support hand hovering, not gripping
  • ✅ Can hold position for target time with small sways only

Video yourself once a month. You'll see posture issues you can't feel. Better yet, one session with a physical therapist can calibrate your form for months of solo practice.

Are There Exercises I Should Avoid After 60?

Yes, a few movements carry more risk than benefit for most adults over 60, especially those with osteoporosis, joint replacements, or a fall history.

Generally avoid or modify:

  • Deep forward bends and toe touches (risk with osteoporosis)
  • Full sit-ups and crunches (spine flexion under load)
  • Behind-the-neck presses or pull-downs (shoulder impingement)
  • Running on uneven surfaces without adequate strength base
  • Plyometric jumps unless cleared and progressed carefully
  • Yoga inversions (headstands, shoulder stands)

Better swaps: planks instead of sit-ups, wall angels instead of behind-the-neck presses, brisk walking instead of jogging.

What if I Don't Have Space for a Full Workout Routine?

You need less space than you think, roughly a 3×3 foot area next to a sturdy chair or counter is enough for a complete fall prevention routine. Balance and strength work don't require running room.

Tiny-space routine (5×5 ft, 15 minutes):

  1. Chair stands, 10 reps
  2. Heel raises holding counter, 15 reps
  3. Single-leg stance each side, 20 sec
  4. Tandem stance hold, 20 sec each foot forward
  5. Marching in place, 30 seconds
  6. Sideways steps (2 each way), 5 rounds
  7. Wall push-ups, 10 reps

Do this 3-5 times a week and you're hitting the minimum evidence-based threshold [7].

What if I Don't Have Space for a Full Workout Routine?

Frequently Asked Questions

Is walking enough to prevent falls?
No. Walking helps cardiovascular health and mild leg strength, but it doesn't train the balance and reactive stepping that prevent falls. Add dedicated balance work at least 3 days a week [7].

Should I use a walker while doing these exercises?
If you already use one, yes, for safety during standing exercises. Do seated exercises without it. A physical therapist can assess whether you might progress away from the walker.

Can I do fall prevention exercises in bed?
Yes for warm-up moves (ankle pumps, leg lifts, bridges), but standing balance work must be done upright with support nearby.

Do these exercises work if I'm over 80?
Yes. Research on the Otago Program and Tai Ji Quan includes adults into their 90s, with meaningful fall reductions across ages [5]. Progression may be slower, but benefits are real.

Is it too late to start after 70?
No. Improvements in balance and strength happen at any age with consistent training. Starting later just means starting at an easier level.

How do I know if I need a physical therapist?
See one if you've fallen in the past year, feel unsteady daily, use a mobility aid, or have vertigo. Medicare typically covers evaluation with a physician referral.

Are group classes better than home workouts?
Both work. Programs like EnhanceFitness and Tai Ji Quan classes show 20-30% fall reductions [4]. Home routines like Otago show 23-40% reductions [5]. Choose based on preference and access.

Can I do these exercises after a hip replacement?
Yes, once your surgeon clears you (usually 6-12 weeks post-op). Follow hip precautions and start with a physical therapist.

Conclusion

Falls after 60 aren't inevitable, they're largely a training problem, and training is fixable. The research is clear: multimodal home workouts combining balance, strength, and reactive stepping cut fall rates by roughly a third when done consistently for 3+ hours weekly [7]. Tai Ji Quan and the Otago Program have the strongest track records, but even a simple home routine of chair stands, progressive stances, and heel-to-toe walking moves the needle.

Your next steps:

  1. This week: Start the 15-minute tiny-space routine 3 days.
  2. Weeks 2-4: Add a 4th and 5th day; progress stance difficulty.
  3. Week 4: Consider a physical therapy evaluation if you've fallen before.
  4. Month 2: Try a free EnhanceFitness or Tai Chi class through your local aging services agency.
  5. Month 3 and beyond: Reassess balance; progress to weighted chair stands and eyes-closed holds.

Consistency beats intensity. Fifteen good minutes five days a week will do more for your independence than a heroic workout once a month.

References

[1] Effects of Different Exercise Programs on Fall Risk in Older Adults – https://pmc.ncbi.nlm.nih.gov/articles/PMC8657315/
[2] Fall Prevention Exercises – Johns Hopkins Medicine – https://www.hopkinsmedicine.org/health/wellness-and-prevention/fall-prevention-exercises
[4] Evidence-Based Falls Prevention Programs – NCOA – https://www.ncoa.org/article/evidence-based-falls-prevention-programs/
[5] Systematic Review of Exercise Interventions for Fall Prevention – https://pmc.ncbi.nlm.nih.gov/articles/PMC12842942/
[6] WHO Physical Activity Guidelines and Fall Prevention – https://pmc.ncbi.nlm.nih.gov/articles/PMC10435089/
[7] Exercise for preventing falls in older people living in the community (Cochrane Review) – https://pubmed.ncbi.nlm.nih.gov/30703272/
[8] Falls in Older Adults: Approach and Prevention – AAFP – https://www.aafp.org/pubs/afp/issues/2020/0101/p42.html
[10] Fall prevention interventions in community-dwelling older adults – https://pubmed.ncbi.nlm.nih.gov/33239019/?tool=bestpractice.com

Yoga vs Pilates for Seniors: Which Is Better for Balance, Strength, and Mobility at Home?

Yoga vs Pilates for Seniors: Which Is Better for Balance, Strength, and Mobility at Home?

Last updated: August 4, 2026

Quick Answer

For most seniors training at home, yoga wins for flexibility and joint mobility, while Pilates wins for core strength and fall prevention. A hybrid routine, two yoga sessions and two Pilates sessions per week, usually delivers the best results for balance, strength, and mobility combined. Start with chair-based or gentle mat versions, get medical clearance if you have osteoporosis, joint replacements, or heart conditions, and progress slowly.

Quick Answer

Key Takeaways

  • Yoga improves flexibility, breathing, balance, and joint range of motion through held poses and stretches.
  • Pilates builds deep core strength, spinal stability, and controlled movement, highly effective for fall prevention.
  • For balance, both help, but Pilates tends to produce faster gains because it directly trains core and hip stabilizers.
  • For arthritis and stiff joints, gentle yoga (especially chair or Iyengar styles) is usually more comfortable.
  • 2-4 sessions per week, 20-40 minutes each, is the sweet spot for older adults.
  • Most seniors can start at home with just a mat; a sturdy chair, resistance band, and small pillow help.
  • A hybrid weekly routine covers strength, mobility, and balance better than either practice alone.
  • Skip poses that require deep spinal flexion or inversion if you have osteoporosis or uncontrolled blood pressure.

What's the difference between yoga and Pilates for older adults?

Yoga is a mind-body practice that combines held postures, breathing, and stretching to improve flexibility, balance, and calm. Pilates is a body-conditioning system built around controlled, precise movements that strengthen the deep core, spine, and hips.

The core distinction for seniors:

  • Yoga emphasizes holding positions, breath awareness, and lengthening tight muscles. Many styles have a meditative or spiritual element.
  • Pilates emphasizes moving with control through repetitions, focusing on core engagement, alignment, and muscular endurance.

Yoga typically feels slower and more restorative. Pilates feels more like a targeted strength workout, though it's low-impact. Both are gentle on joints when done correctly, and both can be adapted for limited mobility.

Choose yoga if you want more flexibility, stress relief, and gentle movement. Choose Pilates if you want more core strength, better posture, and stronger fall prevention.

Which is better for improving balance, yoga or Pilates?

Pilates has a slight edge for balance improvement in seniors, mainly because it directly trains the deep core, glutes, and hip stabilizers that keep you upright. However, yoga's single-leg standing poses (like tree pose or warrior III against a wall) also produce meaningful balance gains.

What the movement science suggests for older adults:

  • Pilates strengthens the transverse abdominis and pelvic floor, muscles central to postural control.
  • Yoga trains proprioception (your sense of where your body is in space) through held single-leg and shifting-weight poses.
  • Combining both gives you strength-based balance (Pilates) and reactive balance (yoga).

Decision rule: If your primary goal is preventing falls, lead with Pilates and add balance-focused yoga poses twice a week.

Can seniors do yoga at home safely without equipment?

Yes, seniors can safely do yoga at home with just a non-slip mat and a sturdy chair for support. Beginners should avoid inversions, deep twists, and unsupported balance poses until they've built confidence.

Safe starting points at home:

  1. Chair yoga, seated stretches, gentle twists, and standing poses using the chair for stability.
  2. Wall-supported poses, practice tree pose, warrior, and downward dog with a wall behind you.
  3. Floor-based restorative yoga, supported bridge, legs-up-the-wall, gentle spinal twists.
  4. Follow guided videos made specifically for seniors (see the free options section below).

Common safety rule: Never force a stretch. Mild tension is fine; sharp or radiating pain is a stop signal.

Pilates exercises for seniors to build core strength

Pilates is one of the safest ways for older adults to build core strength because most exercises are done lying down or seated, which protects the spine and joints. Start with 5-8 reps of each and build slowly.

Beginner-friendly Pilates moves for seniors:

  • Pelvic tilts, lying on your back, gently rock the pelvis to engage lower abs.
  • Single knee lifts (marching), lying down, lift one knee at a time while keeping the pelvis stable.
  • Bridge, press through the heels to lift the hips, engaging glutes and core.
  • Modified hundred, small arm pulses with knees bent, head down.
  • Seated spine twist, gentle rotation from a tall seated position.
  • Side-lying leg lifts, target hip stabilizers essential for balance.

Consistency matters more than intensity. Two to three 20-minute sessions weekly produce noticeable core improvements within 6-8 weeks for most beginners.

Pilates exercises for seniors to build core strength

Yoga for seniors with arthritis and joint pain

Gentle yoga can reduce arthritis stiffness, improve joint range of motion, and ease chronic pain when practiced consistently. Warm, slow styles like chair yoga, Iyengar (which uses props), and restorative yoga are ideal.

Best practices for arthritic joints:

  • Warm up first with 3-5 minutes of gentle movement or a warm shower before practicing.
  • Use props, blocks, bolsters, straps, and a chair, to reduce strain.
  • Avoid deep knee bends if you have knee osteoarthritis; modify with a chair or wall support.
  • Skip weight-bearing wrist poses (like plank or downward dog) if you have wrist arthritis; use forearms instead.
  • Move slowly between poses to protect inflamed joints.

Poses that tend to help arthritis: cat-cow, gentle seated twists, supported bridge, child's pose with a bolster, and legs-up-the-wall.

How often should seniors practice yoga or Pilates per week?

Most older adults see the best results with 2-4 sessions per week, 20-40 minutes each. Beginners should start with two sessions and add more as strength and stamina build.

A practical weekly schedule:

  • Total beginners: 2 sessions × 20 minutes.
  • Intermediate: 3-4 sessions × 30 minutes.
  • Experienced practitioners: 4-5 sessions × 30-45 minutes, mixing styles.

Rest days matter. Muscles adapt during recovery, not during the workout. Alternating yoga days with Pilates days is a smart way to work different systems without overtraining.

Best yoga poses for seniors with mobility issues

Seniors with limited mobility can safely practice yoga using a chair, wall, or bed as support. The goal is gentle movement through available range, not achieving picture-perfect poses.

Accessible poses worth learning:

  • Seated mountain pose, tall spine in a chair, feet flat, shoulders relaxed.
  • Seated cat-cow, arch and round the spine while seated.
  • Chair forward fold, hinge forward from the hips with hands on thighs.
  • Chair pigeon, cross one ankle over the opposite knee for gentle hip opening.
  • Standing wall push, palms on wall, step back, gently stretch shoulders and calves.
  • Supported warrior II, hold a chair back for balance while stepping into a wide stance.

"Range of motion is a use-it-or-lose-it system. Even five minutes of gentle daily movement can preserve mobility that would otherwise fade quickly after age 65."

Pilates reformer vs mat Pilates for seniors, which is easier?

Reformer Pilates is often easier on the body for seniors because the machine's springs provide adjustable support, making it easier to move without straining. Mat Pilates is cheaper and more accessible at home but requires more baseline core strength.

Quick comparison:

  • Reformer Pilates: Requires a studio or expensive home machine ($2,000+). Springs assist movement, reducing joint load. Excellent for seniors recovering from injury or with weak core muscles.
  • Mat Pilates: Needs only a mat. More challenging because gravity provides the only resistance. Best for seniors with reasonable baseline strength.

Choose reformer if you have joint issues, are recovering from surgery, or can access a studio with senior-friendly instructors. Choose mat if you're training at home on a budget and can start with modified exercises.

Can Pilates help prevent falls in older adults?

Yes, Pilates is one of the most effective non-medical interventions for fall prevention in seniors. It targets the exact muscle systems (deep core, glutes, hip abductors, ankle stabilizers) that keep older adults steady on their feet.

Why Pilates works for fall prevention:

  • Strengthens the posterior chain (glutes, back, hamstrings) that maintains upright posture.
  • Improves hip abductor strength, critical for single-leg balance and stair navigation.
  • Trains controlled deceleration, which helps you catch yourself during a stumble.
  • Enhances body awareness and alignment, reducing missteps.

For fall prevention specifically, aim for 2-3 Pilates sessions weekly, focused on standing exercises, bridges, and single-leg work as strength improves.

Yoga or Pilates, better for flexibility in seniors?

Yoga is more effective for improving flexibility in older adults. It uses longer-held stretches that gradually lengthen muscles and connective tissue, while Pilates focuses more on controlled strength than deep flexibility.

That said, Pilates does improve functional flexibility, the range you can actively control, which matters for daily tasks like reaching, bending, and turning. Yoga improves passive flexibility (how far you can stretch), while Pilates improves active flexibility (how much of that range you can use with strength).

Best combo: Do yoga for flexibility on two days and Pilates for strength on two days. This produces well-rounded mobility that transfers to real-world movement.

Senior yoga classes online, free or affordable options

Several trusted platforms offer free or low-cost yoga specifically for seniors. Always look for instructors certified in senior or adaptive yoga.

Reliable options as of 2026:

  • YouTube (free): Channels like Yoga with Adriene (gentle series), SilverSneakers, and Yoga with Kassandra offer senior-friendly content.
  • SilverSneakers: Free for many Medicare Advantage plan members; includes live and on-demand yoga.
  • Yoga International, Alo Moves, Gaia: Paid subscriptions ($10,$20/month) with curated senior-friendly libraries.
  • Local library or community center: Often offer free streaming yoga classes for seniors.
  • YMCA Y360: Included with many YMCA memberships; features senior yoga and Pilates.

Tip: Preview any class before following along. If the instructor doesn't offer modifications, choose another one.

What equipment do I need to start Pilates at home?

You can start Pilates at home with just a yoga or exercise mat and comfortable clothing. As you progress, a few inexpensive additions make workouts more effective.

Starter equipment checklist:

  • Non-slip mat ($20-40), thicker than a yoga mat for spine comfort.
  • Sturdy chair, free; used for support in many senior modifications.
  • Small pillow or towel ($0-10), for head or knee support.
  • Resistance band ($10-20), adds gentle resistance for arms and legs.
  • Small Pilates ball or rolled towel ($10-15), great for core engagement.
  • Optional: Foam roller ($20-30), for mobility and gentle self-massage.

Total starter cost: under $80. No expensive machines required.

What equipment do I need to start Pilates at home?

Is yoga or Pilates better for someone with bad knees?

Pilates is generally safer for seniors with knee problems because most exercises are done lying down or seated, keeping weight off the knees. Yoga can also work if you avoid deep knee bends and use props for support.

Knee-friendly guidelines:

  • In Pilates: Skip full squats and lunges; favor bridges, clamshells, and leg circles.
  • In yoga: Avoid deep warrior poses and hero pose; use a chair for lunges, and place a folded blanket under the knee in kneeling positions.
  • Always warm up with gentle joint circles before harder movements.
  • Never lock the knees in standing poses, keep a soft micro-bend.

If knee pain persists during any exercise, stop and consult a physical therapist. Some knee conditions require personalized modifications.

Common mistakes seniors make when starting yoga or Pilates

The most common mistakes come from doing too much too soon, skipping warmups, or following classes designed for younger, more flexible bodies.

Mistakes to avoid:

  • Going too fast, too soon, start with 2 short sessions weekly, not 5 long ones.
  • Following general classes instead of senior-specific ones.
  • Holding the breath during poses or reps, breath should flow steadily.
  • Ignoring pain signals, soreness is fine, sharp pain is not.
  • Skipping the warmup and cooldown, both matter more as we age.
  • Comparing yourself to the instructor, modifications are the goal, not a "failure."
  • Practicing on slippery floors, invest in a proper non-slip mat.
  • Skipping medical clearance if you have osteoporosis, joint replacements, cardiac issues, or balance disorders.

The case for a hybrid yoga and Pilates routine at home

For most seniors, the best answer to "yoga vs Pilates for seniors: which is better for balance, strength, and mobility at home?" isn't picking one, it's blending both. A hybrid routine covers every physical system that matters as we age.

A simple weekly hybrid schedule:

Day Practice Duration Focus
Monday Pilates 25 min Core, hips
Tuesday Rest or walking , Recovery
Wednesday Yoga 30 min Flexibility, breath
Thursday Rest or walking , Recovery
Friday Pilates 25 min Balance, glutes
Saturday Gentle yoga 20 min Restorative
Sunday Rest , Recovery

This structure builds strength, mobility, flexibility, and balance without overtraining. Adjust duration based on your energy and starting fitness.

FAQ

Is yoga or Pilates better for seniors over 70?
Both are safe and effective, but many seniors over 70 do best starting with chair yoga or beginner Pilates for the first month, then adding standing poses as strength returns.

Can I do yoga or Pilates with osteoporosis?
Yes, but avoid deep forward folds, spinal twists under load, and any flexion of the spine. Focus on extension-based poses and get clearance from your doctor first.

How long until I see results?
Most seniors notice better balance and less stiffness within 3-4 weeks of consistent practice. Strength and flexibility gains become clear at 8-12 weeks.

Do I need an instructor?
Not required, but at least one session with a certified senior fitness instructor is highly recommended to check your alignment and modifications before going solo.

Can I do both on the same day?
Yes, short sessions (15 minutes each) or one session using both styles works well. Just avoid two intense sessions back-to-back.

Is Pilates safe after hip or knee replacement?
Usually yes, but only after your surgeon clears you. A physical therapist can help you transition safely into either practice.

What should I wear?
Comfortable, breathable clothing that lets you move. Avoid slippery socks; either bare feet or grip socks work best.

Can yoga or Pilates replace strength training?
Pilates provides real strength gains, especially in the core and hips. Yoga does less for pure strength. For full-body strength, add light resistance training 1-2 times weekly.

Conclusion

Yoga and Pilates aren't rivals, they're complementary tools for aging well. Yoga gives you flexibility, calm, and better joint mobility. Pilates gives you core strength, stability, and stronger fall prevention. Together, they cover the full spectrum of what an older body needs to stay independent, upright, and pain-free.

Next steps:

  1. Get medical clearance if you have any joint, heart, or balance conditions.
  2. Buy a non-slip mat and set up a small practice space near a sturdy chair.
  3. Start with two 20-minute sessions per week, one gentle yoga, one beginner Pilates.
  4. Use a senior-specific instructor (SilverSneakers, YouTube senior channels, or a local class).
  5. Track how you feel after 4 weeks and adjust duration or frequency from there.

Consistency beats intensity every time. Fifteen minutes today is worth more than an hour planned for someday.

Balance, Flow, and Core Strength: A 20-Minute Mobility Flow for Active Agers

Balance, Flow, and Core Strength: A 20-Minute Mobility Flow for Active Agers

Last updated: August 2, 2026

Quick Answer

A 20-minute mobility flow for active agers links balance drills, core activation, and gentle joint mobility into one continuous routine, no equipment required. Done three to four times a week, it can measurably improve single-leg balance, trunk stability, and hip mobility within four to six weeks. The key is flowing between positions (standing, kneeling, floor) so the body practices transitions, which is where most falls actually happen.

Quick Answer

Key Takeaways

  • Mobility flow blends yoga's transitions, Pilates' core control, and physical therapy's balance work into one sequence.
  • 20 minutes, 3-4x per week is the sweet spot for older adults, enough to build capacity without over-fatiguing joints.
  • Balance improvements typically appear in 2-4 weeks; strength and mobility gains in 6-8 weeks.
  • No equipment needed, though a sturdy chair, wall, and yoga mat make the routine safer and more comfortable.
  • Falls happen during transitions (sitting to standing, turning, reaching), so training transitions matters more than static poses.
  • Safe with most conditions including arthritis, mild back pain, and osteoporosis when modified, but check with a doctor first if you have recent surgery or acute injury.
  • Morning practice tends to reduce stiffness and set posture for the day; evening practice helps unwind tight hips and shoulders.
  • Common mistakes: rushing transitions, holding the breath, and skipping the warm-up.

What is mobility flow and why does it matter for older adults

Mobility flow is a continuous sequence of movements that takes joints through their full range while engaging stabilizing muscles, typically the core, hips, and shoulders. Unlike static stretching, it keeps you moving from one position to the next, which trains the nervous system to control the body during transitions.

For older adults, that matters because aging doesn't just reduce flexibility, it reduces motor control. The brain gets slower at coordinating multi-joint movement, which is why picking up a dropped item or stepping off a curb can feel unsteady. Mobility flow rebuilds that coordination.

Who it's for: Adults 50+ who can stand and move independently, including those with mild arthritis, high blood pressure, or a history of minor joint pain.

Who should modify or skip it: Anyone recovering from recent surgery, with severe balance disorders, uncontrolled blood pressure, or acute injury, see a physical therapist first.

How does a 20-minute mobility routine improve balance and core strength

A 20-minute flow improves balance and core strength by combining three things in one session: proprioceptive challenge (standing on one leg, changing planes), deep core activation (breath-linked bracing during transitions), and hip and ankle mobility (the joints most responsible for reactive balance).

Here's what happens physiologically:

  • Weeks 1-2: Nervous system adapts. You feel steadier and more coordinated even before muscles change.
  • Weeks 3-4: Deep stabilizers (transverse abdominis, glute medius, ankle stabilizers) strengthen. Single-leg balance improves noticeably.
  • Weeks 5-8: Range of motion increases at hips, thoracic spine, and shoulders. Everyday movements, turning, bending, reaching, feel easier.

The 20-minute length matters. Long enough to hit all major joints and get a training effect, short enough that form doesn't degrade from fatigue.

The 20-minute mobility flow: Balance, flow, and core strength for active agers

This is the full routine. Move slowly, breathe steadily, and rest whenever you need. A sturdy chair or wall should be within arm's reach for balance segments.

Block 1: Warm-up and joint prep (4 minutes)

  1. Seated cat-cow, 8 reps. Sit tall in a chair, hands on knees, arch and round the spine with breath.
  2. Neck half-circles, 4 each side. Chin to chest, roll ear toward shoulder, return.
  3. Shoulder rolls + arm circles, 30 seconds each direction.
  4. Ankle circles and pumps, 10 each foot.
  5. Seated marches with reach, 30 seconds. Lift knee, opposite arm reaches overhead.

Block 2: Standing mobility and balance (6 minutes)

  1. Standing hip circles, 5 each direction, each leg. Hand on chair for support.
  2. Heel-to-toe rocks, 15 reps. Rise onto toes, rock back onto heels.
  3. Single-leg stand, 20-30 seconds each leg. Progress: eyes closed or head turns.
  4. Standing knee lift with arm reach, 8 each side. Lift knee, opposite arm overhead, hold 2 seconds.
  5. Sit-to-stand from chair, 8 reps, slow tempo.
  6. Standing hip hinge, 8 reps. Hands on hips, hinge forward with a flat back.

Block 3: Floor flow, core and spinal mobility (7 minutes)

  1. Cat-cow on hands and knees, 8 breaths.
  2. Bird-dog, 6 each side. Opposite arm and leg extend, pause, return.
  3. Thread the needle, 5 each side. Rotates the thoracic spine.
  4. Dead-bug, 6 each side. Lying on back, opposite arm and leg lower slowly.
  5. Glute bridge, 10 reps. Lift hips, squeeze glutes, lower.
  6. Supine spinal twist, 30 seconds each side.

Block 4: Cool-down flow (3 minutes)

  1. Child's pose, 5 breaths.
  2. Seated forward fold, 5 breaths.
  3. Standing side bends, 3 each side.
  4. Box breathing, 4 counts in, 4 hold, 4 out, 4 hold. Repeat 4 times.

Block 4: Cool-down flow (3 minutes)

Best mobility exercises for people over 50 or 60

The most valuable mobility exercises for people over 50 target the joints that stiffen first: hips, thoracic spine (mid-back), ankles, and shoulders. These are also the joints most linked to fall prevention and posture.

Top 7 exercises to prioritize:

Exercise Primary benefit Reps
Sit-to-stand Leg strength, transfer power 8-12
Single-leg stand Static balance, ankle stability 20-30 sec each
Bird-dog Core control, spinal stability 6 each side
Glute bridge Posterior chain, low-back health 10-15
Thoracic rotation Mid-back mobility, posture 5 each side
Hip 90/90 transitions Deep hip mobility 5 each side
Heel-to-toe walk Dynamic balance 10 steps

Choose sit-to-stand over squats if your knees complain. It trains the same muscles with less joint stress.

Can you do mobility flow if you have arthritis or joint pain

Yes, in fact, mobility flow is often recommended for mild-to-moderate arthritis because gentle, repeated movement lubricates joints and reduces stiffness. The Arthritis Foundation consistently endorses low-impact, range-of-motion routines for exactly this reason.

Rules for arthritic joints:

  • Move within a pain-free range. A little stiffness is fine; sharp pain is a stop signal.
  • Warm up longer, 5-6 minutes instead of 4, especially in the morning.
  • Reduce reps, not intensity. Do 4 reps of a movement with good form rather than 10 rushed ones.
  • Skip deep flexion if knees or hips are painful, use partial range.
  • Ice after if a joint feels aggravated; heat before if it feels stiff.

Common mistake: Stopping movement entirely when a joint hurts. Immobility usually makes arthritis worse. Gentle daily motion is the treatment.

Mobility flow vs yoga vs Pilates for active aging

Mobility flow, yoga, and Pilates overlap but emphasize different things. For active agers, mobility flow tends to be the most direct match for functional daily movement.

Quick comparison:

  • Yoga, Emphasizes flexibility, breath, and held postures. Great for calm and range of motion, but some styles (Ashtanga, hot yoga) are too intense for older joints.
  • Pilates, Emphasizes deep core control and precise, slow movement. Excellent for posture and back health; less focus on standing balance.
  • Mobility flow, Emphasizes joint range plus balance plus transitions. Most closely mirrors real-life movement patterns like getting off the floor or navigating stairs.

Choose mobility flow if you want practical, fall-prevention, focused training. Choose yoga if you want mental calm and long holds. Choose Pilates if you have back issues and need deep core work. Many active agers do all three across the week.

How often should you do mobility work to see results in balance

Three to four sessions per week of 20 minutes each is the research-backed sweet spot for balance improvement in older adults. Daily short sessions (10 minutes) also work, the total weekly volume matters more than session length.

Realistic schedule:

  • Minimum effective dose: 2 sessions/week, maintains what you have.
  • Balance improvement: 3-4 sessions/week, measurable gains in 4-6 weeks.
  • Optimal: 4-5 sessions/week with one full-body strength session added.

Signs it's working: You stop reaching for railings, you can put on socks standing up, you turn without shuffling, and you get off the floor without using hands.

What equipment do you need for a 20-minute mobility session

Almost nothing. The routine is bodyweight-only, but a few items make it safer and more comfortable.

Essential:

  • Sturdy chair or wall, for balance support during standing work.
  • Yoga mat or rug, cushions knees and spine during floor segments.

Nice-to-have:

  • Yoga block, reduces distance to the floor if hips are tight.
  • Light resistance band, adds progression once basics feel easy.
  • Wooden dowel or broomstick, helps with shoulder mobility drills.

Skip: Anything that promises "instant balance" through vibration plates or gadgets. Balance is a skill built through practice, not equipment.

What equipment do you need for a 20-minute mobility session

Is mobility flow safe if you have back problems or injuries

Mobility flow is generally safe and often therapeutic for chronic low back stiffness, but specific conditions require modification. Anyone with disc herniation, spinal stenosis, or recent back surgery should have a physical therapist review the routine first.

Modifications for back issues:

  • Skip deep forward folds, hinge from the hips with a flat back instead.
  • Avoid loaded spinal twists, use gentle, unweighted rotations.
  • Prioritize glute bridges and bird-dogs, these directly support spinal stability.
  • Use a chair for floor transitions, getting up and down is often more provocative than the exercises themselves.

Red flags to stop: Radiating pain down the leg, numbness, sudden weakness, or pain that gets worse over the session (not better).

Common mistakes people make during mobility training

Most people undermine their mobility work with a handful of small errors. Fixing these usually doubles the results within a few weeks.

  1. Rushing transitions, the whole point is controlled movement between positions. Slow down by 30%.
  2. Holding the breath, breath drives core engagement. Exhale on effort, inhale on release.
  3. Skipping the warm-up, cold joints don't move well, especially in the morning.
  4. Doing it once a week, mobility is like brushing teeth. Frequency beats intensity.
  5. Pushing into pain, mobility work should feel like effort, not sharp discomfort.
  6. Ignoring the feet, bare feet on the floor during balance work builds better proprioception than cushioned shoes.
  7. Comparing to old range, meet your body where it is today, not where it was at 35.

How long before you notice better balance from mobility exercises

Most people feel steadier within 2-3 weeks of consistent practice. Measurable improvements in single-leg stand time and functional tests typically appear by 4-6 weeks. Larger gains in strength and joint range take 8-12 weeks.

Timeline expectations:

  • Week 1: Body feels looser after each session; sleep may improve.
  • Week 2-3: Steadier when turning, reaching, or standing from a chair.
  • Week 4-6: Single-leg balance holds double or triple in length.
  • Week 8+: Everyday tasks feel dramatically easier, stairs, gardening, getting in and out of the car.

The nervous system adapts fast; muscle and connective tissue take longer. Patience is part of the practice.

Mobility flow for people with limited mobility or balance issues

The routine can be fully seated or chair-supported for those with significant balance limitations, walking aids, or post-surgery restrictions. The principle is the same: move every joint through its available range with breath and control.

Seated version, 15 minutes:

  • Seated cat-cow, neck rolls, shoulder circles (3 min)
  • Seated marches, knee extensions, ankle pumps (4 min)
  • Seated torso twists, side bends, forward hinges (4 min)
  • Seated arm reaches, shoulder mobility with a dowel (2 min)
  • Box breathing and gentle stretch hold (2 min)

Standing with chair support: Do the full routine but keep one hand lightly on a chair back throughout the standing block. Progress by using two fingers, then one, then hovering.

Can mobility training help prevent falls in older adults

Yes, this is one of the most well-supported findings in geriatric research. Structured exercise programs that combine balance, strength, and mobility work reduce fall rates in community-dwelling older adults, according to Cochrane reviews of dozens of trials.

Why it works:

  • Faster reaction time to trips and slips.
  • Stronger ankle and hip stabilizers to catch loss of balance.
  • Better spatial awareness from practicing multi-plane movement.
  • Confidence, fear of falling itself increases fall risk. Practice reduces the fear.

Falls almost never happen from standing still. They happen during transitions, turning, stepping down, reaching. Mobility flow trains exactly those moments.

What's the difference between mobility and flexibility training

Flexibility is passive, how far a joint can be moved when something else moves it (like a stretch). Mobility is active, how far you can move a joint using your own muscles with control. Mobility requires flexibility plus strength through the range.

Simple example: You can passively bring your knee to your chest lying down (flexibility). But can you lift your knee that high while standing (mobility)? For older adults, mobility is the more useful quality because daily life requires active, controlled movement, not held stretches.

Best time of day to do a mobility flow routine

Morning is ideal for reducing stiffness and improving posture through the day; evening is better for relaxation, hip release, and sleep quality. Both work, consistency beats timing.

Morning benefits:

  • Reduces overnight joint stiffness
  • Improves posture and energy for the day
  • Easier to make habitual

Evening benefits:

  • Releases accumulated tension from sitting
  • Improves sleep onset
  • Body is warmer, so range is greater

Avoid: Heavy mobility work immediately after a large meal or right before bed if you use energizing sequences.

Pull quote: "The best mobility routine is the one you'll actually do, same time, same place, most days of the week."

FAQ

Do I need to be flexible to start a mobility flow?
No. Mobility flow builds flexibility gradually. Start where your body is today.

Can I do this if I've never exercised?
Yes. Start with the seated version for one week, then add the standing block. Progress at your own pace.

Is it safe with osteoporosis?
Generally yes, but avoid deep forward folds and loaded spinal flexion. Focus on posture-supporting moves like glute bridges, bird-dogs, and standing balance work. Confirm with your doctor.

How is this different from tai chi?
Tai chi is excellent for balance and is a proven fall-prevention practice. Mobility flow adds more targeted core and joint range work, and takes less time to learn.

Will 20 minutes really make a difference?
Yes, if done 3-4 times a week consistently. Frequency and consistency matter more than session length.

Can I do this if I use a cane or walker?
Yes, use the seated and chair-supported versions. Skip single-leg balance work or do it while holding the walker.

Should I feel sore afterward?
Mild muscle awareness is normal. Sharp pain, joint swelling, or lasting soreness beyond 48 hours means back off intensity.

What if I miss a few days?
No problem. Restart at a lighter intensity for one session, then resume normally. Consistency over months matters, not perfection week to week.

Conclusion

A 20-minute mobility flow won't turn back the clock, but it will change how the next 20 years feel. The gains, steadier balance, easier transitions, less morning stiffness, more confidence on stairs and uneven ground, compound quietly with each session.

Start this week:

  1. Pick a time (morning or evening) and commit to three sessions.
  2. Set up a chair, mat, and clear floor space.
  3. Do the full 20-minute flow, or start with the seated version.
  4. Track how you feel, not just what you did.
  5. After four weeks, retest single-leg balance and sit-to-stand count.

The body responds to movement at every age. Give it 20 minutes, three times a week, and it will return the favor for decades.

Core Strength and Balance Flow Sessions at Home to Boost Mobility and Prevent Falls

Core Strength and Balance Flow Sessions at Home to Boost Mobility and Prevent Falls

Last updated: August 1, 2026

Quick Answer

Quick Answer

Core strength and balance flow sessions at home to boost mobility and prevent falls combine gentle abdominal and hip work with slow, connected movement patterns borrowed from yoga, tai chi, and Pilates. Done 2-4 times a week for 20-30 minutes, this style of training has been shown in multiple clinical reviews (including the Cochrane 2019 falls-prevention meta-analysis) to cut fall risk in older adults by roughly 20-30%. No gym required, just a sturdy chair, a mat, and a wall.

Key Takeaways

  • Frequency matters more than intensity. Three sessions a week for 12 weeks is the sweet spot most research points to.
  • Flow beats isolated reps. Linking movements (like a cat-cow into a bird-dog into a side plank) trains the nervous system to react, which is what actually prevents falls.
  • A chair is the single most important tool. It doubles as support, a prop, and a resistance anchor.
  • Core weakness shows up as poor posture, back pain, and difficulty rising from a chair, not just a soft belly.
  • Static balance (holding still) and dynamic balance (moving through space) are different skills. You need both.
  • Younger adults benefit too. Balance flow work restores mobility lost to desk jobs and reduces injury risk in sport.
  • Most people notice improvements in 2-4 weeks; measurable fall-risk reduction typically appears by week 8-12.
  • You do not need a trainer to start, but a one-time video assessment can catch bad form early.

What is core strength and balance training, and why does it prevent falls?

Core strength and balance training is a category of exercise that strengthens the muscles wrapping your trunk, hips, and pelvis, while simultaneously challenging your body's ability to sense and correct its position in space. It prevents falls because most falls happen when the body loses balance mid-movement (stepping off a curb, turning quickly, reaching for something) and the core is too slow or too weak to catch the shift.

Three systems keep you upright: your inner ear (vestibular), your eyes (visual), and your body's position sensors (proprioceptive). Balance flow sessions train all three at once. When you slowly transition from a standing pose to a lunge with your eyes tracking your hand, you're forcing those systems to talk to each other, the exact skill that fails during a real-world stumble.

The core isn't just abs. It's the diaphragm on top, pelvic floor on the bottom, and deep abdominal and back muscles wrapping around like a corset. Weakness anywhere in this cylinder makes balance harder.

How often should I do balance and core exercises to see results?

Aim for 2-4 sessions per week, 20-30 minutes each, for at least 12 weeks. Research on older adults consistently shows this is the minimum "dose" needed to reduce fall risk meaningfully. Fewer than two sessions a week produces mood benefits but limited physical change.

A realistic weekly template:

Day Session Length
Monday Core + slow balance flow 25 min
Wednesday Tai-chi-inspired dynamic flow 20 min
Friday Pilates-based core + wall balance 30 min
Optional Sun Gentle mobility walk-through 15 min

Choose more frequency (4x) if: you're recovering from a fall, have osteoporosis, or are over 70.
Choose less (2x) if: you're active in other sports and using this as maintenance.

Best core strength exercises for seniors at home

The best exercises are low-impact, chair-optional, and build from stable to unstable positions. Start with these five:

  1. Seated pelvic tilts, Sit tall, rock the pelvis forward and back 10 times. Wakes up the deep abdominal wall.
  2. Modified dead bug, Lie on your back, knees bent at 90°, lower one heel to tap the floor, alternate. 8 per side.
  3. Bird-dog (from hands and knees), Extend opposite arm and leg, hold 3 seconds. 6 per side.
  4. Standing marches with chair support, Lift knee to hip height, pause, lower. 10 per side.
  5. Wall sit with breath focus, Slide down a wall to a shallow squat, hold 20-30 seconds while breathing slowly.

)

The trick with older adults: quality over quantity. Six slow, focused reps beat twenty sloppy ones every time.

Can balance training really prevent falls, or does it just help with stability?

Yes, it genuinely prevents falls, not just stability in the moment. The Cochrane systematic review of exercise for fall prevention (Sherrington et al., 2019) analyzed over 100 trials and found that balance and functional training reduced the rate of falls by about 24% in community-dwelling older adults. Tai chi specifically showed roughly a 20% reduction.

The mechanism isn't just stronger legs. Balance flow work:

  • Sharpens reaction time in the ankles and hips (the "ankle strategy" and "hip strategy" your brain uses to catch a stumble).
  • Improves proprioception, your unconscious sense of where your limbs are.
  • Reduces fear of falling, which itself is a major fall predictor. Fearful walkers shuffle, and shuffling causes falls.

Common mistake: People assume walking is enough. It isn't. Walking is linear and predictable; falls happen in unpredictable moments. You need training that mimics the chaos.

What equipment do I need for home balance and core workouts?

What equipment do I need for home balance and core workouts?

Very little. The five essentials:

  • A sturdy, non-rolling chair (dining chair, not office chair)
  • A yoga mat with grip
  • A clear wall space at least 4 feet wide
  • Comfortable, snug clothing (loose pants can trip you)
  • Bare feet or thin, flexible shoes, cushioned running shoes actually reduce balance feedback

Optional upgrades once you're 4-6 weeks in:

  • Balance pad or folded towel ($15-30) for unstable surface training
  • Resistance loop bands ($10) for hip strength
  • Light dumbbells (2-5 lb) for added core load

Skip: BOSU balls, wobble boards, and vibrating plates until you have a solid base. They're not beginner tools despite the marketing.

How long should a core and balance session be?

Twenty to thirty minutes is the sweet spot for most home practitioners. Shorter than 15 minutes and you can't cover warm-up, main work, and cool-down properly. Longer than 40 minutes and fatigue leads to sloppy form, which is when injuries happen.

A well-built session:

  • 5 minutes warm-up: joint circles, gentle spinal rolls, breath work
  • 10-15 minutes main flow: core activation → static balance → dynamic balance flow
  • 5 minutes cool-down: stretching, floor work, breathing

If you only have 10 minutes, keep the warm-up and cut the main flow in half. Never skip the warm-up before balance work.

Is balance training safe if I already have balance problems?

Yes, but start seated and near support. People with existing balance issues benefit the most from this training, they just need to scale entry appropriately.

Safe-start rules:

  1. First 2 weeks: do everything seated or with two hands on a chair back.
  2. Weeks 3-4: progress to one hand on chair.
  3. Weeks 5+: fingertips only, then hover, then hands free.

Talk to a doctor first if you have: recent surgery, uncontrolled vertigo, severe osteoporosis, Parkinson's-related instability, or you've fallen more than twice in the past year. A physical therapist can screen you and clear you for home practice.

Edge case: If you have inner ear disorders (BPPV, Meniere's), certain head-turning movements can trigger dizziness. Modify by keeping the gaze forward and moving slowly.

Static balance exercises vs. dynamic balance flow, what's the difference?

Static balance is holding still, standing on one foot, tree pose, a plank. Dynamic balance is maintaining control while moving, walking heel-to-toe, transitioning between yoga poses, tai chi weight shifts. You need both, but dynamic balance flow is what most closely mimics real-life fall situations.

Static Balance Dynamic Balance Flow
What it trains Postural muscles, endurance Reaction, coordination
Example Tree pose, single-leg stand Tai chi form, sun salutation
Best for Beginners, foundation Real-world fall prevention
Time to master 2-3 weeks 6-12 weeks

Rule of thumb: Spend the first month mostly static. Layer in dynamic flow once you can hold single-leg stands for 20 seconds without wobbling.

Online balance classes vs. in-person: what's the cost difference?

Online core and balance classes typically run $10-30 per month for unlimited access (SilverSneakers On-Demand, Yoga with Adriene's free library, GetActive, Bold, Nymbl). In-person classes at a studio or Y average $15-25 per class or $80-150 per month for unlimited. Physical therapy sessions run $75-200 each but often include insurance coverage.

)

Choose online if: you're self-motivated, have basic fitness experience, and want flexibility.
Choose in-person if: you need accountability, have specific medical concerns, or benefit from social exercise.
Choose PT (at least short-term) if: you've fallen recently or have a diagnosed condition. Get cleared first, then transition to home practice.

Can younger people benefit from balance flow, or is it just for older adults?

Can younger people benefit from balance flow, or is it just for older adults?

Balance flow benefits every age, it's marketed to seniors because they're the group with the highest fall risk, but adults in their 20s, 50s often have surprisingly poor balance from sedentary jobs. If you can't stand on one foot with eyes closed for 10 seconds, you're behind the curve.

For younger adults, balance flow specifically helps:

  • Runners and cyclists, improves single-leg stability, reduces knee and ankle injuries
  • Desk workers, reverses hip and thoracic stiffness
  • Parents, restores the core control lost during pregnancy or from years of one-sided carrying
  • Recreational athletes, sharpens agility and reaction time

The training just scales up: faster flows, less support, more single-leg work, added load.

How do I know if my core is weak and needs work?

Try these four quick self-tests. Struggling with two or more means your core needs attention:

  1. Sit-to-stand test: Rise from a chair without using your hands. Can you do it 5 times in under 15 seconds?
  2. Single-leg stand: Balance on one foot with eyes open. Under 20 seconds is a red flag if you're under 65.
  3. Plank hold: Forearm plank with a straight line from head to heels. Under 30 seconds signals weakness.
  4. Bend-and-reach: Bend to touch your toes and stand back up. Does your low back hurt or do you feel unstable?

Other signs: chronic low back pain, poor posture when tired, difficulty carrying groceries up stairs, needing hands to push off your thighs when standing.

What mistakes do people make starting balance training at home?

The five most common errors:

  1. Skipping the warm-up. Cold joints plus balance work equals sprained ankles. Always do 3-5 minutes of joint circles first.
  2. Progressing too fast. People see quick early gains and jump to advanced moves. The nervous system needs 4-6 weeks to consolidate before adding challenge.
  3. Holding the breath. Balance requires oxygen to the brain. Breath-holding is a top cause of dizziness during practice.
  4. Practicing on carpet. Deep pile carpet actually makes balance too unstable for beginners. Firm floor with a mat is better.
  5. Only training in one direction. Everyone does forward lunges and forgets side and rotational movement, but most real falls involve twisting or lateral shifts.

Do I need a trainer, or can I do core and balance flow on my own?

Most healthy adults can do this on their own using video classes and structured programs. But one or two sessions with a qualified trainer or physical therapist at the start will catch form errors that would otherwise become injuries or plateaus.

Consider a professional if:

  • You've fallen in the past year
  • You have osteoporosis, arthritis, or a joint replacement
  • You're recovering from surgery or a stroke
  • You feel dizzy or unstable doing basic moves
  • You've been sedentary for over a year

Otherwise, well-structured video programs from certified instructors (look for CPT, PT, or E-RYT credentials) work well. YouTube channels focused on senior fitness, Pilates, and gentle yoga are legitimate starting points.

How quickly will I notice improvements in mobility and balance?

Week 1-2: You'll feel more aware of your body. Balance itself may not improve yet, but posture usually does.
Week 3-4: Single-leg stands get noticeably steadier. Getting out of chairs feels easier.
Week 6-8: Mobility improvements become obvious, reaching, turning, and stair-climbing feel smoother.
Week 8-12: Measurable fall-risk reduction appears in objective tests (Berg Balance Scale, Timed Up and Go).
Week 12+: Gains consolidate. Stopping now means losing progress within 4-6 weeks.

The key: consistency beats intensity. Three 20-minute sessions a week for 12 weeks outperforms one 90-minute weekend session.

FAQ

Q: Can I do balance flow if I use a cane or walker?
A: Yes. Start entirely seated, then progress to standing with two hands on a sturdy surface. Many chair yoga and seated tai chi programs are designed exactly for this.

Q: Will core work flatten my belly?
A: It may improve posture and reduce the visual "pooch" from weak deep abdominals, but visible fat loss requires nutrition changes. Core training is for function first, aesthetics second.

Q: Is yoga or tai chi better for fall prevention?
A: Tai chi has more direct fall-prevention research behind it. Yoga builds more strength and flexibility. A blended flow session gets the best of both.

Q: Can I do this if I have knee pain?
A: Yes, with modifications. Avoid deep squats and kneeling positions; substitute chair-based versions. Knee pain often improves as hip and core strength develop.

Q: What time of day is best?
A: Morning for most people, joints warm up during the session and you gain balance benefits throughout the day. Avoid right before bed if practice energizes you.

Q: Do I need to warm up if the flow is already gentle?
A: Yes. Even gentle balance work challenges the nervous system, and cold muscles react slowly. Five minutes of joint circles is non-negotiable.

Q: Can I combine this with strength training?
A: Absolutely. Do balance flow on strength-training rest days, or as a 10-minute warm-up before lifting.

Q: Will I feel sore?
A: Mild soreness in the deep abdominals, hips, and small stabilizer muscles is normal for the first 2 weeks. Sharp pain is not.

Conclusion: Your Next Steps

Start this week. Not with a 90-minute masterclass, but with one 20-minute session. Set a chair on your mat, watch a beginner-level balance flow video, and commit to three sessions this week.

Concrete action plan:

  1. Today: Do the four self-assessment tests. Write down your numbers.
  2. This week: Complete three 20-minute sessions. Any beginner tai chi, chair yoga, or Pilates fundamentals video works.
  3. Week 2-4: Add one new balance challenge per week (eyes closed briefly, one hand off the chair, a longer hold).
  4. Week 6: Retest yourself. Compare to week 1.
  5. Week 12: Reassess. Adjust your program based on what improved most.

Core strength and balance flow sessions at home to boost mobility and prevent falls aren't a quick fix, they're a lifelong maintenance practice, like brushing your teeth. Twenty minutes, three times a week, for the rest of your life is the actual prescription. The payoff, staying independent, mobile, and unafraid of falling, is worth every session.