Chair and Standing Workouts for Seniors: Low-Impact Strength and Mobility When Getting Down Is Difficult

Chair and Standing Workouts for Seniors: Low-Impact Strength and Mobility When Getting Down Is Difficult

Last updated: July 30, 2026

Quick Answer

Chair and standing workouts for seniors are structured, low-impact routines that build strength, balance, and circulation without requiring you to get down to the floor. A safe weekly plan combines 2-3 seated strength sessions (leg extensions, seated marches, arm curls) with 2-3 supported standing sessions (calf raises, sit-to-stands, side leg lifts), each 15-30 minutes. Done consistently, these workouts improve posture, reduce fall risk, and preserve independence, even for adults with arthritis, balance problems, or limited mobility.[1][2][8]

Key Takeaways

  • Full-body training is possible from a chair. Seated routines can target legs, core, arms, and back with proper form and pain-free range of motion.[1]
  • Aim for 4-5 short sessions per week, mixing seated and supported-standing days for balance and strength.
  • A sturdy armless chair on a non-slip surface is the single most important piece of equipment.[1][9]
  • Supported standing exercises (holding a chair or counter) are the safest way to train balance if you're at risk of falls.[6][7]
  • Visible results appear in 4-8 weeks with consistent practice: easier sit-to-stand, better posture, less stiffness.[2]
  • Chair yoga focuses on flexibility and breath; chair aerobics raises heart rate, most seniors benefit from both.
  • Stop immediately if you feel chest pain, dizziness, or sharp joint pain, these are not "push through" workouts.

Key Takeaways

What Are Chair Exercises for Seniors With Limited Mobility?

Chair exercises are strength, mobility, and cardio movements performed while seated in a sturdy chair, designed for older adults who can't safely get down to (or up from) the floor. They cover the same fitness pillars as standard workouts, muscle strength, joint mobility, cardiovascular endurance, and flexibility, just adapted so the chair provides stability and support.[1][2]

Common seated movements include:

  • Seated leg extensions, lift one leg until it's parallel to the floor, hold 2 seconds, lower slowly. 10-12 reps per leg.[1]
  • Seated marches, lift knees alternately as if walking. 30-60 seconds for a cardio burst.
  • Seated arm curls with light dumbbells or water bottles, 10-15 reps.
  • Seated trunk rotations, gentle twists to keep the spine mobile.[8]
  • Ankle circles and wrist circles, 8-12 per direction to keep joints lubricated.[8]

Choose chair-based workouts if you have knee replacements, severe arthritis, vertigo, recent surgery, or simply feel unsafe standing without support. They're also the right starting point after long periods of inactivity.

How Do You Do Standing Workouts Safely if You Have Balance Issues?

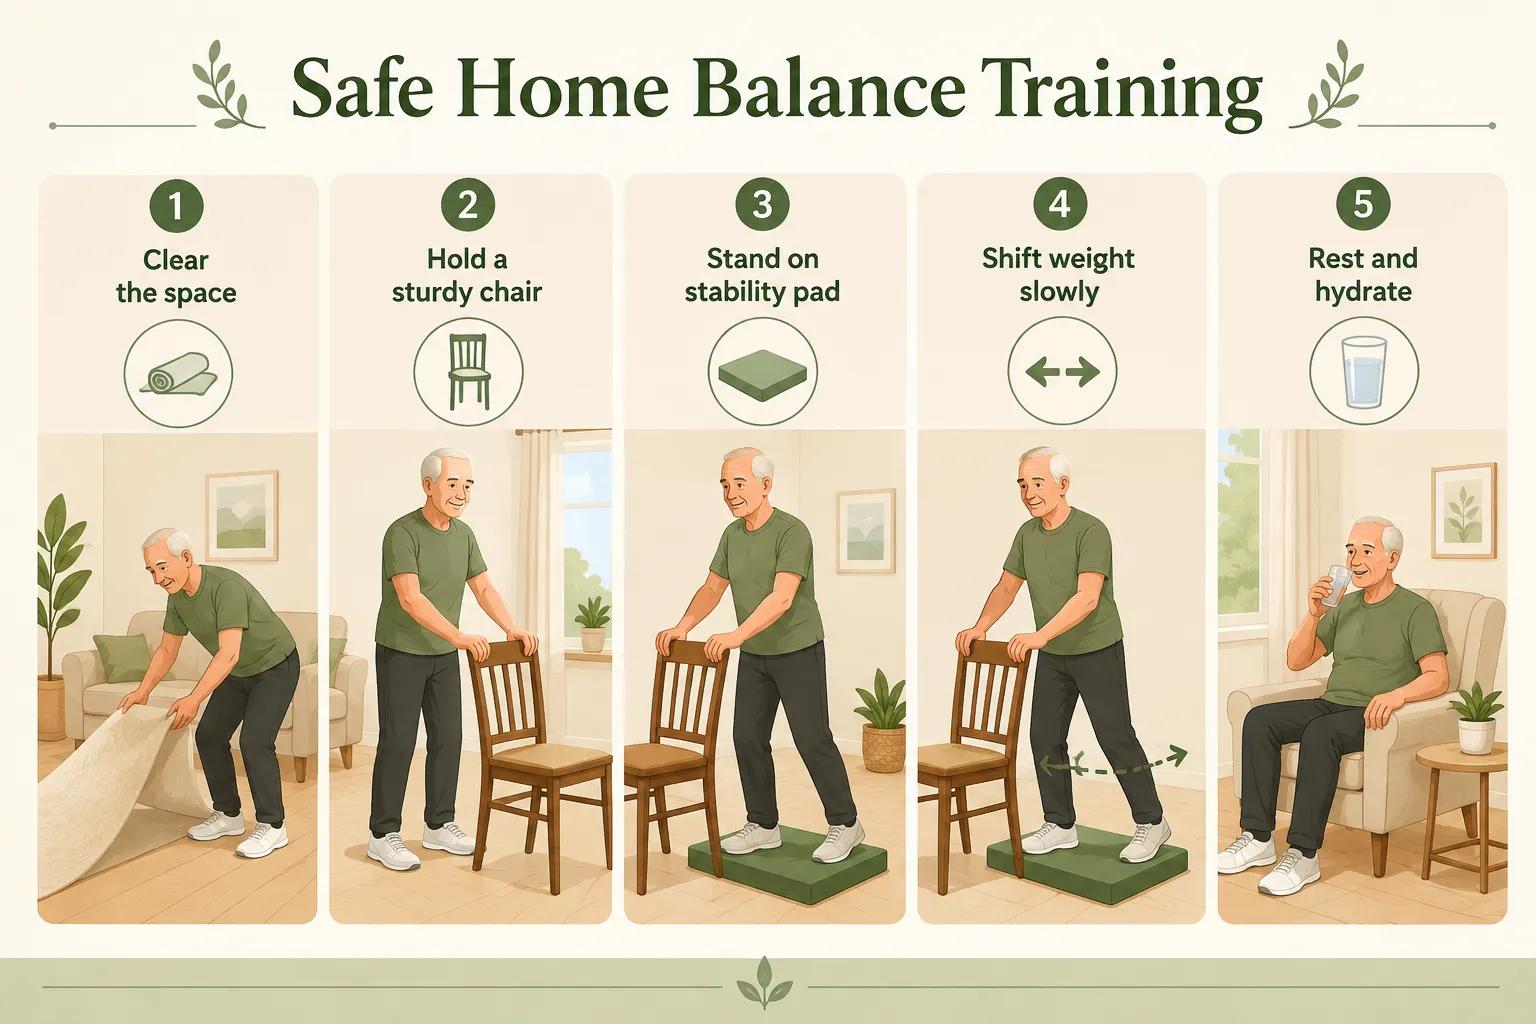
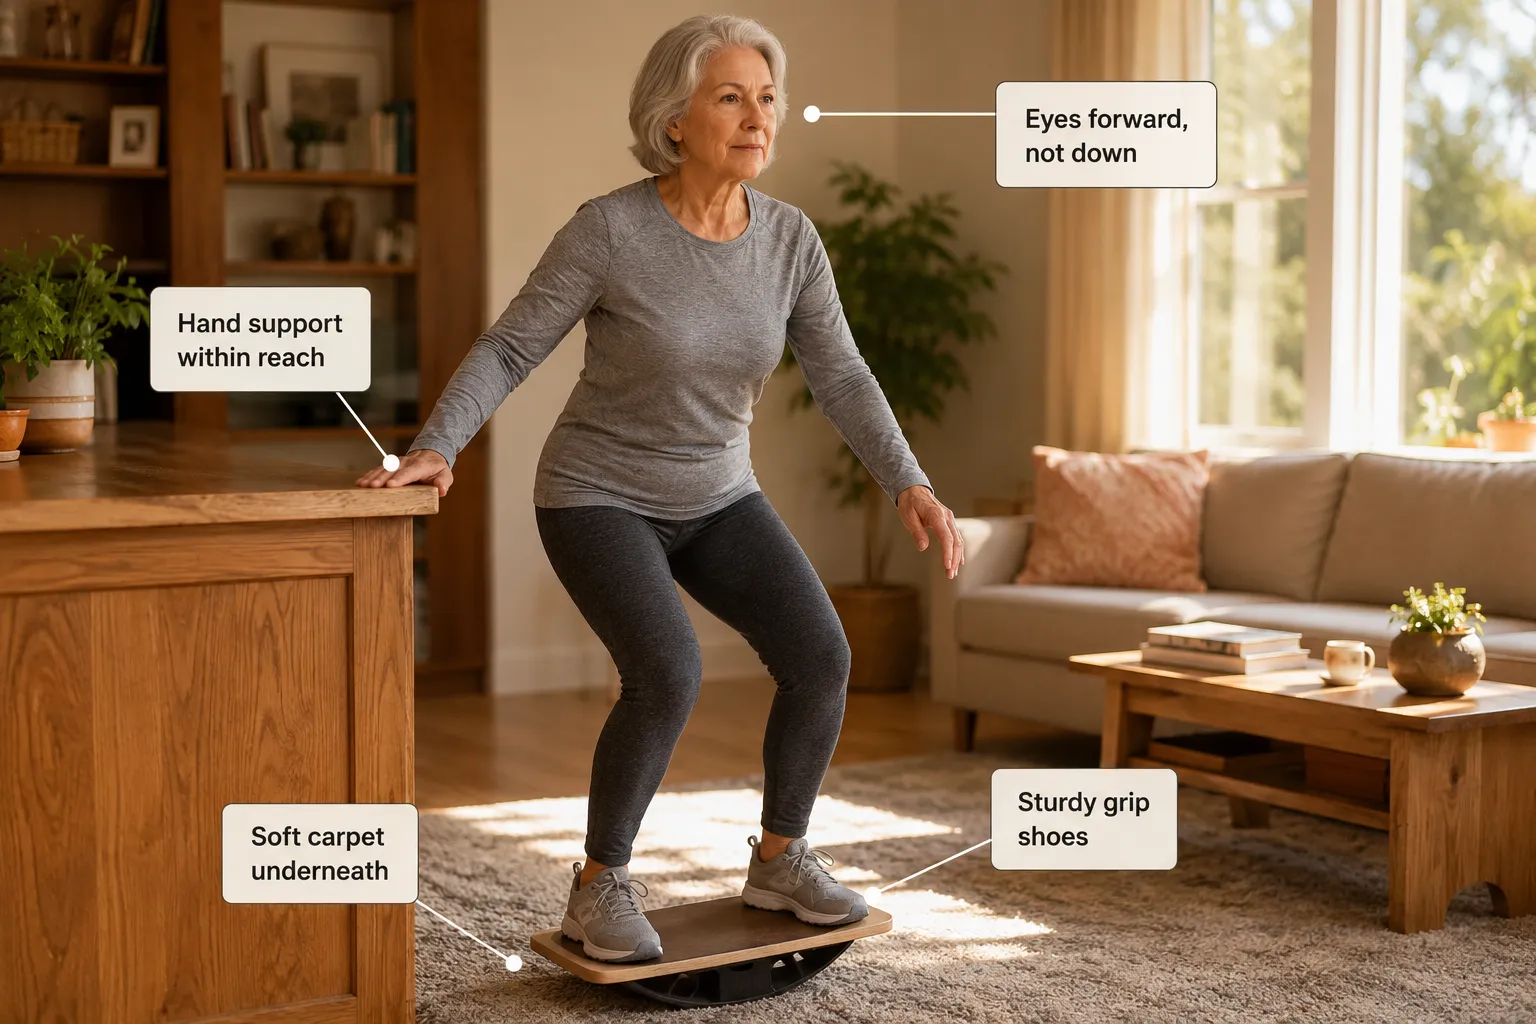
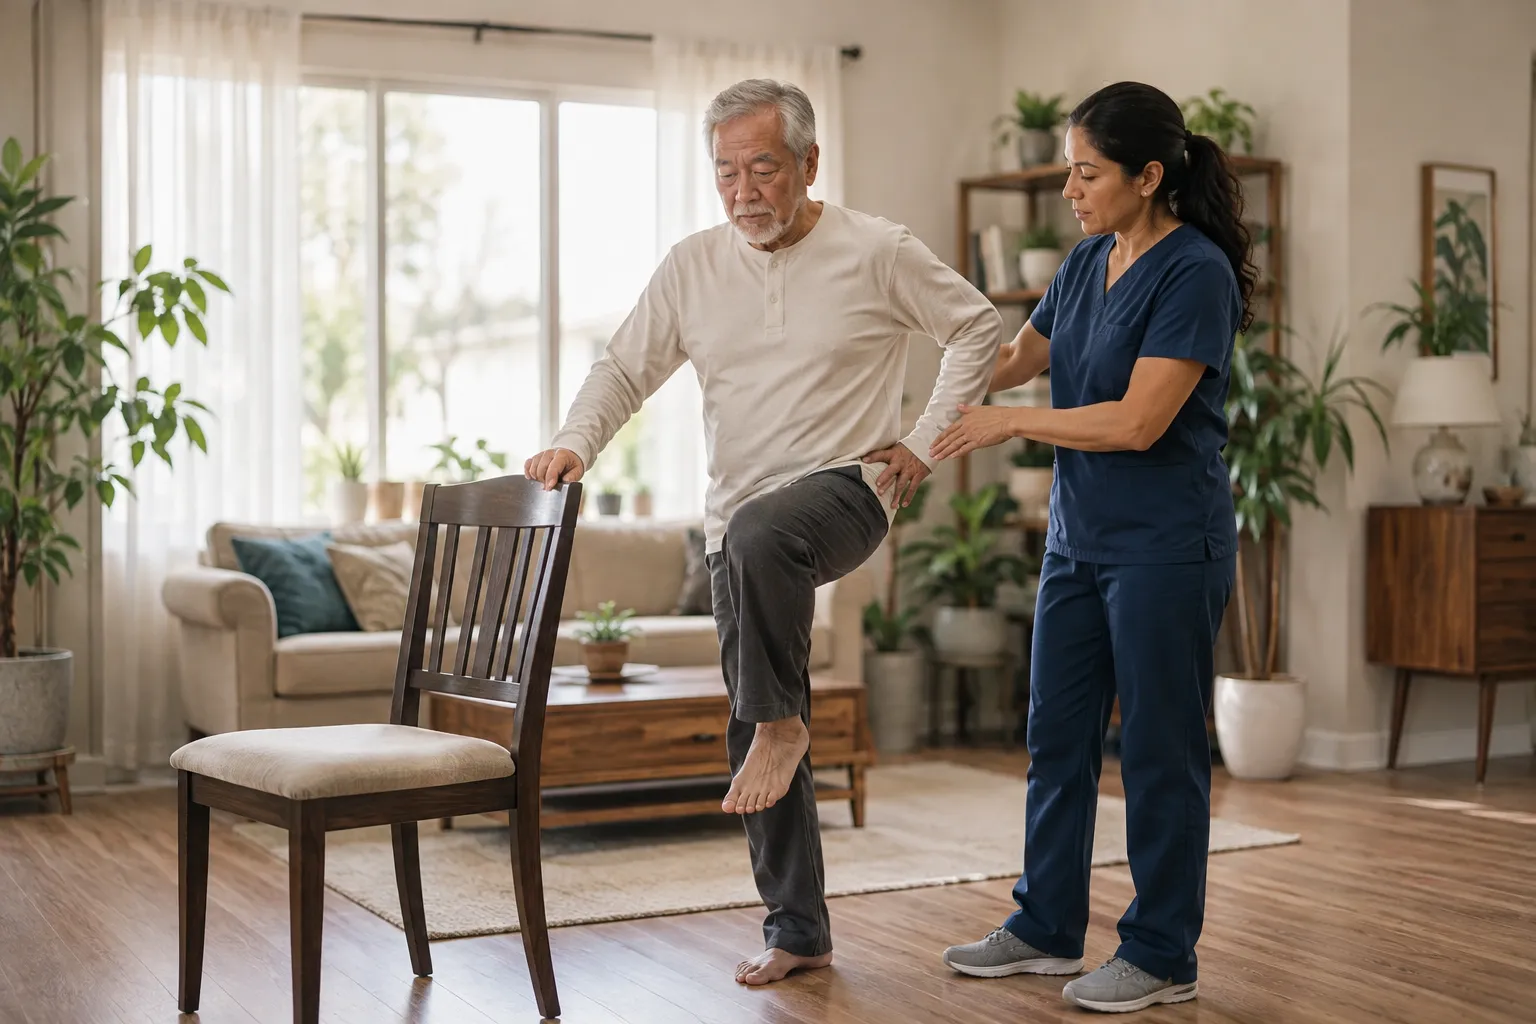
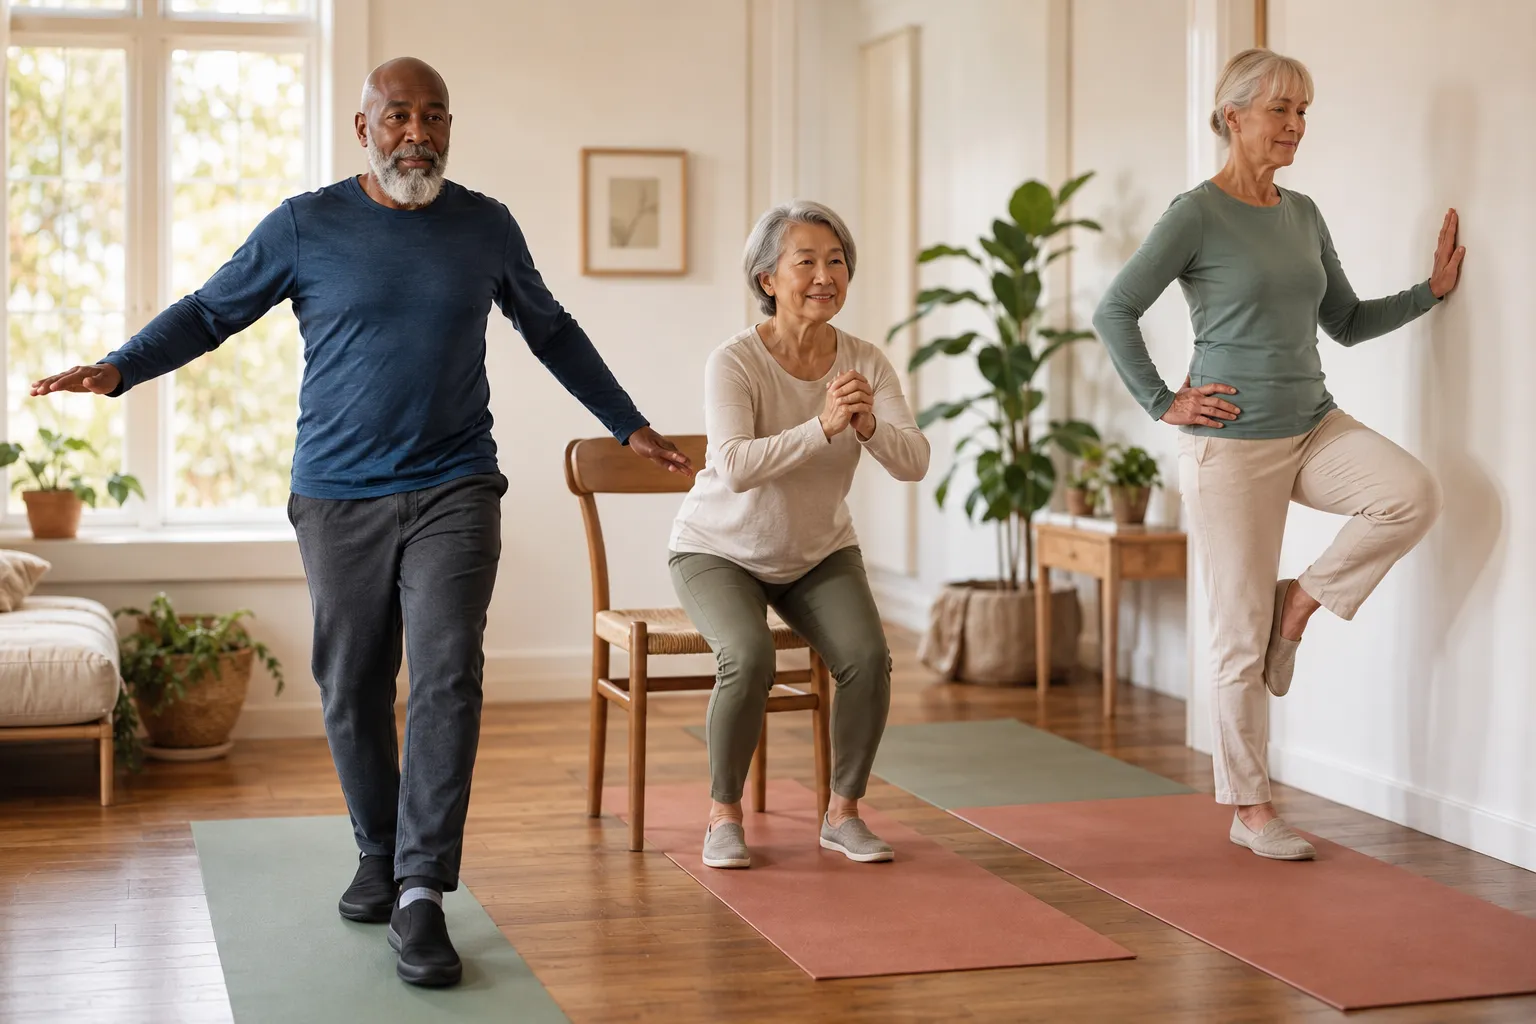
Always keep at least one hand on a sturdy anchor, the back of a heavy chair, a kitchen counter, or a wall bar, and never train standing exercises alone if you've fallen in the past year. Position yourself so you can sit down within one step at any moment.[6][7]

Safe setup checklist:

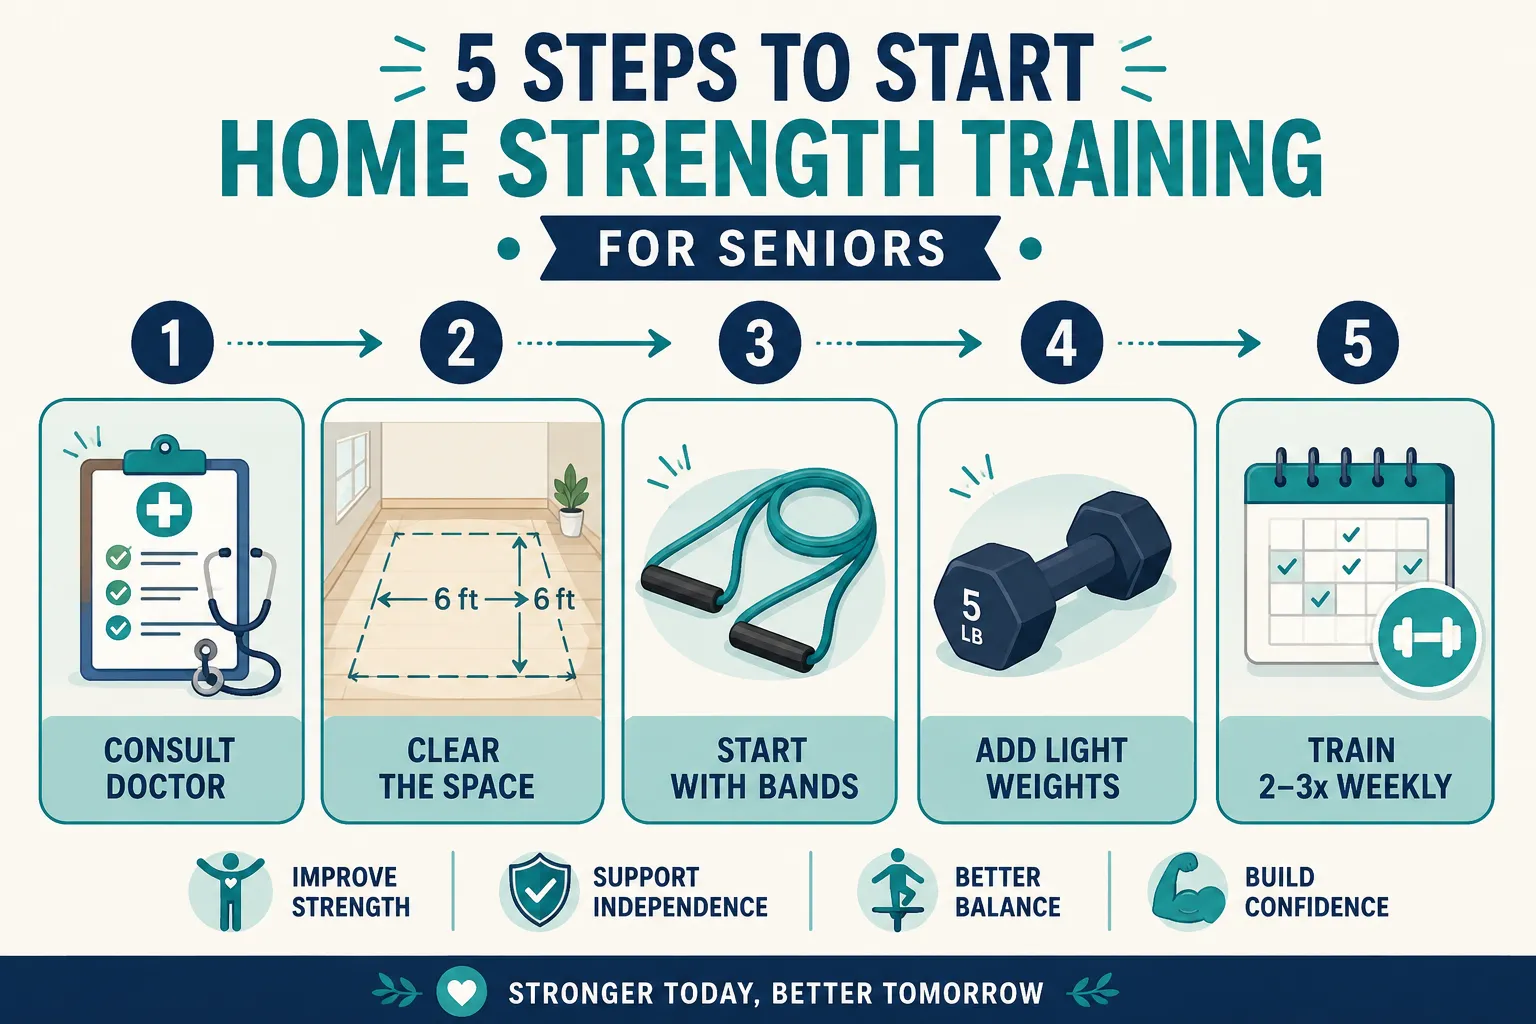
  1. Use a chair with a high back and no wheels, placed against a wall so it can't slide.
  2. Wear flat, closed-toe shoes with grip, no socks on hardwood.
  3. Clear a 3-foot radius of rugs, cords, and pets.
  4. Have water within reach and a phone nearby.
  5. Start with both hands on the chair back; progress to one hand, then fingertips, only when steady.

Beginner supported-standing moves:

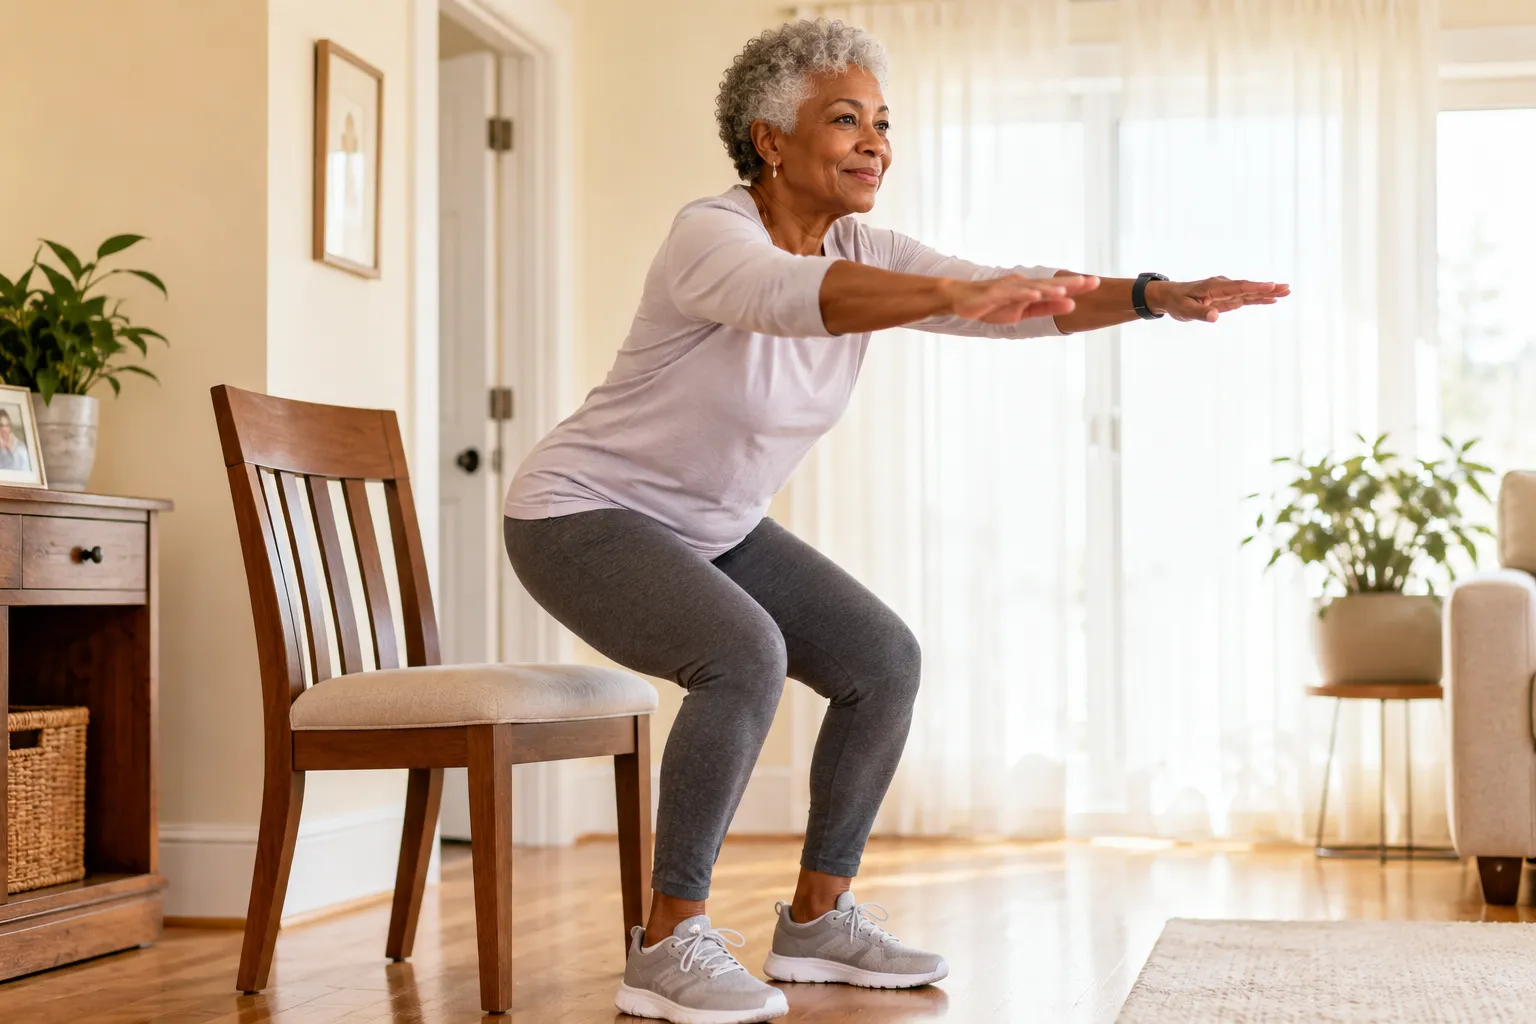
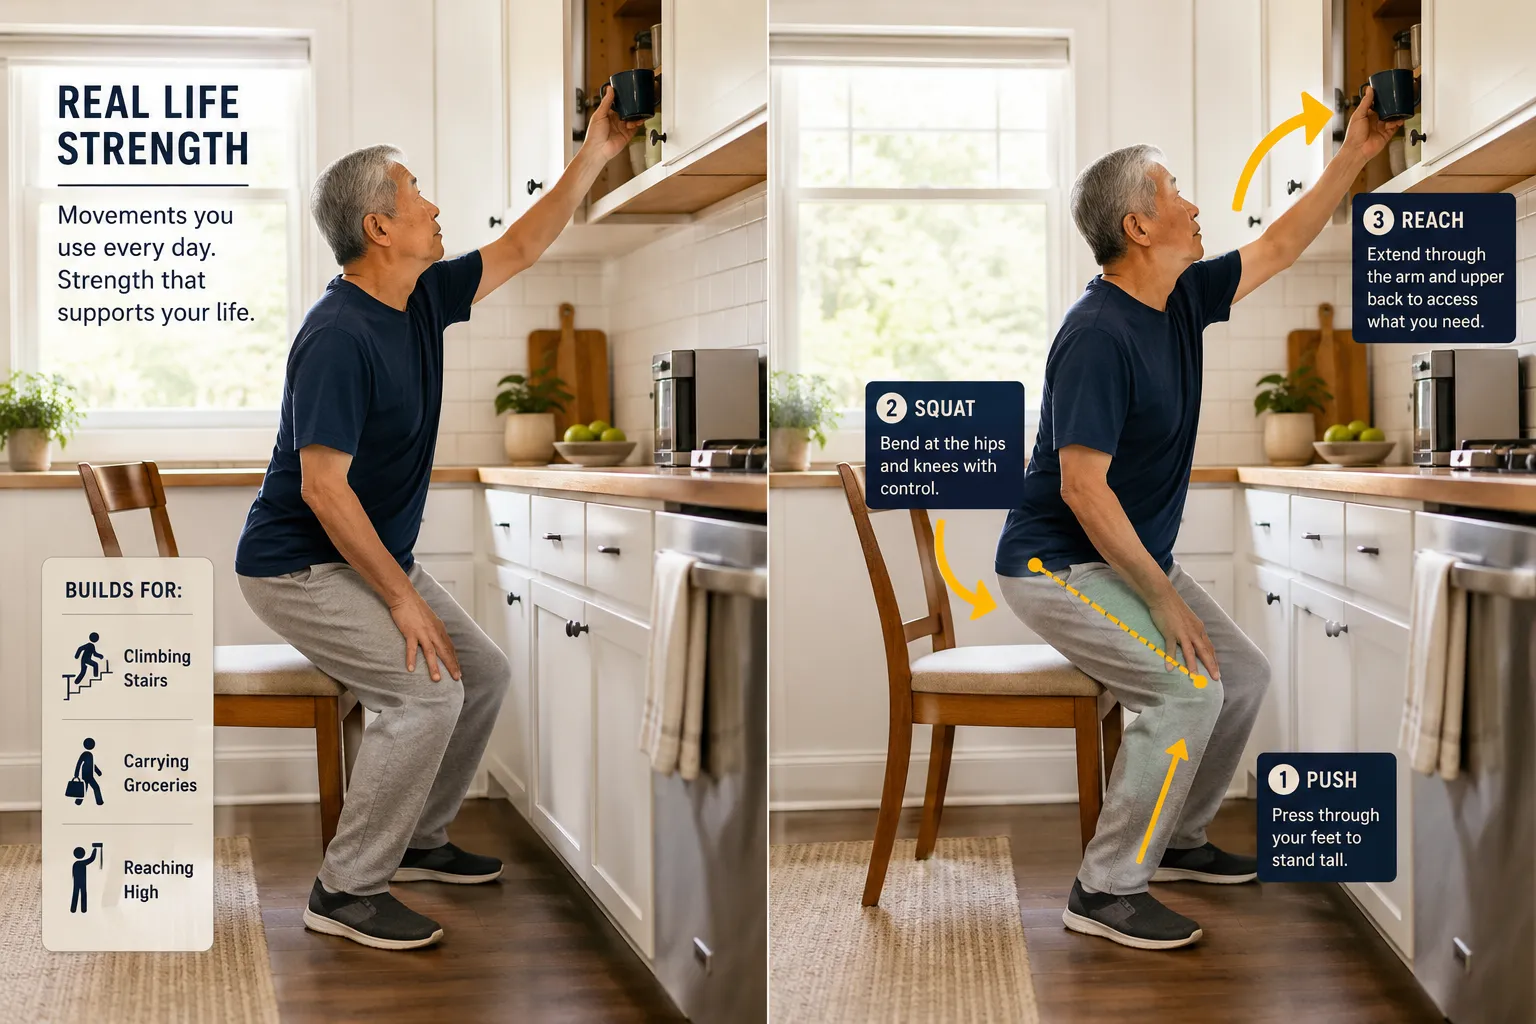
  • Sit-to-stands, from a chair, stand up and sit down slowly. 8-10 reps. This is the single best predictor of independence in later life.
  • Standing calf raises, rise onto toes, lower with control. 10-15 reps.
  • Standing side leg lifts, lift one leg out to the side. 10 per side.
  • Standing marches, lift knees while holding the chair. 30 seconds.

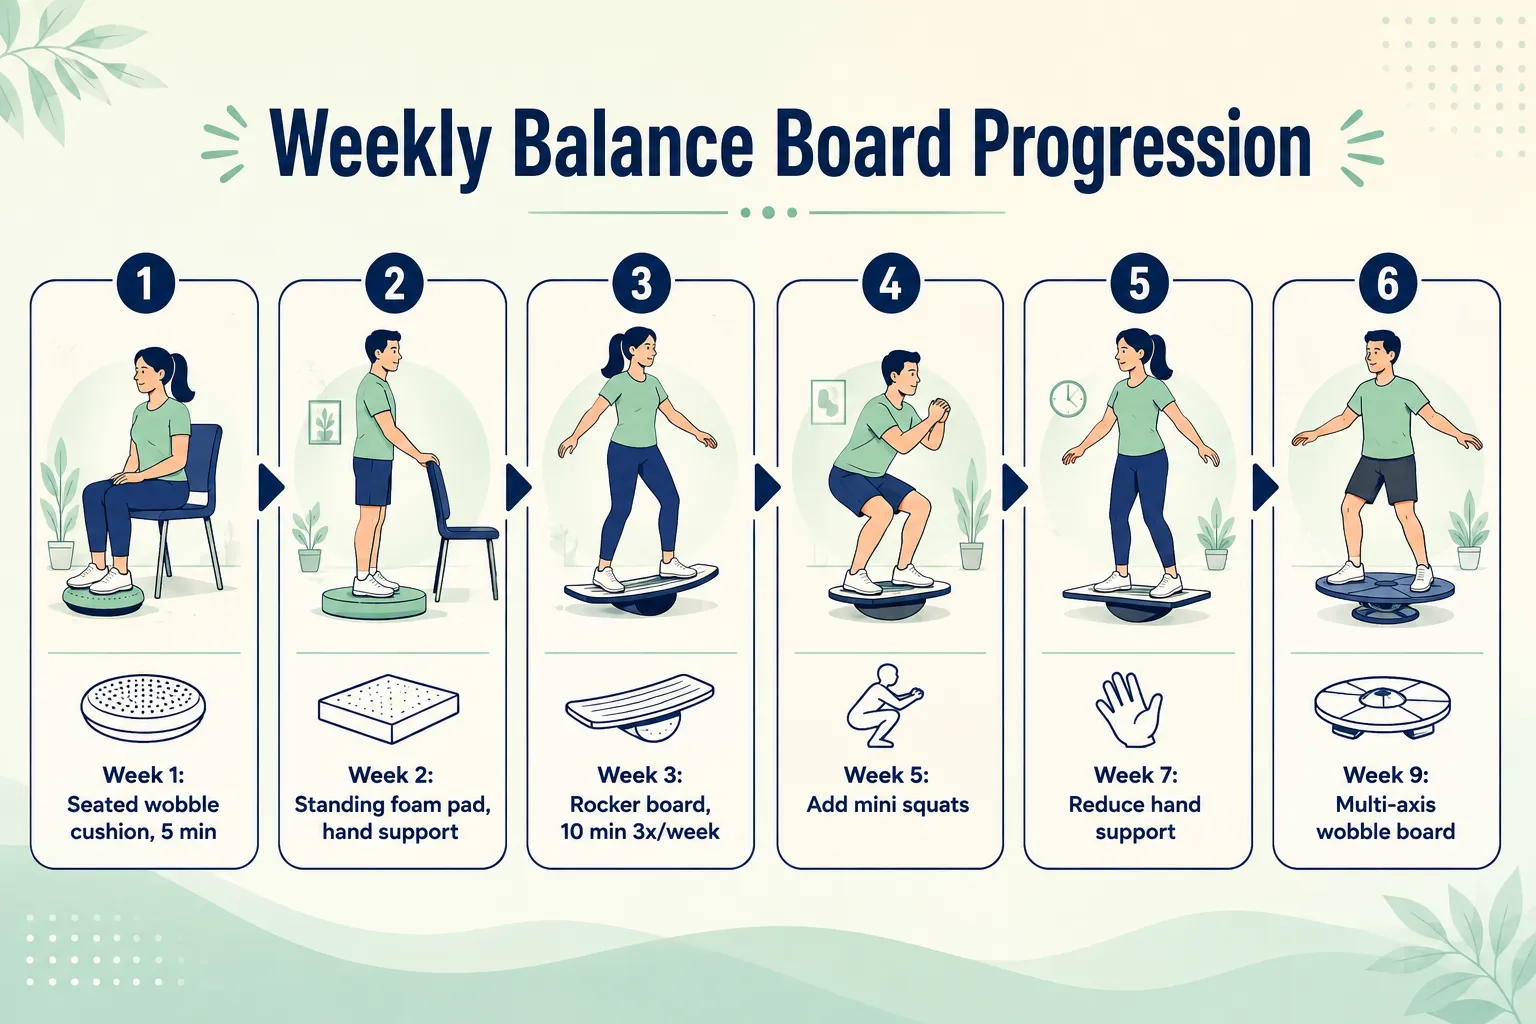
Common mistake: Rushing to let go of support. Balance improves by degrees. Spend 2-4 weeks holding on with both hands before reducing support.

Can Seniors Build Muscle Strength From Chair Exercises Alone?

Yes, chair exercises can build meaningful strength, especially in the legs, core, shoulders, and arms, when they use enough resistance and are done 2-3 times per week. Muscle responds to challenge at any age, and Harvard Health confirms that seated resistance work improves strength, stamina, and daily function in older adults.[2]

To make chair work strength-building (not just movement):

  • Add resistance: light dumbbells (1-5 lb), resistance bands, or filled water bottles.
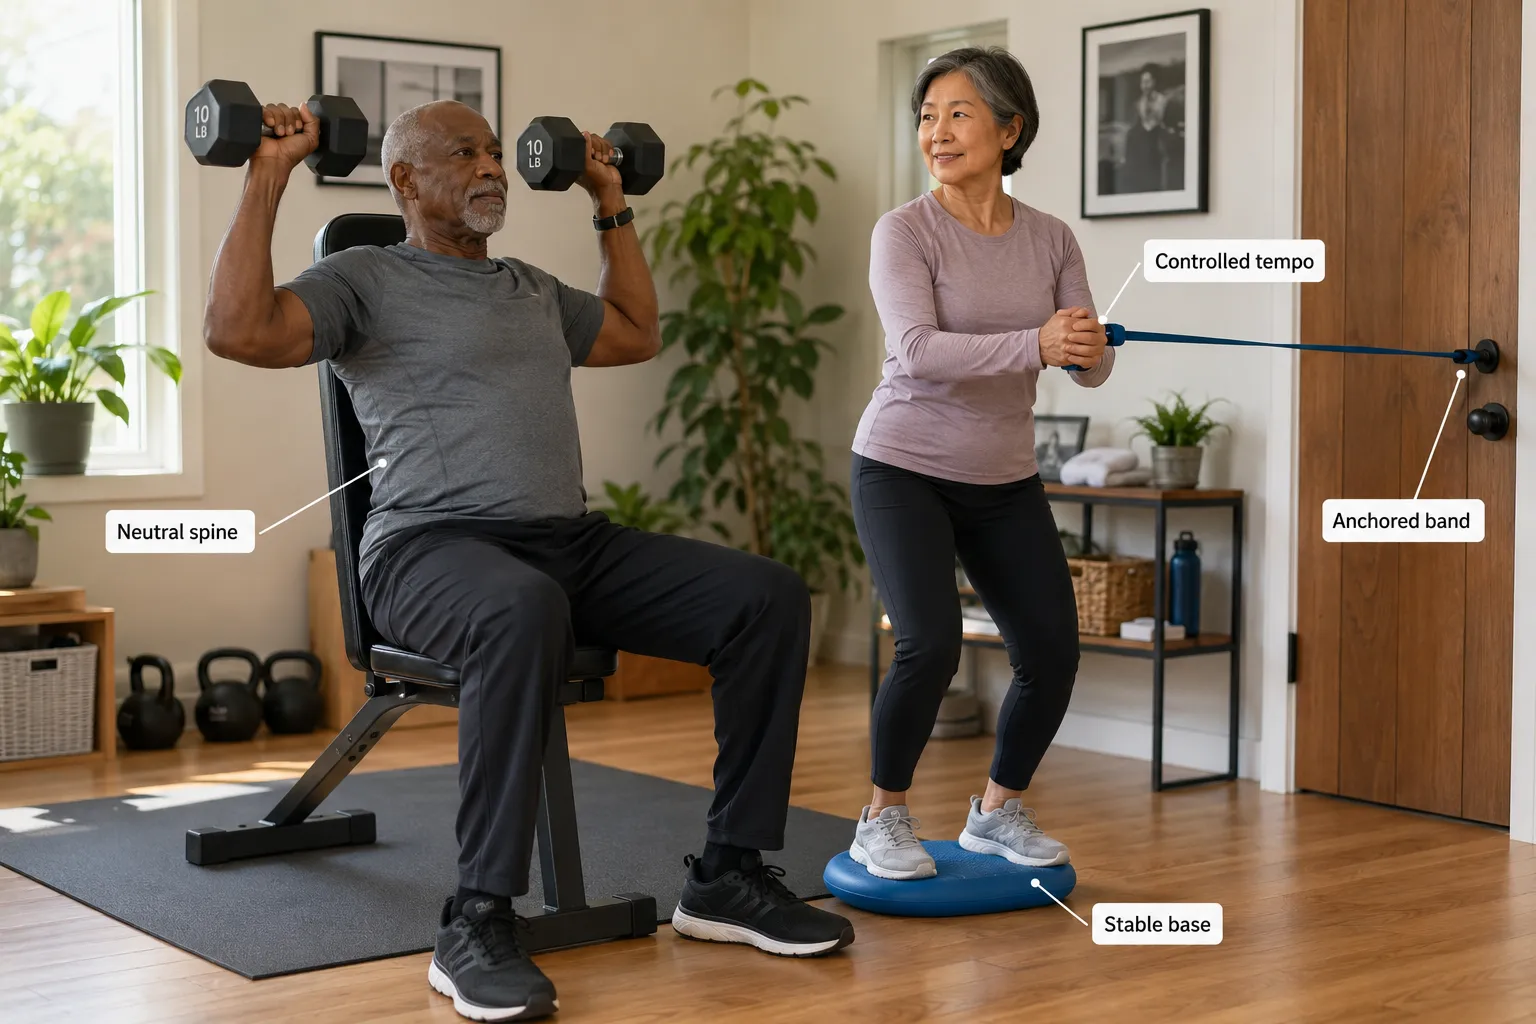
  • Slow the tempo: 2 seconds up, 2 seconds pause, 3 seconds down. Slow reps recruit more muscle.
  • Progress gradually: when 12 reps feel easy, add a set or increase weight by 1-2 lb.
  • Train opposing muscles: curls and presses, extensions and hamstring curls.

Edge case: If you have severe sarcopenia (age-related muscle loss), pair chair strength work with adequate protein, roughly 1.0-1.2 g per kg of body weight daily, or the muscle-building signal has nothing to work with.

Can Seniors Build Muscle Strength From Chair Exercises Alone?

Chair Yoga vs. Chair Aerobics: What's the Difference?

Chair yoga emphasizes slow stretching, breath control, and flexibility; chair aerobics emphasizes continuous movement to raise heart rate and improve cardiovascular fitness. Neither is "better", they train different systems, and most seniors benefit from doing both across the week.

Chair Yoga
Pace: slow · Focus: flexibility, breath, calm · Typical moves: seated cat-cow, chest openers, seated forward fold, neck stretches · Heart rate: low

Chair Aerobics
Pace: moderate to brisk · Focus: cardio, circulation, stamina · Typical moves: seated marches, punches, side taps, boxer shuffles · Heart rate: elevated

Choose chair yoga if stress, stiffness, or sleep is your main concern. Choose chair aerobics if endurance, energy, or heart health is the priority. Do both if you want a complete program.

Best Low-Impact Standing Exercises for Seniors With Arthritis

For arthritic joints, the best standing exercises use short lever arms, pain-free range, and constant chair support. Prioritize movements that strengthen muscles around the joint without loading it heavily, quad sets, hip abductions, and calf raises fit this profile.[7][10]

Arthritis-friendly standing routine (10 minutes):

  1. Warm-up marches at the counter, 60 seconds
  2. Mini sit-to-stands (halfway down only), 8 reps
  3. Standing calf raises, 12 reps
  4. Standing hip abductions (leg out to side), 10 per side
  5. Standing hamstring curls (heel toward glute), 10 per side
  6. Wall push-ups, 8-10 reps
  7. Cool-down: standing chest opener, hold 20 seconds

Rule of thumb: Pain during exercise should not exceed 3/10, and it should return to baseline within an hour of stopping. If it doesn't, reduce range or reps next session.

How Often Should Seniors Do Chair and Standing Workouts Per Week?

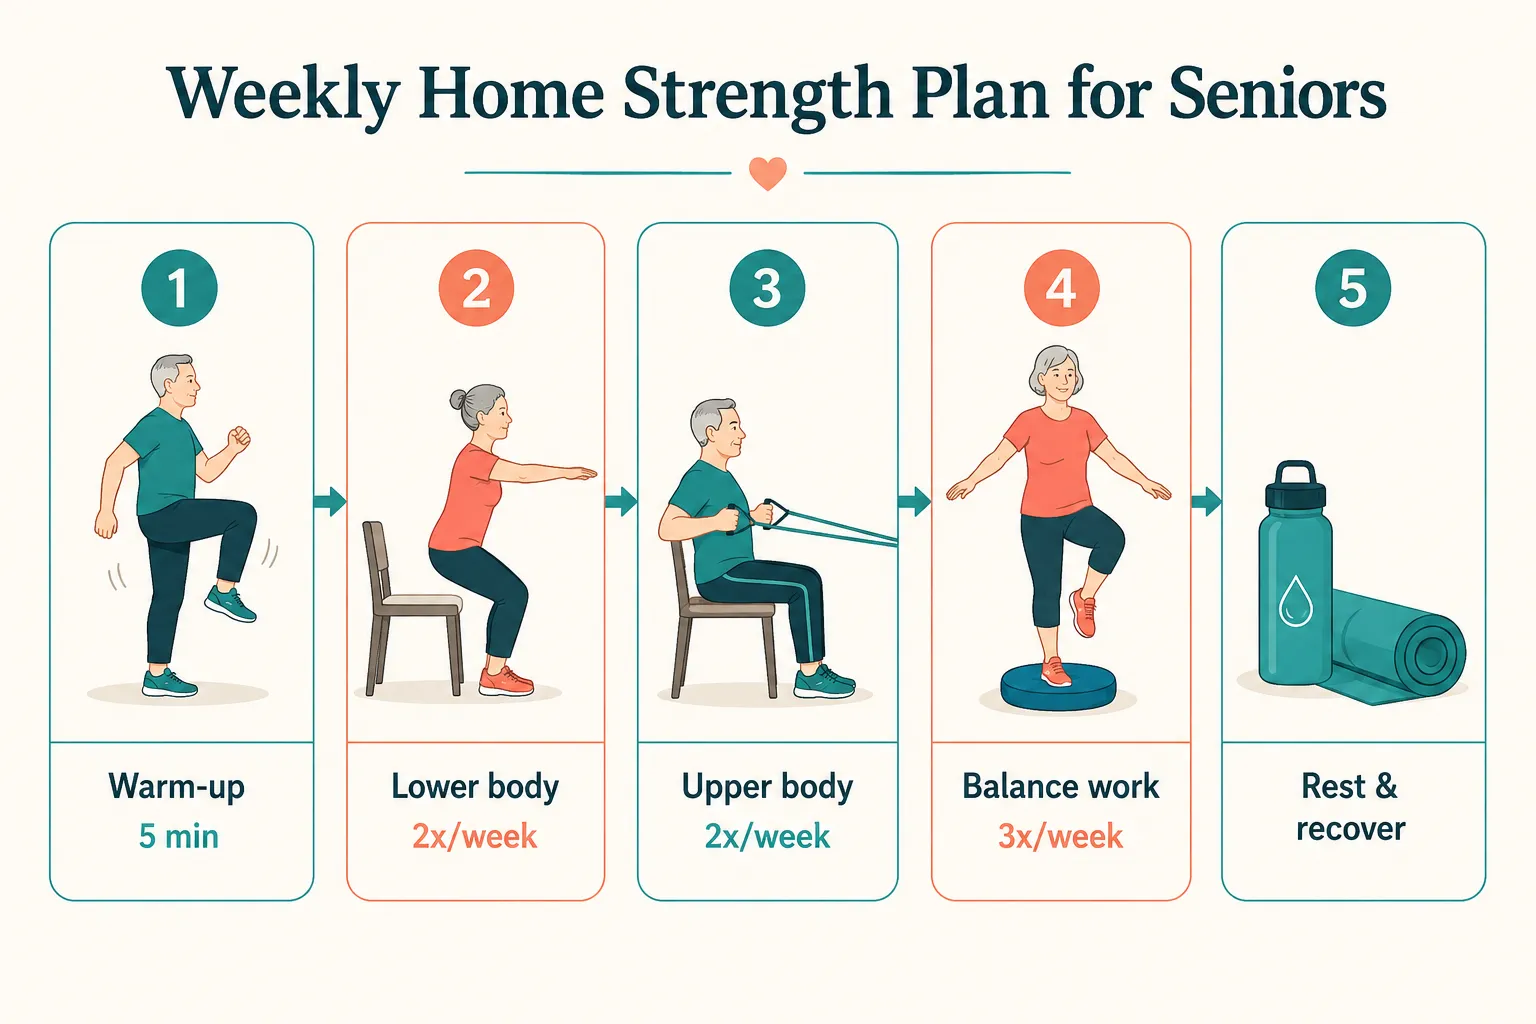
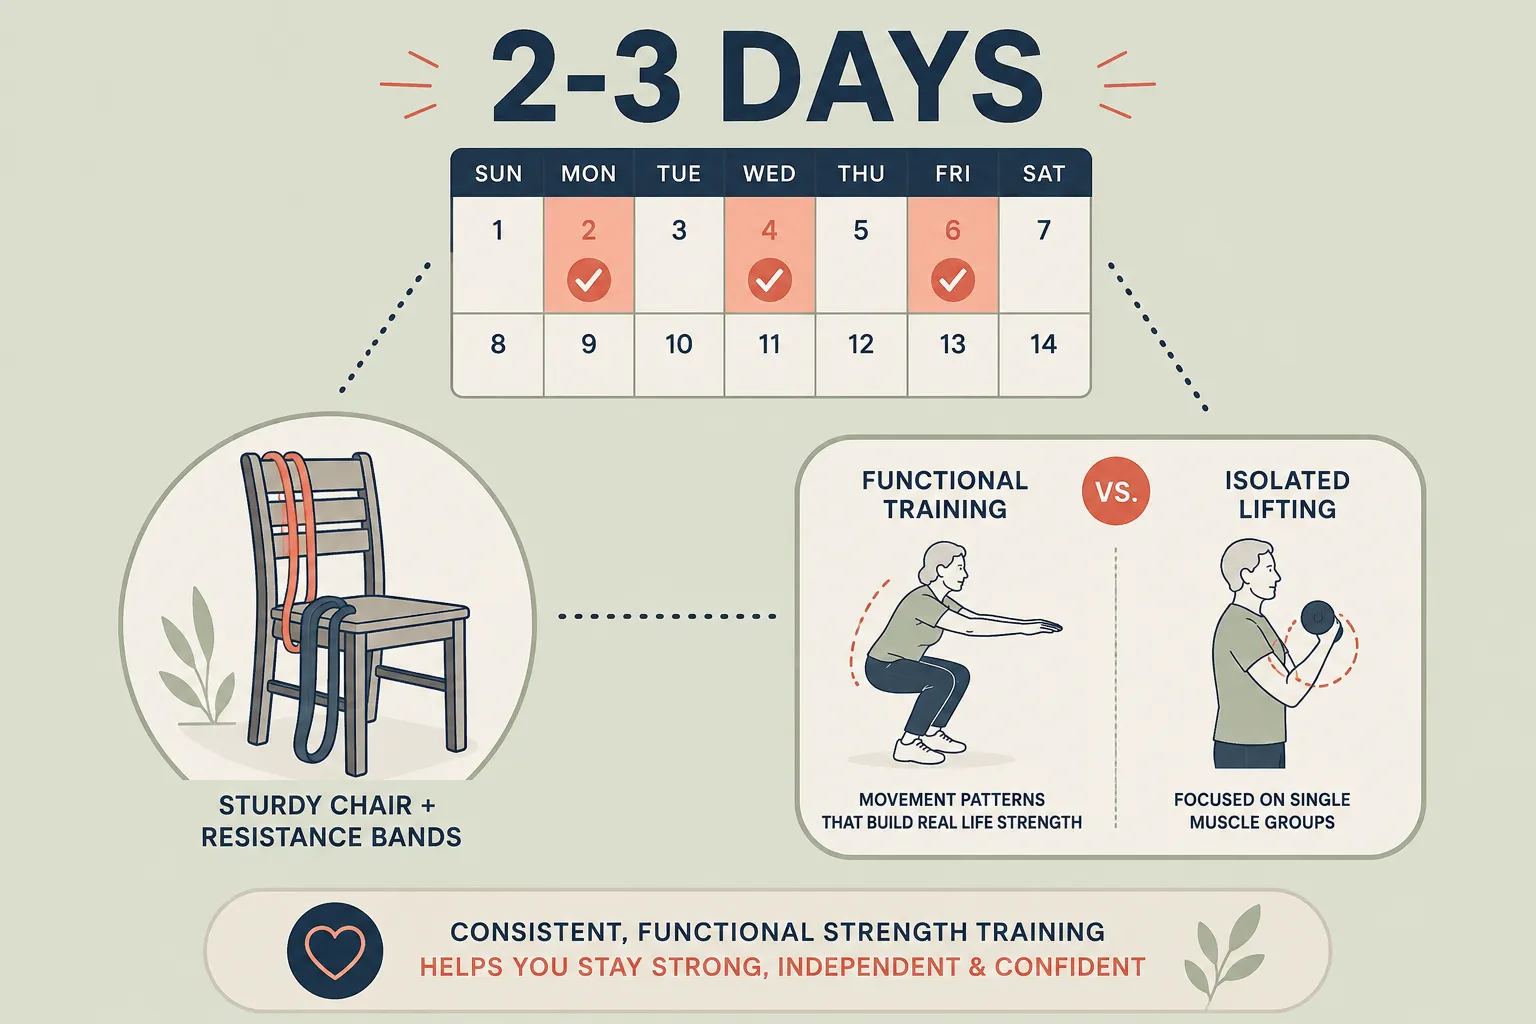
Aim for 4-5 sessions per week, typically 2-3 strength-focused days and 2-3 mobility or cardio days, with at least one full rest day. Sessions of 15-30 minutes are enough to produce measurable gains within two months.[2][8]

Sample weekly plan:

Day Focus Length
Monday Seated strength (legs + arms) 25 min
Tuesday Chair yoga / mobility 20 min
Wednesday Supported standing strength 20 min
Thursday Rest or gentle walk ,
Friday Seated aerobics 20 min
Saturday Supported standing balance 20 min
Sunday Chair yoga or full rest 15 min

Beginner adjustment: Start with 3 days a week for the first two weeks. Add a fourth day only when you're not sore the next morning.

Can You Lose Weight Doing Seated Exercises as a Senior?

Yes, modest weight loss is achievable with consistent seated workouts combined with dietary adjustments, but chair cardio alone burns fewer calories than walking, so the diet side matters more. Expect a slow, sustainable pace of 0.5-1 pound per week when both are aligned.

  • Calorie burn (seated aerobics): roughly 120-200 calories per 30-minute session, depending on intensity and body size.
  • Muscle mass matters: strength work raises resting metabolic rate, which helps long-term.
  • Diet lever: a 300-500 calorie daily reduction, paired with adequate protein, drives most senior weight loss.

Don't try aggressive calorie cuts. Rapid weight loss in older adults often strips muscle, which is exactly what chair workouts are trying to build.

What Equipment Do You Need for Chair Workouts at Home?

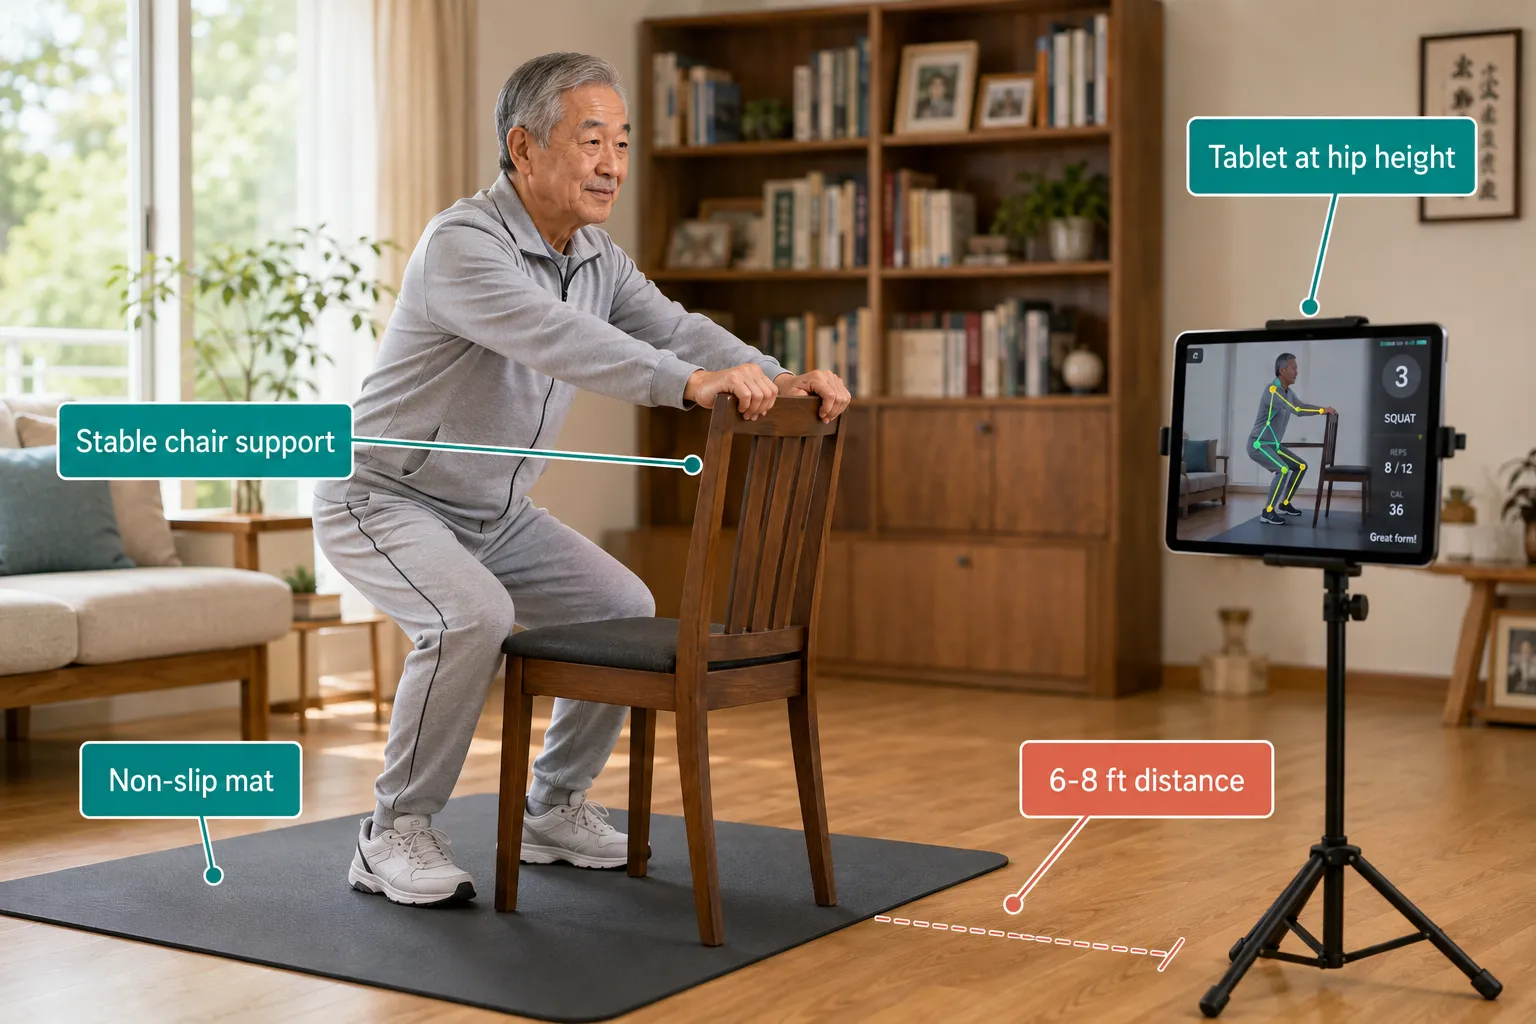
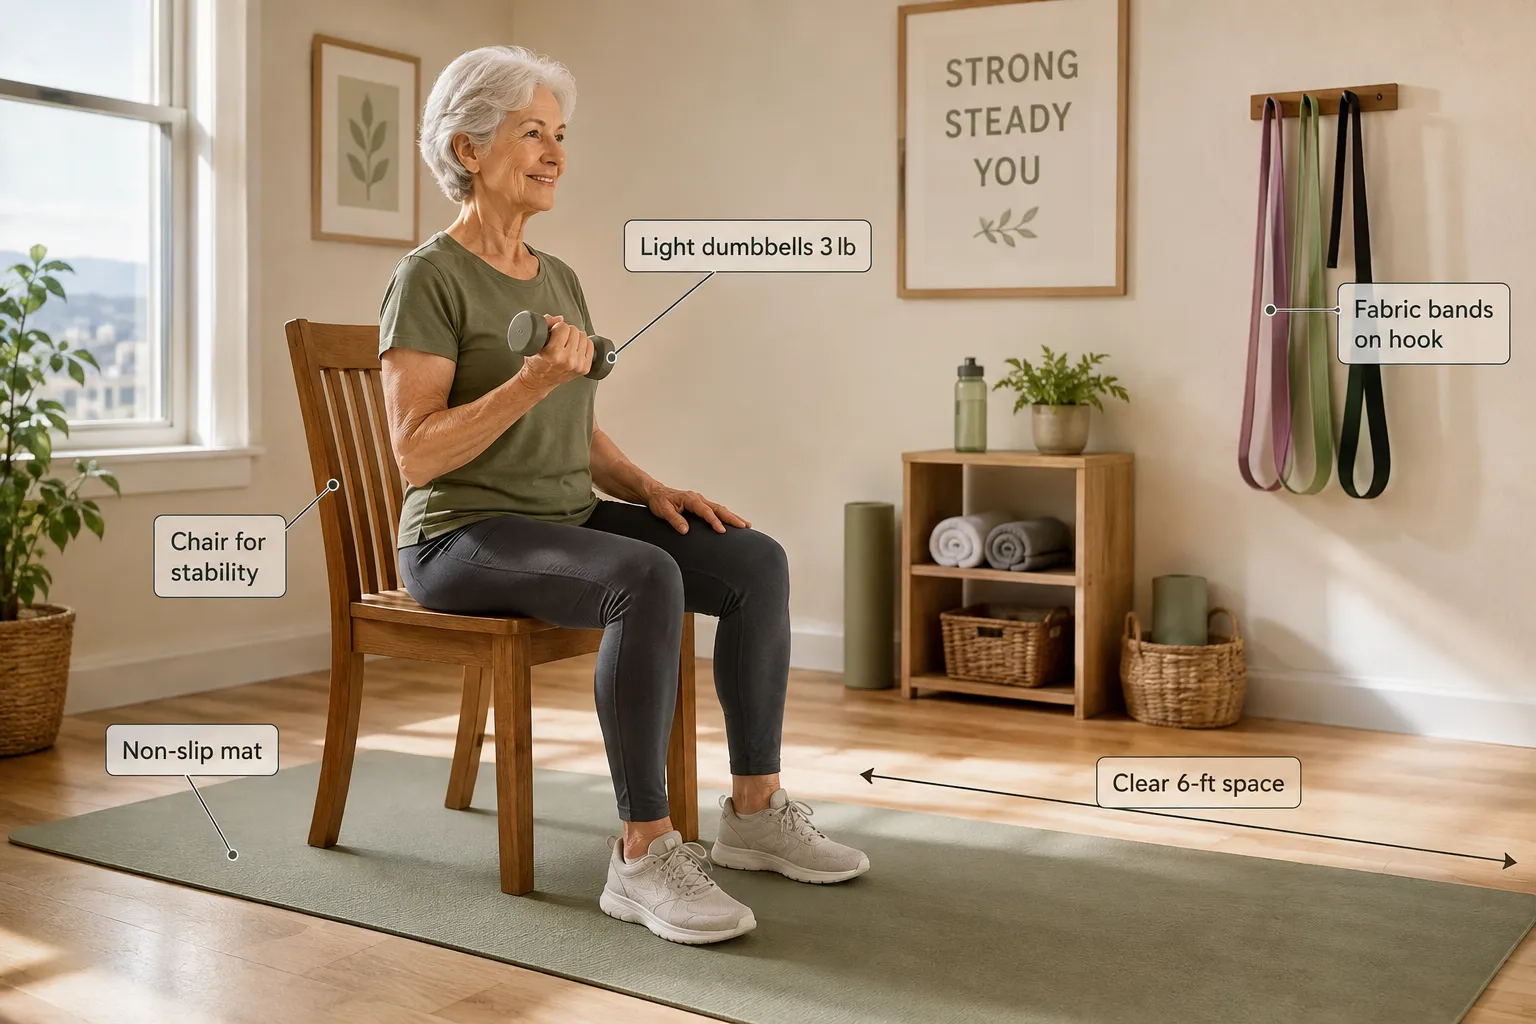
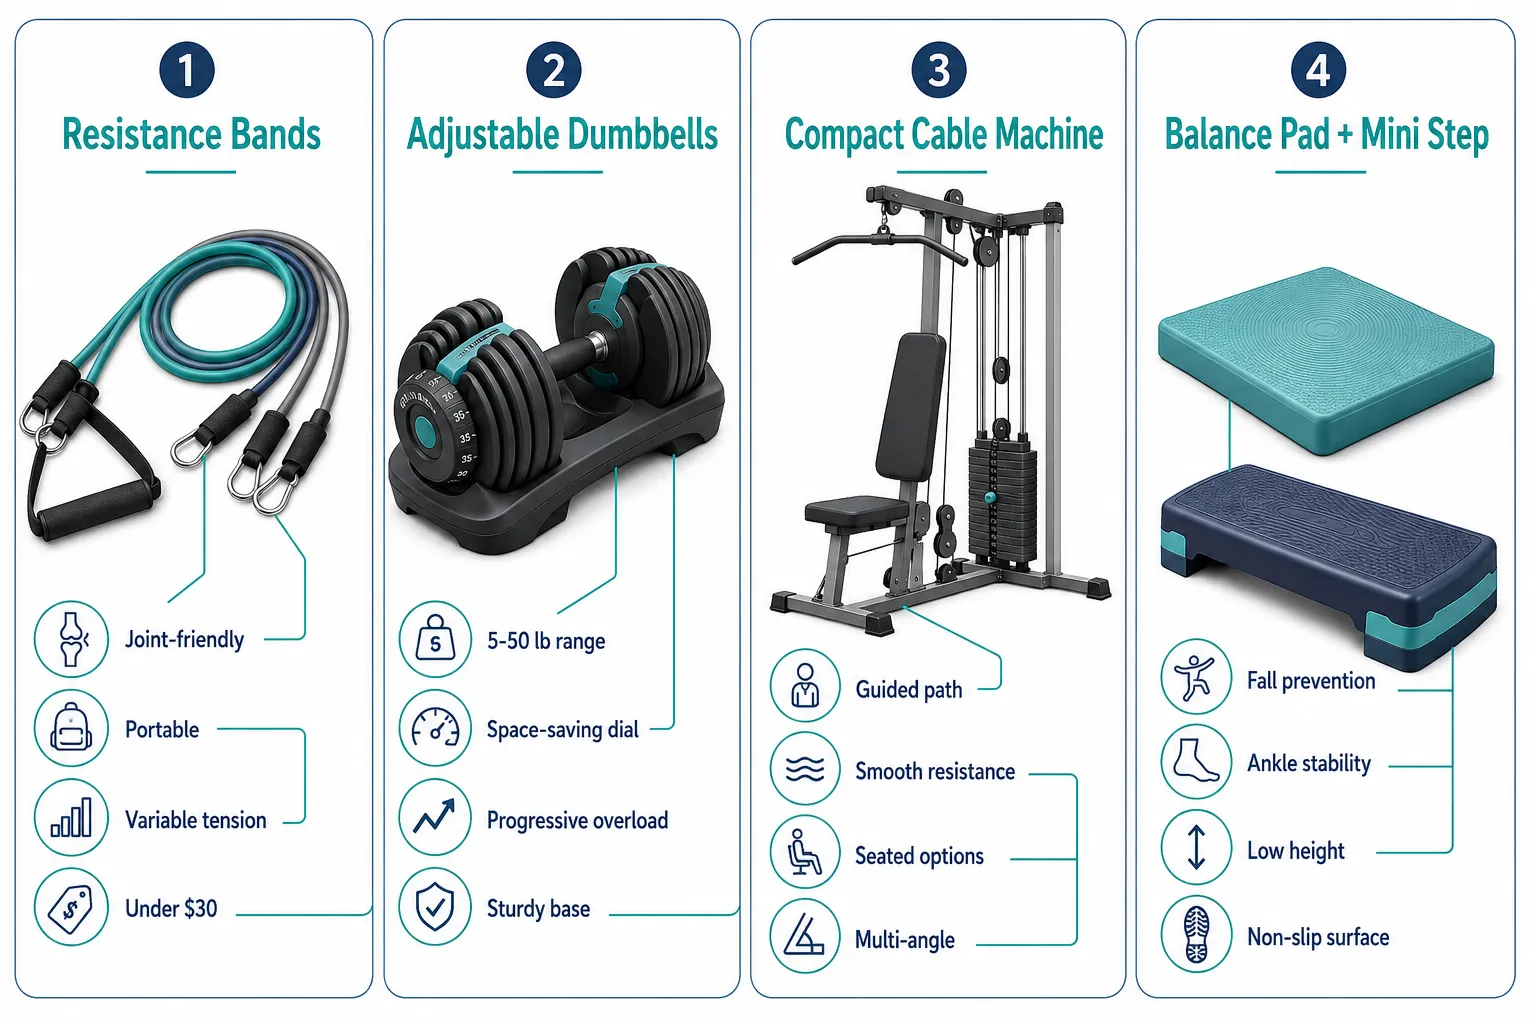
The minimum kit is a sturdy armless chair on a non-slip floor. Everything else is optional and cheap. Total starter cost: $0,$40.[1][9]

Essential:

  • Sturdy chair with a firm seat, no wheels, no arms (dining chair works)
  • Non-slip floor or yoga mat under the chair
  • Flat shoes with grip

Nice to have:

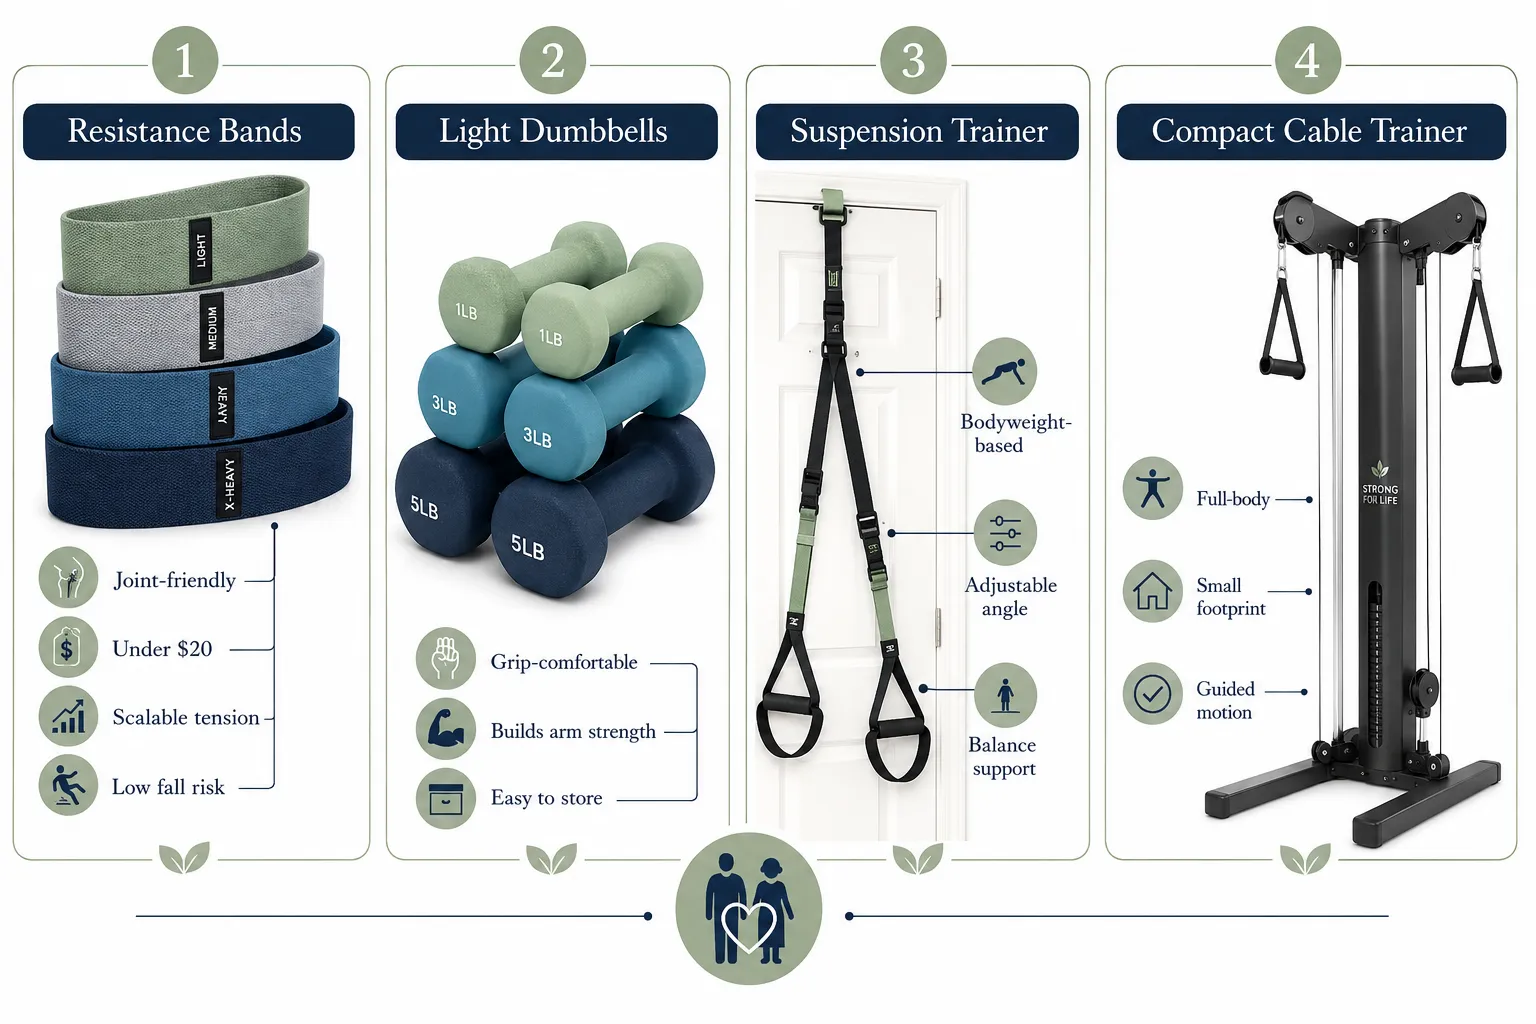
  • Light dumbbells (1, 2, 3, 5 lb set), ~$20
  • Resistance bands (light and medium), ~$10
  • Small pillow for lumbar support
  • Water bottles (double as improvised weights)

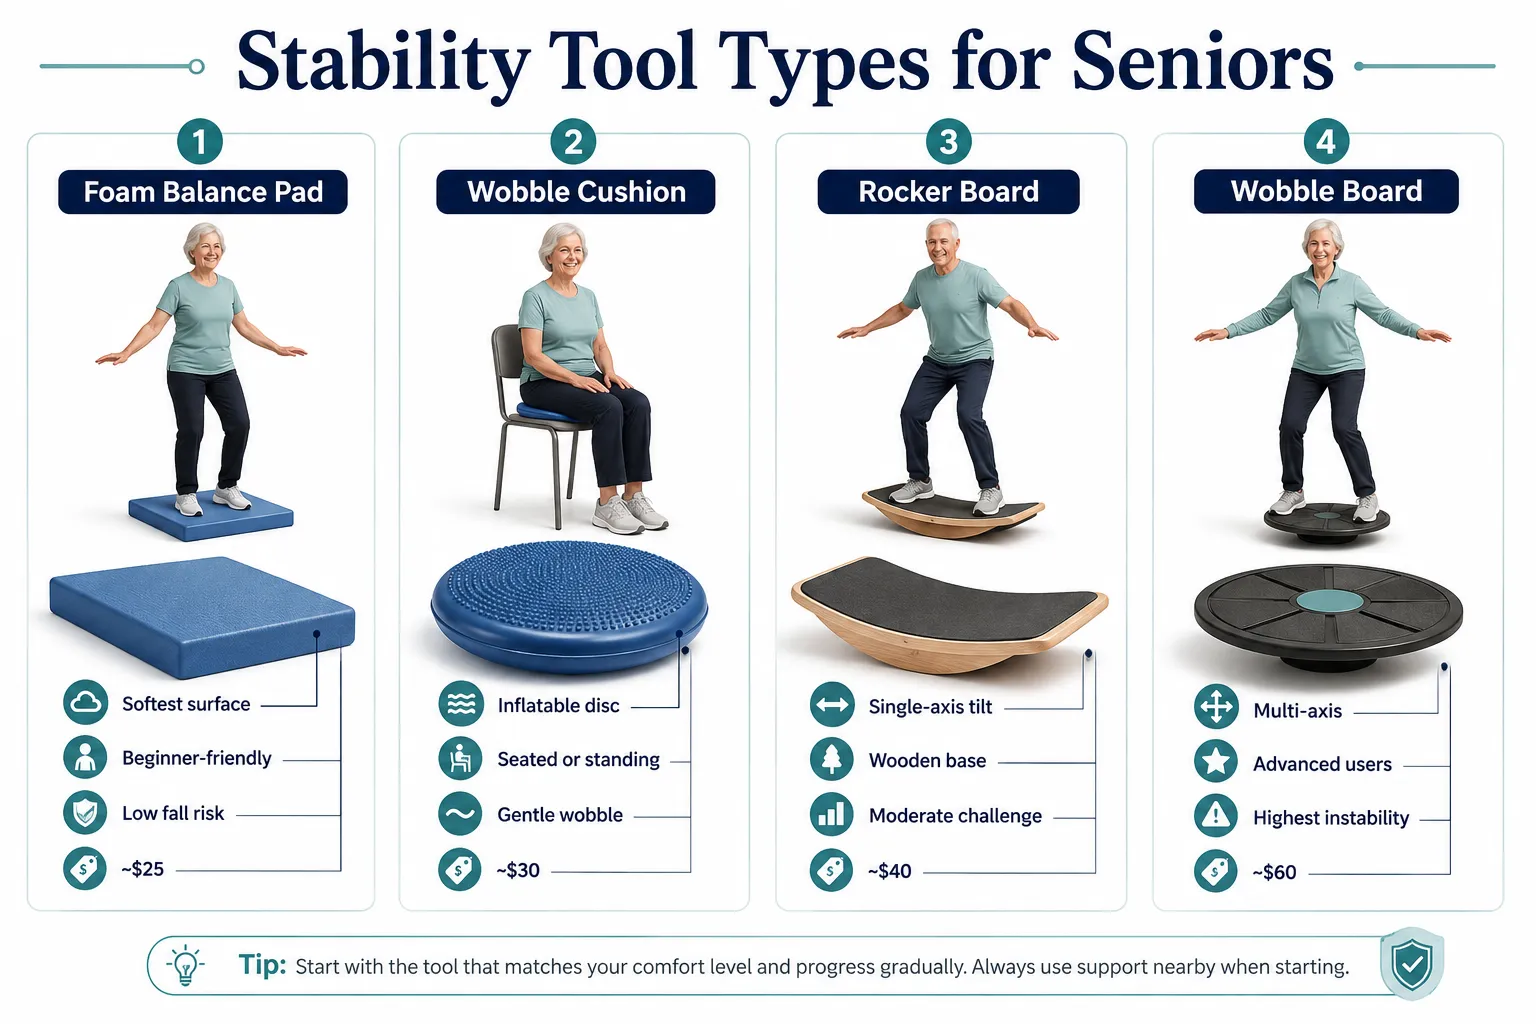
Skip: ankle weights heavier than 2 lb (they strain knees), unstable surfaces like balance discs (fall risk), and treadmill-style equipment unless supervised.

What Equipment Do You Need for Chair Workouts at Home?

How Do Chair Exercises Help With Fall Prevention in Seniors?

Chair exercises reduce fall risk by strengthening the exact muscles that catch you when you stumble, quads, glutes, hip abductors, and ankle stabilizers, and by training the sit-to-stand transition that causes many at-home falls.[1][6]

High-value fall-prevention moves:

  • Sit-to-stands, trains hip and knee power for getting out of chairs, cars, toilets.
  • Standing hip abductions, strengthens the side-hip muscles that keep you upright on one leg.
  • Heel-toe rocks (holding chair), trains ankle stability.
  • Seated marches with reach, trains hip flexors and core coordination.

Progress marker: If you can do 10 sit-to-stands in 30 seconds without using your hands, your fall risk is significantly lower than someone who can't.

Are Chair Workouts Effective for Improving Posture and Flexibility?

Yes. Regular chair-based mobility work counteracts the forward-hunched posture that develops from sitting and reduces stiffness in the shoulders, spine, and hips. The British Heart Foundation's 2026 chair mobility routine, shoulder shrugs, chest openers, and gentle trunk rotations, is specifically designed for this.[8]

Daily 5-minute posture reset:

  1. Seated shoulder rolls, 10 backward, 10 forward
  2. Chest opener (hands behind head, elbows wide), 3 breaths
  3. Seated trunk rotation, 8 per side
  4. Neck turns (chin to shoulder), 8 per side
  5. Seated cat-cow, 8 rounds

Consistency beats duration. Five minutes daily outperforms 30 minutes once a week.

What Should Seniors Avoid When Doing Standing Exercises?

Avoid unsupported balance work early on, holding your breath during strain, deep knee bends past 90 degrees, and any movement that causes sharp joint pain or dizziness. Also skip exercises done on soft surfaces (beds, thick rugs), they hide balance errors.[6][7]

Red flags, stop immediately if you feel:

  • Chest pain, tightness, or unusual shortness of breath
  • Dizziness, lightheadedness, or visual changes
  • Sharp joint pain (dull ache is usually fine)
  • Numbness or tingling down an arm or leg
  • Loss of bladder control or sudden weakness

Common mistakes to avoid:

  • Wearing socks instead of shoes
  • Locking knees at the top of standing moves
  • Rushing reps (speed hides poor control)
  • Skipping the warm-up
  • Training when severely fatigued or ill

Can Chair Exercises Help With Balance and Coordination Problems?

Yes, targeted chair-based drills improve balance by training the sensory and motor systems that keep you upright, even before you attempt full standing work. This is the safest entry point for anyone with vertigo, neuropathy, or recent falls.

Balance-building chair drills:

  • Seated weight shifts, shift weight side to side without lifting feet, 20 reps
  • Seated single-leg reaches, extend one leg and reach opposite arm forward, 8 per side
  • Head turns while marching, challenges the vestibular system, 30 seconds
  • Eyes-closed seated marches (only if steady), 20 seconds

Progress to supported standing balance work, heel raises, toe raises, tandem stance holding the chair, once seated drills feel easy.

How Long Does It Take to See Results From Senior Chair Workouts?

Most seniors notice easier daily movement within 2-3 weeks, measurable strength gains by 4-6 weeks, and clear improvements in balance and posture by 8-12 weeks of consistent training.[2]

Realistic timeline:

  • Week 1-2: less morning stiffness, better mood, slightly better sleep
  • Week 3-4: sit-to-stand feels easier, stairs less taxing
  • Week 6-8: noticeable arm and leg strength; posture improves
  • Week 12+: endurance, balance confidence, and often lower resting blood pressure

If you see nothing by week 6: you're probably under-loading (weights too light) or under-doing (fewer than 3 sessions weekly). Add resistance or a day, not more reps.

The Safest Way to Transition From Sitting to Standing During Exercise

Move slowly through three stages: scoot, plant, press. This sequence prevents the blood-pressure drop and dizziness that causes many exercise-related falls in older adults.

Step by step:

  1. Scoot to the front third of the chair seat.
  2. Plant both feet flat, hip-width apart, directly under or slightly behind your knees.
  3. Lean your chest forward over your toes ("nose over toes").
  4. Press through your heels and stand up, using the chair arms or thighs for a push if needed.
  5. Pause standing for 3-5 seconds before starting any movement, this lets blood pressure equalize.
  6. To sit: reverse the process. Feel the chair with the back of your legs before lowering.

Decision rule: If you feel dizzy standing up, sit back down immediately, breathe, and try again in 30 seconds. Never fight through lightheadedness.

Full-Body Chair and Standing Workouts for Seniors: Sample Routines

Here are two complete routines you can use today. Both are Chair and Standing Workouts for Seniors, Low-Impact Strength and Mobility When Getting Down Is Difficult in action.

Routine A: 20-Minute Seated Full-Body

  • Warm-up: seated marches + arm swings, 2 min
  • Seated leg extensions, 2 sets of 10 per leg[1]
  • Seated overhead press with light weights, 2 sets of 10
  • Seated bicep curls, 2 sets of 12
  • Seated trunk rotations, 2 sets of 10 per side[8]
  • Seated ankle circles + wrist circles, 8 each direction[8]
  • Cool-down: chest opener + slow breathing, 2 min

Routine B: 20-Minute Supported Standing

  • Warm-up: standing marches at chair, 2 min
  • Sit-to-stands, 2 sets of 8
  • Standing calf raises, 2 sets of 12
  • Standing side leg lifts, 2 sets of 10 per side
  • Standing hamstring curls, 2 sets of 10 per side
  • Wall push-ups, 2 sets of 8
  • Cool-down: standing chest opener + gentle sway, 2 min

Alternate A and B across the week for a balanced program.

FAQ

Q: Do I need a doctor's approval before starting?
A: Yes, if you have heart disease, uncontrolled blood pressure, recent surgery, or a history of falls. A quick clearance conversation is worth it.

Q: Can I do chair workouts if I use a wheelchair?
A: Absolutely. Most seated exercises transfer directly. Skip standing work and focus on resistance training and mobility.

Q: How heavy should my dumbbells be?
A: Start with 1-2 lb. If you can do 15 reps easily with perfect form, move up 1-2 lb. Most seniors work in the 2-8 lb range.

Q: Are YouTube chair workout videos safe?
A: Many are excellent, but confirm the instructor is certified in senior fitness (SilverSneakers, ACE Senior, or similar) and start with beginner-level content.[3][4]

Q: What if I get sore?
A: Mild soreness for 24-48 hours is normal for new exercisers. Sharp pain, swelling, or soreness lasting over 3 days means you overdid it, scale back.

Q: Can chair exercises replace walking?
A: They complement walking, not replace it. If you can walk safely, keep walking. Chair work fills gaps on bad-weather days or when joints flare.

Q: Is it too late to start at 80 or 90?
A: No. Strength gains have been documented in adults well into their 90s. Start smaller and progress slower, but start.

Q: How do I stay motivated?
A: Schedule sessions like appointments, track them on a paper calendar, and pair workouts with something you enjoy (music, a favorite show, a phone call).

Conclusion

Chair and standing workouts for seniors are one of the most reliable ways to preserve strength, balance, and independence when getting down to the floor isn't safe or realistic. The formula is simple: a sturdy chair, 4-5 short sessions per week, gradual added resistance, and supported standing work built in as balance improves.

Your next steps:

  1. Place a sturdy armless chair in a clear, well-lit space today.
  2. Do Routine A (seated full-body) this week, three times, 20 minutes each.
  3. Add Routine B (supported standing) in week two.
  4. Track progress with one simple metric: how many sit-to-stands you can do in 30 seconds.
  5. Reassess at week 6. Add weight, add a day, or add a new movement.

Consistency, not intensity, is what changes outcomes at this stage of life. Start smaller than you think you need to, and don't stop.

References

[1] Chair Exercises For Seniors – https://health.clevelandclinic.org/chair-exercises-for-seniors
[2] Chair Exercises For Seniors Boosting Strength Flexibility And Stamina – https://www.health.harvard.edu/exercise-and-fitness/chair-exercises-for-seniors-boosting-strength-flexibility-and-stamina
[3] Watch – https://www.youtube.com/watch?v=MmIpgD1hL30
[4] Watch – https://www.youtube.com/watch?v=mQLzNf8VOIc
[5] 7 Standing Exercises For Core Strength – https://www.silversneakers.com/blog/7-standing-exercises-for-core-strength/
[6] Standing Exercises For Seniors – https://eldercarealliance.org/blog/standing-exercises-for-seniors/
[7] Standing Exercises For Seniors – https://www.planetfitness.com/blog/articles/standing-exercises-for-seniors
[8] Chair Based Exercises – https://www.bhf.org.uk/informationsupport/heart-matters-magazine/activity/chair-based-exercises
[9] Chair Exercises For Seniors – https://www.lifeline.ca/en/resources/chair-exercises-for-seniors/
[10] Standing Exercises For Seniors – https://miravieseniorliving.com/lifestyle/standing-exercises-for-seniors/

Progressive Strength Training for Seniors: Building Muscle and Bone Density After 50 at Home

Progressive Strength Training for Seniors: Building Muscle and Bone Density After 50 at Home

Last updated: July 28, 2026

Quick Answer

Quick Answer

Progressive strength training for seniors means gradually increasing resistance, reps, or difficulty over weeks so your muscles and bones keep adapting. Adults over 50 can build meaningful muscle and improve bone density at home using bodyweight moves, resistance bands, and a few dumbbells, no gym needed. Aim for 2-3 sessions per week, hitting all major muscle groups, and add small load increases every 1-2 weeks [3][7].

)

Key Takeaways

  • Muscle growth is possible at any age. Studies show adults in their 60s, 70s, 80s, and even 90s can gain strength and lean mass with consistent resistance training [1][5].
  • Progression is the key ingredient. Doing the same 3-pound dumbbell curls forever won't build bone or muscle, the load must increase over time [3].
  • 2-3 sessions per week covering all major muscle groups is the ACSM 2026 target for older adults [3].
  • Heavy loads may build more strength than light ones for seniors who train safely with good form [3].
  • Bones respond to load. Weight-bearing and resistance exercise stimulate bone remodeling and can slow or reverse density loss [6].
  • Home training works. A pair of adjustable dumbbells, a resistance band, and a sturdy chair cover most needs.
  • Arthritis is not a stop sign. Modified strength training often reduces joint pain over time [9].
  • Expect visible strength gains in 6-12 weeks and measurable bone density changes over 6-12 months [1][8].

What is progressive strength training and how does it work for older adults?

Progressive strength training is a method where you steadily increase the demand on your muscles, through heavier weight, more reps, more sets, or harder variations, so your body keeps adapting. For older adults, this means starting at a comfortable baseline and adding a small challenge every 1-2 weeks.

The mechanism is simple: muscle and bone are living tissues that respond to stress. When you lift something slightly harder than last week, tiny signals tell your body to build more muscle fibers and lay down more bone [5][8].

How progression looks in practice:

  • Week 1: 10 chair squats with bodyweight
  • Week 3: 12 chair squats holding a gallon of water
  • Week 5: 10 squats holding a 10-lb dumbbell
  • Week 8: 10 squats holding two 10-lb dumbbells

Small, steady jumps beat huge leaps. This is the difference between exercise that maintains and exercise that builds.

Why is muscle and bone density important after age 50?

After 50, adults lose roughly 1-2% of muscle mass and 1% of bone density per year without intervention, a process called sarcopenia and osteopenia [4][5]. That loss compounds. By age 80, an untrained person may have lost 30-40% of their peak strength.

Why it matters:

  • Falls and fractures. Weak muscles and thin bones drive most senior injuries. A hip fracture at 75 carries a serious mortality risk within one year [6].
  • Independence. Getting off the toilet, climbing stairs, and carrying groceries all require leg and grip strength.
  • Metabolic health. More muscle means better blood sugar control and a higher resting metabolism [5].
  • Balance and posture. Strong back, hip, and core muscles keep you upright.

Direct answer: Muscle and bone density protect your ability to live independently, recover from illness, and avoid life-changing fractures. After 50, defending them is a health priority on par with blood pressure or cholesterol.

Can you build muscle after 50 without going to a gym?

Yes. Multiple studies confirm that adults over 50, and even over 80, build measurable muscle at home using bodyweight, bands, and light-to-moderate dumbbells [1][5]. Gyms offer variety, but they aren't required for the fundamentals.

What home training gives you:

  • No commute, no membership, no waiting for equipment
  • Privacy to learn form at your own pace
  • Consistency, which matters more than fancy machines

What you sacrifice: heavy barbell options and coached feedback. For most seniors, the trade is worth it, especially in the first 1-2 years, where progress comes fast on modest equipment.

Best home exercises for seniors to increase bone density

Bone responds best to weight-bearing and resistance exercise that loads the hip, spine, and wrist [6][8]. The following moves cover those areas and can be scaled from beginner to advanced.

Movement Bones loaded Beginner version Progression
Squat Hip, spine Chair sit-to-stand Goblet squat with dumbbell
Hip hinge / deadlift Hip, spine Hinge to countertop Kettlebell or dumbbell deadlift
Push-up Wrist, spine Wall push-up Incline then floor push-up
Row Spine, shoulder Band seated row Dumbbell bent-over row
Overhead press Spine, wrist Light dumbbell press Heavier standing press
Step-up Hip, spine 4-inch step 8-inch step with weight
Farmer's carry Spine, wrist, grip Two grocery bags Heavy dumbbells, 60+ seconds

Rule of thumb: Choose a weight that feels challenging by rep 8-10. Easy sets don't stimulate bone.

How often should seniors do strength training per week?

The 2026 ACSM guidance recommends 2-3 strength sessions per week for older adults, targeting all major muscle groups, with at least 48 hours between sessions for the same muscles [3]. The BBC's 2026 review of the research reached the same conclusion [7].

A workable weekly plan:

  • Monday: Full-body strength (30-40 min)
  • Wednesday: Full-body strength (30-40 min)
  • Friday: Full-body strength or a lighter mobility + balance day
  • Other days: Walking, gardening, or light cardio

Two sessions per week still delivers most of the benefit if three feels like too much. One session per week maintains but doesn't build.

)

Progressive strength training for seniors with arthritis or joint pain

Progressive strength training for seniors with arthritis or joint pain

Arthritis is not a reason to skip strength training, it's a reason to do it. Stronger muscles around a joint reduce load on the cartilage and often lower pain scores over time [9]. The rules just change slightly.

Adjustments that work:

  • Warm up longer. 5-10 minutes of easy movement before lifting.
  • Reduce range of motion. Half-squats before full squats.
  • Slower tempo. 3 seconds down, 1 second up, less jarring on joints.
  • Skip painful angles. If overhead pressing hurts the shoulder, try incline pressing instead.
  • Track pain, not just weight. Pain during the set that fades within 24 hours is usually fine. Pain that lingers 48+ hours means back off.

Decision rule: If a joint hurts sharply during a movement, stop and modify. If it aches mildly and settles quickly, continue with lighter load.

What equipment do I need for senior strength training at home?

You can start with almost nothing. A full home setup for progressive strength training under $200 typically includes:

  • A sturdy chair (for squats, rows, step-ups)
  • A set of resistance bands with different tensions, $20-40
  • Adjustable dumbbells or a few pairs (5, 10, 15, 20 lb), $80-200
  • A yoga or exercise mat, $20
  • Optional: a light kettlebell (10-20 lb) for hip hinges, $30-50

Progression path: Bodyweight → resistance bands → light dumbbells → heavier dumbbells or kettlebell. Adjustable dumbbells are the single best purchase because they grow with you for years.

Skip: vibration plates, ab rollers, ThighMasters, and anything advertised on late-night TV.

How long does it take to see results from strength training over 50?

Results come in stages, and each stage has a rough timeline based on published research [1][5][8]:

  • Weeks 1-4: Nervous system adaptations. You feel stronger and more coordinated, but muscles haven't grown much yet.
  • Weeks 6-12: Visible muscle gains begin. Clothes fit differently. Everyday tasks feel easier.
  • Months 3-6: Meaningful strength gains, often 30-50% on key lifts for beginners.
  • Months 6-12: Bone density changes become measurable on DEXA scans in many people [6][8].
  • Year 1+: Body composition, balance, and functional independence shift dramatically.

The trap: quitting at week 3 because the mirror hasn't changed. Trust the timeline.

Is progressive strength training safe for seniors with osteoporosis?

Yes, with modifications. The 2024 NOGG osteoporosis guideline explicitly endorses progressive resistance training as part of fracture prevention, provided form is good and spinal flexion under load is avoided [6].

Safe for osteoporosis:

  • Squats, hip hinges with neutral spine
  • Rows, presses, carries
  • Slow, controlled tempo
  • Weight-bearing walking

Avoid or modify:

  • Loaded spinal flexion (weighted crunches, toe-touches)
  • High-impact jumping unless cleared by a doctor
  • Twisting under heavy load

Direct answer: Progressive strength training is one of the most recommended interventions for osteoporosis when performed with neutral spine and gradual load progression. Get clearance from your doctor if you've had a recent fracture or a DEXA T-score below -3.0.

Common mistakes seniors make when starting strength training

The five most frequent errors, each of which limits results or increases injury risk:

  1. Staying too light forever. 2-pound dumbbells don't stimulate bone or build muscle after the first month.
  2. Skipping legs. Upper-body-only routines miss the biggest muscle groups and the bones most likely to fracture.
  3. No warm-up. Cold muscles and stiff joints don't tolerate load well.
  4. Ego lifting. Jumping weight too fast is how injuries happen. Add 2.5-5 lb at a time, not 20.
  5. Inconsistent schedule. Training hard for two weeks then skipping a month resets progress.

Bonus mistake: Not tracking anything. A simple notebook with date, exercise, weight, and reps beats memory every time.

Progressive strength training vs regular exercise for seniors

Regular exercise (walking, gardening, yoga) is valuable but doesn't build muscle or bone the way resistance training does. The mechanisms are different [3][5][8].

Factor Walking / cardio Progressive strength training
Heart health Excellent Moderate
Muscle building Low High
Bone density Modest High
Fall prevention Moderate High
Metabolic health Good Very good
Time required 30+ min 30-40 min, 2-3x/week

The verdict: Do both. Walking daily plus strength training 2-3x per week covers the biggest health drivers for adults over 50.

Can seniors build muscle without weights at home?

Can seniors build muscle without weights at home?

Yes, especially in the first 6-12 months. Bodyweight and band-only routines build significant muscle in previously untrained older adults [1][7]. The catch: progression eventually requires more resistance.

Bodyweight progression examples:

  • Squats: chair-assisted → bodyweight → single-leg to a chair → pistol squats
  • Push-ups: wall → countertop → incline → floor → decline
  • Rows: band rows → inverted rows under a sturdy table
  • Hinges: hip hinge to wall → single-leg deadlift

Once bodyweight variations become too easy for 15+ reps, adding external load (dumbbells, bands, a loaded backpack) is the fastest way to keep progressing.

How to progress safely in strength training as a senior

Progression is the whole game. The safest method for older adults is called double progression: hit the top of your rep range, then add weight next session.

The double-progression rule:

  1. Pick a rep range, e.g., 8-12 reps.
  2. Start with a weight you can lift for 8 reps with good form.
  3. Each session, try to add 1 rep.
  4. When you hit 12 reps for all sets, increase the weight next session and drop back to 8 reps.
  5. Repeat.

Weekly progression checklist:

  • Did I hit all planned sets and reps? ✓
  • Was form solid throughout? ✓
  • Did I recover well between sessions? ✓
  • No lingering joint pain? ✓

If all four are yes, add load. If any is no, hold steady for another week.

Best beginner strength training program for 60 year olds at home

A simple, effective full-body program for 3 days per week:

Workout A (Mon/Fri):

  • Chair squats or goblet squats, 3 sets of 8-12
  • Wall or incline push-ups, 3 sets of 8-12
  • Band or dumbbell rows, 3 sets of 8-12
  • Farmer's carry, 3 rounds of 30 seconds

Workout B (Wed):

  • Dumbbell deadlifts (hip hinge), 3 sets of 8-10
  • Overhead press (light dumbbells), 3 sets of 8-12
  • Step-ups onto a low step, 3 sets of 8 per leg
  • Dead bug or bird dog, 3 sets of 8 per side

Warm up with 5 minutes of easy walking and arm circles. Cool down with 5 minutes of gentle stretching. Log every session. Add load using double progression.

)

FAQ

Is it too late to start strength training at 70 or 80?
No. Research documents meaningful muscle and strength gains in adults into their 90s [1][5]. Starting later means slower progress, but the direction is still up.

Should seniors lift heavy weights?
When form is solid, moderately heavy loads (challenging by rep 8-10) build more strength than very light ones [3]. Start light, progress gradually, and consider heavier work once you have 3-6 months of consistent training.

How much protein do seniors need to build muscle?
Most research supports 1.0-1.2 grams per kilogram of bodyweight daily for active older adults, spread across meals [4]. That's higher than the standard RDA. Talk to your doctor if you have kidney concerns.

Can strength training reverse osteoporosis?
It can slow, stop, and sometimes modestly reverse bone density loss, especially when combined with adequate calcium, vitamin D, and medical treatment where prescribed [6][8].

Is soreness normal?
Mild soreness for 1-2 days after a new exercise is normal. Sharp pain during a set, or soreness lasting 4+ days, means you did too much.

Do I need a trainer to start?
Not required, but 2-3 sessions with a qualified trainer or physical therapist to check form is a smart investment for anyone new to lifting.

What if I have high blood pressure?
Most people with controlled blood pressure can strength train safely. Avoid holding your breath during lifts, exhale on the effort. Get clearance if your BP is uncontrolled.

Can I combine strength training with walking?
Yes, and you should. Walking on non-lifting days works well.

Conclusion

Progressive strength training for seniors is the closest thing to a fountain of youth that research has produced. Two or three short sessions per week, bodyweight to bands to dumbbells, will rebuild muscle, defend bone, sharpen balance, and protect independence for decades.

Your next steps:

  1. This week: pick a chair, do 3 sets of 8 sit-to-stands, then 3 sets of 8 wall push-ups. That's your baseline.
  2. Order a resistance band and a pair of adjustable dumbbells if you don't have them.
  3. Schedule three 30-minute sessions on your calendar for next week, treat them like doctor's appointments.
  4. Log every session. Track weight and reps.
  5. Add a rep or a pound whenever the previous session felt manageable.

Consistency beats intensity. Show up twice a week for a year, and you'll be stronger at 65 than you were at 55.

References

[1] Build Muscle After 60 – https://healthymag.org/2026/07/08/build-muscle-after-60/

[3] Resistance Training Guidelines Update 2026 – https://acsm.org/resistance-training-guidelines-update-2026/
[4] As A Doctor I Recommend These 4 Things To Reduce Age Related Muscle Loss – https://www.sandiegouniontribune.com/2026/07/28/as-a-doctor-i-recommend-these-4-things-to-reduce-age-related-muscle-loss/
[5] Healthspan Recognizing The Rewards Of Resistance Training – https://www.humangood.org/about/news-room/healthspan-recognizing-the-rewards-of-resistance-training
[6] NOGG Guideline 2024 – https://www.nogg.org.uk/sites/nogg/download/NOGG-Guideline-2024.pdf
[7] How To Start Strength Training To Stay Healthier As You Age – https://www.bbc.com/future/article/20260612-how-to-start-strength-training-to-stay-healthier-as-you-age
[8] PMC10345999 – https://pmc.ncbi.nlm.nih.gov/articles/PMC10345999/
[9] Senior Workouts – https://www.healthline.com/health/everyday-fitness/senior-workouts
[10] Strength Training Older Adults – https://www.tuftsmedicarepreferred.org/healthy-living/strength-training-older-adults

Healthspan vs. Lifespan: Strength and Mobility Training After 50 to Stay Independent Longer

Healthspan vs. Lifespan: Strength and Mobility Training After 50 to Stay Independent Longer

Last updated: July 26, 2026

Editorial landscape split-screen conceptual illustration contrasting 'healthspan' and 'lifespan': left side shows a vibrant

Quick Answer

Lifespan is how long you live. Healthspan is how long you live well, without disability or dependence. After 50, the fastest way to widen the gap in your favor is progressive strength training two to three days per week, paired with daily mobility work. Recent 2026 guidance calls resistance training "mandatory" for healthspan, with a sweet spot of roughly 90-120 minutes per week [2][7].

Key Takeaways

  • Lifespan measures years lived. Healthspan measures years lived independently, and the two can differ by a decade or more.
  • Strength training is the single biggest lever for preserving independence after 50, according to 2026 fitness and longevity research [2][7].
  • Aim for 90-120 minutes of strength work per week, split across 2-3 sessions, plus 150 minutes of moderate cardio [7][10].
  • Sarcopenia (age-related muscle loss) begins in your 30s and accelerates after 60, resistance training is the proven counter [8].
  • Mobility work daily, even 10 minutes, protects joints and prevents the stiffness that leads to falls.
  • Falls are the leading cause of injury death in adults over 65, and balance-focused training cuts fall risk meaningfully [4].
  • It's not too late at 60, 70, or 80, muscle responds to training at every age studied [5].
  • Functional, daily-life movements (squat, hinge, carry, push, pull, rotate) matter more than machines.

What's the difference between healthspan and lifespan?

Lifespan is the total number of years you live. Healthspan is the number of those years spent in good health, mobile, cognitively sharp, and independent. In the U.S., the average person lives roughly 10 years longer than they stay healthy, meaning the last decade often involves disability, chronic disease, or loss of independence [1].

The goal of training after 50 isn't to add years to the end of life. It's to compress the frail years down to as few as possible. Strength and mobility work is the most reliable tool for doing that [2].

Quick example: Two 55-year-olds both live to 85. One spends the last 12 years using a walker, dependent on family. The other hikes with grandkids until 82 and lives alone comfortably until the end. Same lifespan. Very different healthspan.

Why is strength training important after 50?

Because muscle is the organ of independence. After 50, adults lose roughly 1-2% of muscle mass per year and up to 3% of strength annually if they don't train, a condition called sarcopenia [8]. Weak muscles mean weaker bones, worse balance, slower metabolism, and a higher risk of falls, fractures, and hospitalization.

Resistance training reverses much of this. It's the only intervention that consistently rebuilds muscle, improves bone density, and preserves the fast-twitch fibers you need to catch yourself when you trip [5][8]. In 2026 healthspan guidance, strength training moved from "recommended" to "mandatory", treated the same way clinicians treat blood pressure control [2][7].

What strength training protects:

  • Muscle mass and power (power fades faster than strength and matters more for falls)
  • Bone density, reducing fracture risk
  • Insulin sensitivity and metabolic health
  • Cognitive function, through myokines released during exercise
  • Confidence, knowing your body can handle stairs, groceries, and grandkids

How much strength and mobility training do you need to stay independent?

The current sweet spot from 2026 longevity research is 90-120 minutes of strength training per week, spread across 2-3 sessions, plus 150 minutes of moderate cardio and daily mobility work of 10-15 minutes [7][10]. International guidelines for older adults align: at least two strength sessions per week that hit all major muscle groups, plus balance work [10].

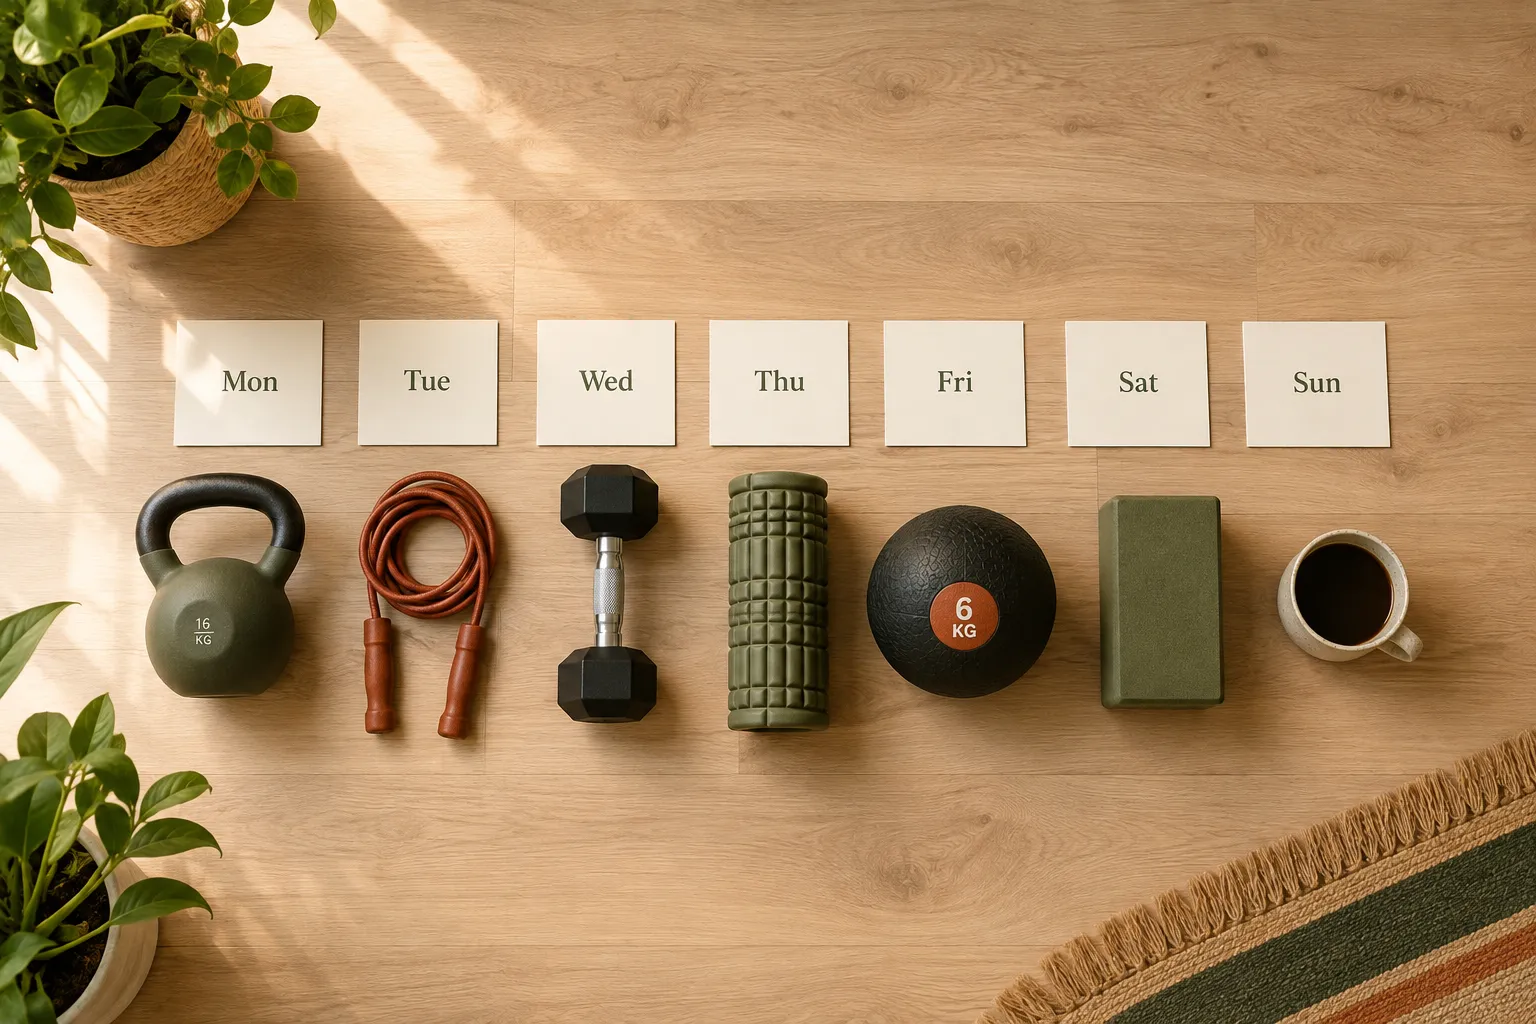
A realistic weekly template:

Day Focus Time
Monday Full-body strength 40 min
Tuesday Walk + mobility 30 + 10 min
Wednesday Rest or easy walk 20 min
Thursday Full-body strength 40 min
Friday Walk + balance work 30 + 10 min
Saturday Optional third strength or hike 30-60 min
Sunday Mobility and stretch 15 min

You don't need a gym. A single kettlebell, a set of resistance bands, a sturdy chair, and floor space are enough to run this program for years.

How much strength and mobility training do you need to stay independent?

Can you improve healthspan at 60, or is it too late?

It's not too late. Studies of adults starting resistance training in their 60s, 70s, and even 90s show meaningful gains in muscle mass, strength, walking speed, and stair-climbing ability within 8-12 weeks [4][5]. The relative gains are often larger in older beginners than in younger trained people, because there's more room to improve.

The honest caveat: progress is slower, recovery takes longer, and injury risk is higher if you skip the ramp-up. Start light, add load gradually, and prioritize form over weight for the first two to three months.

Decision rule: If you can stand up from a chair without using your hands, you have enough baseline strength to start a beginner program at home. If you can't, start with sit-to-stands from a higher surface and build from there.

What exercises prevent falls in older adults?

Falls are prevented by a mix of lower-body strength, single-leg balance, and reactive power, the ability to move fast when you stumble. The exercises with the strongest evidence for fall prevention include:

  1. Sit-to-stand from a chair, trains the hip and thigh muscles you use every day
  2. Step-ups onto a low box or bottom stair, builds single-leg strength
  3. Farmer's carries (walking with weights in each hand), trains grip, core, and gait stability
  4. Single-leg balance holds, 30 seconds per leg, progress to eyes closed
  5. Heel-to-toe walking in a straight line
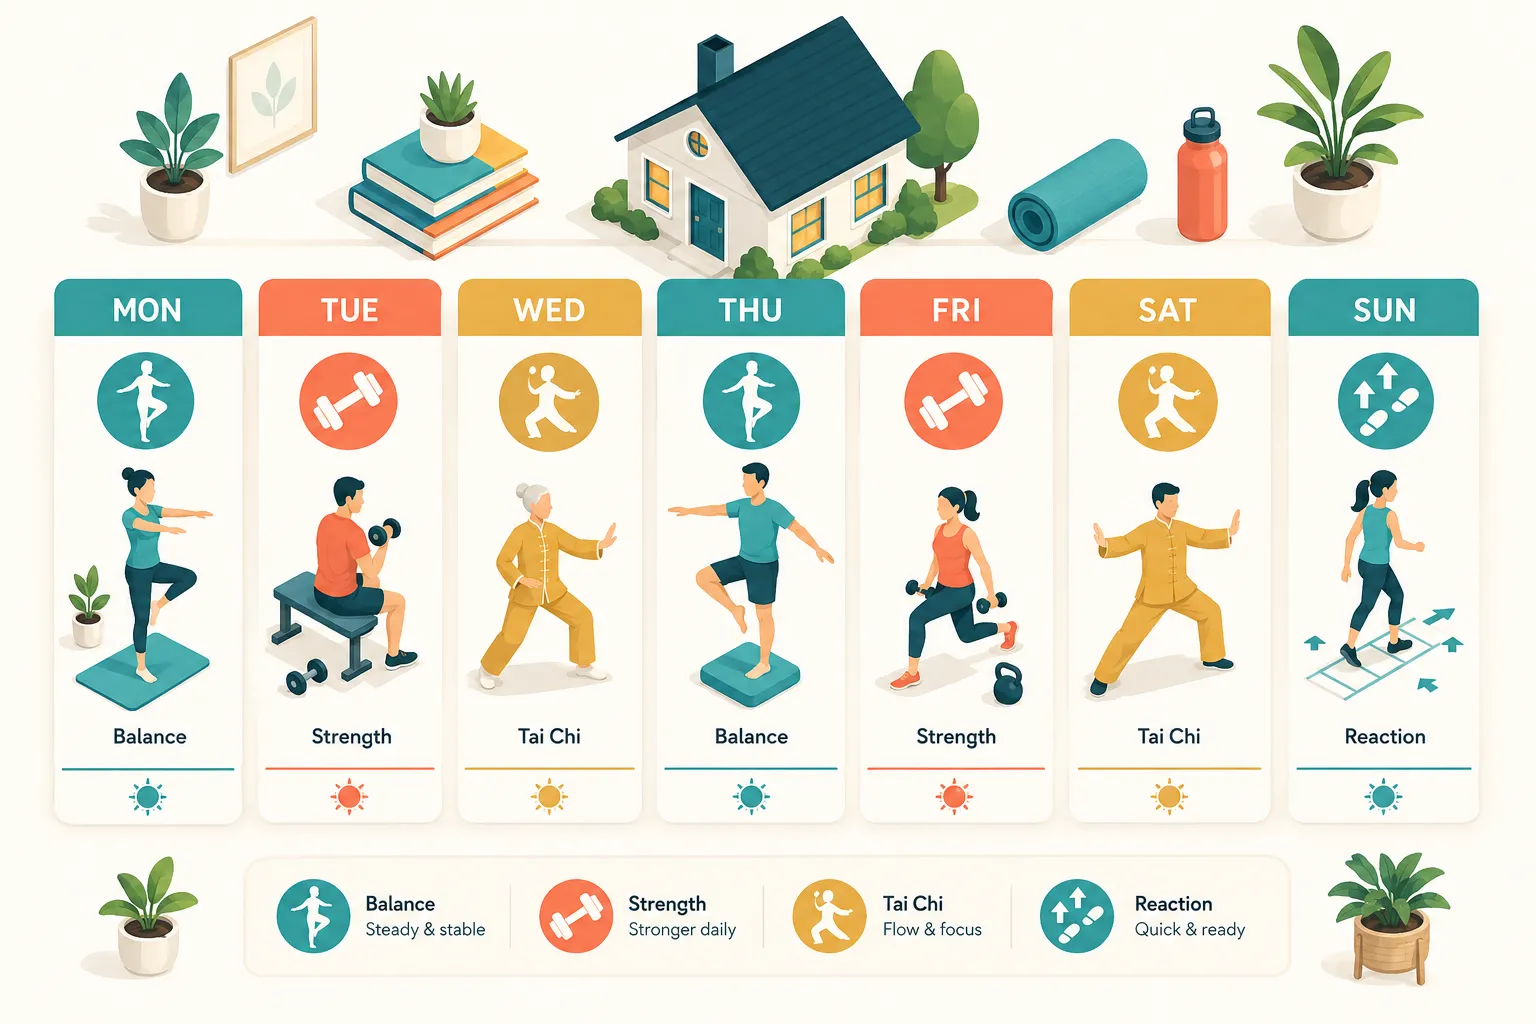
  6. Tai chi or slow controlled squats, proven to reduce fall rates in randomized trials [4]
  7. Loaded hip hinges (deadlifts with light weight), trains the posterior chain that catches you when you trip

Aim to include at least one balance-focused movement in every session.

Healthspan training vs. regular gym workouts for seniors

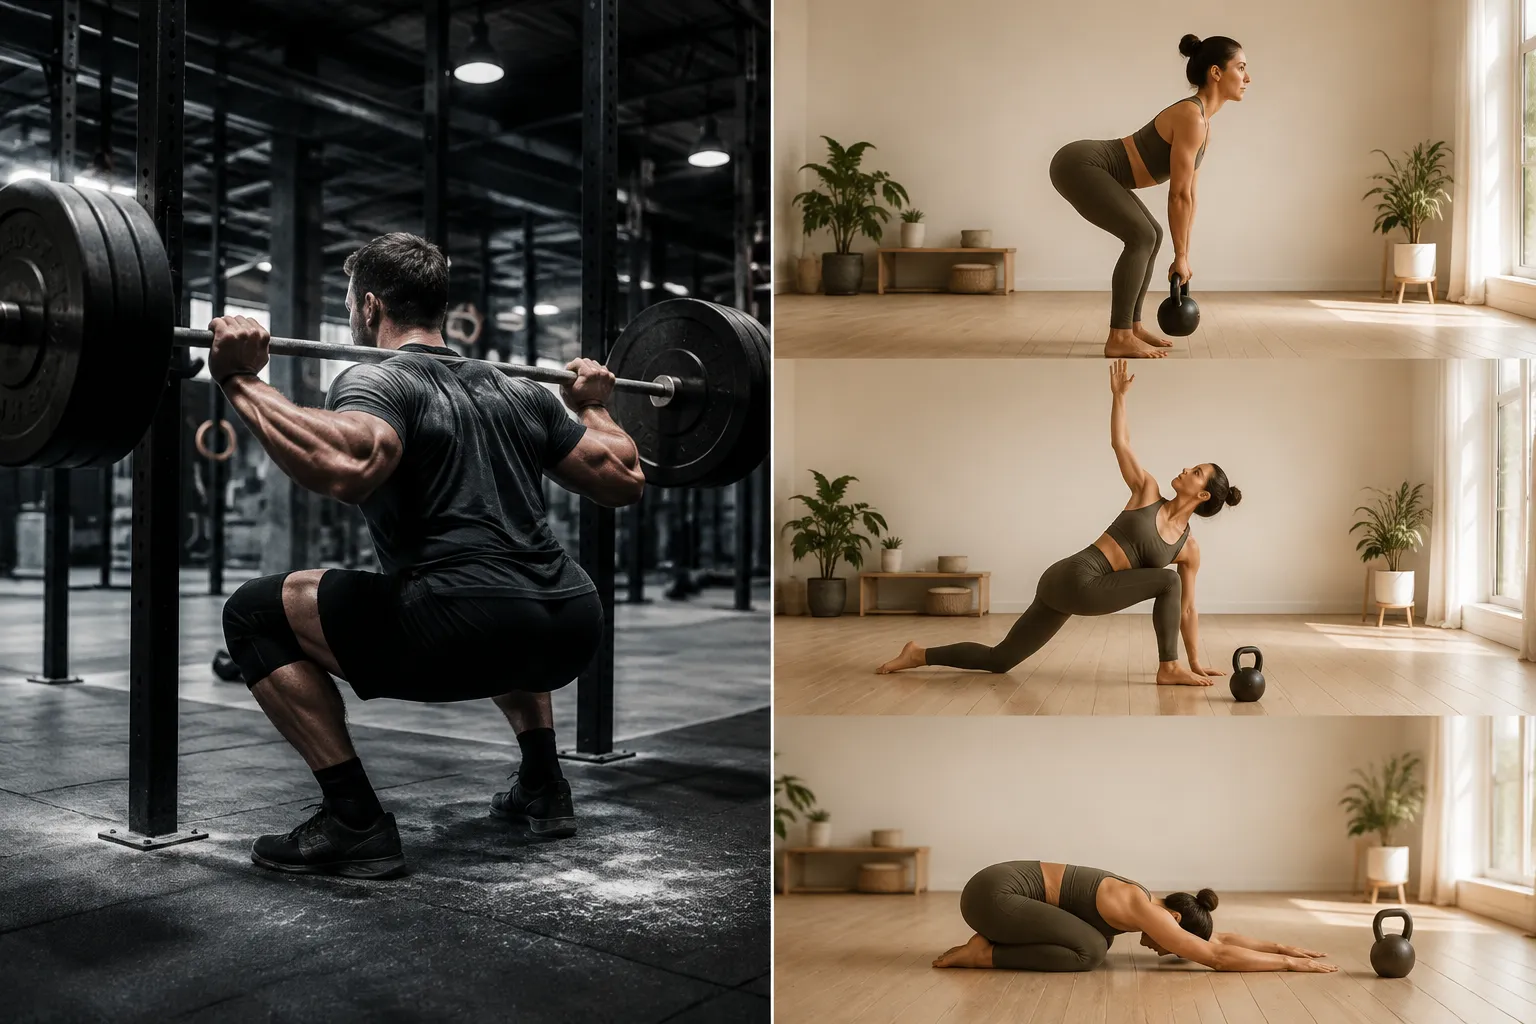
Healthspan training is built around functional movement patterns you use in daily life: squatting to a chair, hinging to pick something up, carrying groceries, pushing a door open, pulling yourself out of a pool. Regular gym workouts often isolate muscles on machines, bicep curls, leg extensions, seated chest press, which build size but transfer poorly to real life [7].

Choose healthspan-style training if you want to: stay independent, prevent falls, keep hiking or gardening, play with grandchildren, and reduce injury risk.

Choose bodybuilding-style training if you want to: maximize muscle size, look a certain way, or compete.

The two overlap, but the emphasis matters. A 70-year-old who can deadlift a suitcase, carry it up stairs, and get down to the floor and back up has more functional capacity than one with big arms and a sore back.

How often should you do strength and mobility work after 50?

Strength: 2-3 sessions per week, with at least 48 hours between sessions targeting the same muscles. Mobility: daily, in short 10-minute doses [7][10]. More isn't better once you cross about 150 minutes of strength work per week, recovery becomes the bottleneck [7].

A simple minimum-effective-dose plan:

  • Two 30-minute strength sessions per week (full body)
  • Ten minutes of mobility on non-lifting days
  • One longer walk or hike on the weekend
  • Five to ten minutes of balance work sprinkled through the week

That's under three hours total. It's enough to meaningfully shift your healthspan trajectory.

What happens if you don't train for strength and mobility as you age?

You lose muscle, bone, and balance on a predictable timeline. By 80, an untrained adult has typically lost 30-40% of the muscle mass they had at 30, and grip strength drops in parallel with overall mortality risk [8][9]. The functional consequences:

  • Difficulty rising from a chair or toilet without assistance
  • Higher fall risk, one in four adults over 65 falls each year [4]
  • Loss of driving independence as reaction time and neck mobility decline
  • Hospitalizations after minor injuries that a stronger body would shrug off
  • Cognitive decline accelerates in parallel with physical decline

None of this is inevitable. It's the default trajectory without training. Resistance work bends the curve.

"Muscle is the currency of aging. Spend it wisely, and you buy back years of independence.", a summary of the current healthspan consensus [2][7]

Is healthspan training safe if you have arthritis or joint pain?

Yes, and it's often the best thing you can do for joint pain. Strength training reduces arthritis symptoms by building the muscle that supports and stabilizes the joint [5]. The key is smart programming: pain-free range of motion, gradual loading, and choosing exercises that don't aggravate the specific joint.

Arthritis-friendly swaps:

  • Painful squats → box squats to a higher surface, or wall sits
  • Painful overhead press → landmine press at an angle
  • Painful running → cycling, swimming, or fast walking
  • Painful floor work → standing or elevated variations

When to consult a professional first: recent joint replacement, active flare, unexplained pain, uncontrolled blood pressure, or any cardiac symptoms. A physical therapist or a certified trainer with older-adult experience can adapt any program.

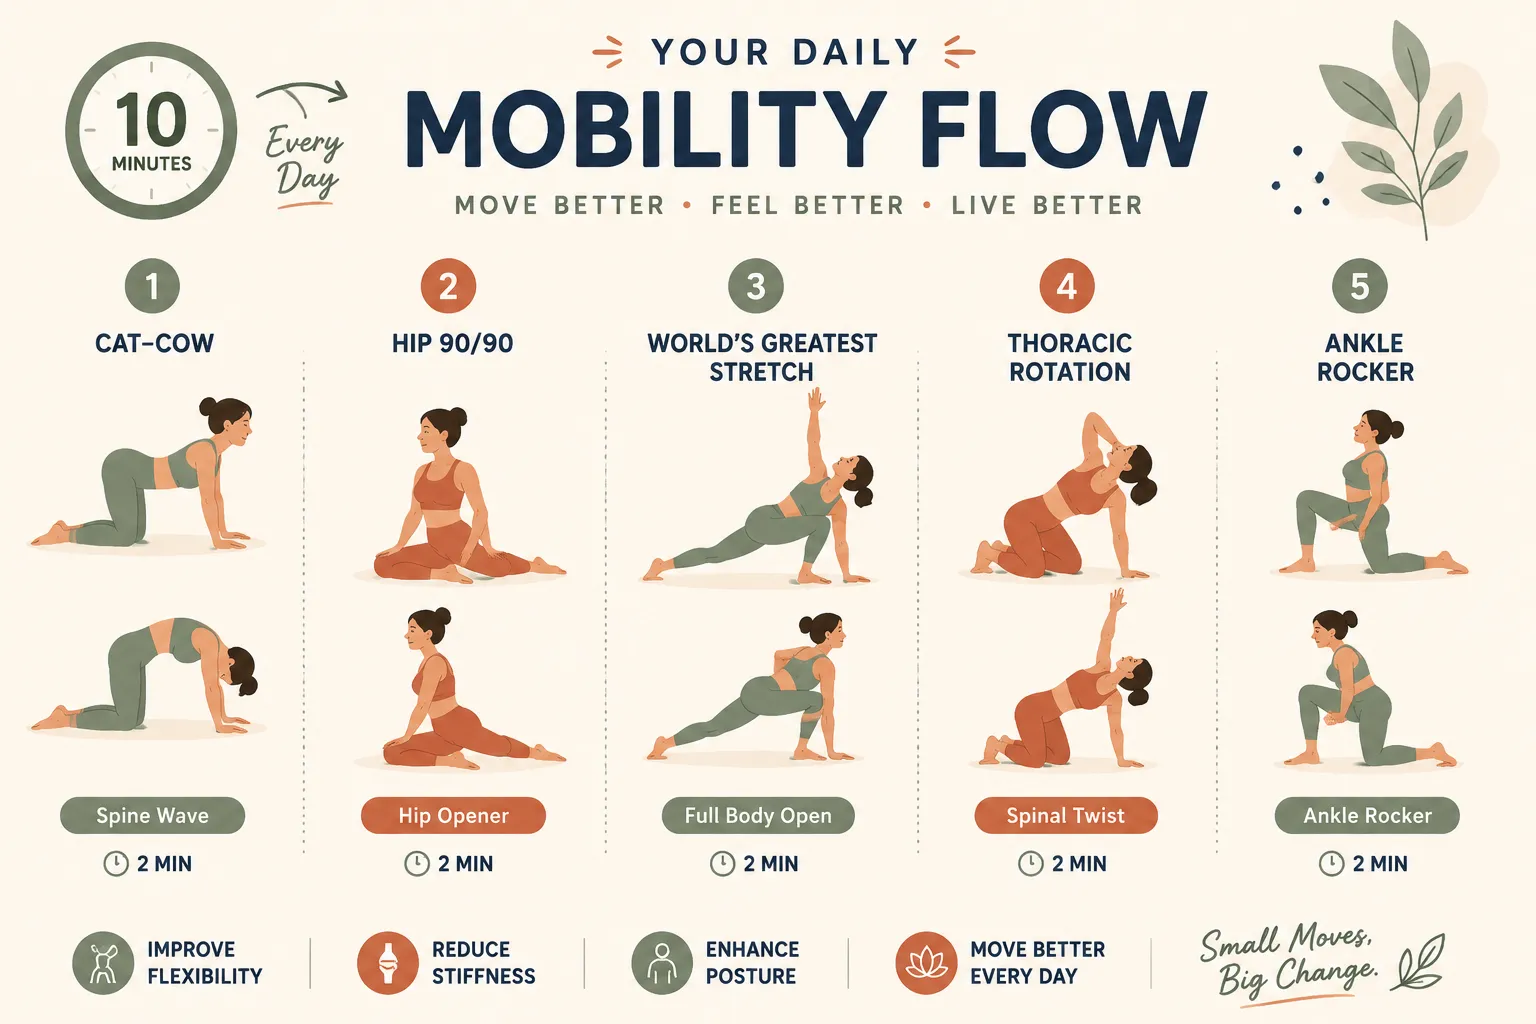
Best mobility exercises for people over 50 at home

Mobility work restores the range of motion that stiffens with age and desk work. These seven movements cover the biggest problem areas and take under 10 minutes:

  1. Cat-cow, 8 slow reps, spine flexion and extension
  2. World's greatest stretch, 3 per side, hips and thoracic spine
  3. 90/90 hip switches, 8 per side, hip rotation
  4. Doorway pec stretch, 30 seconds per side, chest and shoulders
  5. Wall slides, 10 reps, shoulder and upper-back mobility
  6. Ankle circles and calf stretches, 30 seconds per side (ankle mobility drives balance)
  7. Deep squat hold, build up to 60 seconds, holding a support if needed

Do these daily. Consistency beats intensity for mobility.

Best mobility exercises for people over 50 at home

How long does it take to notice improvements in strength and balance?

Most beginners notice better balance and easier stairs within 2-4 weeks. Measurable strength gains show up around 6-8 weeks. Visible muscle changes and meaningful bone-density shifts take 3-6 months of consistent training [5][8].

Realistic milestones for a 55-year-old starting from scratch:

  • Week 2: Getting off the floor feels easier
  • Week 4: Stairs no longer require the handrail
  • Week 8: Groceries feel lighter, posture improves
  • Month 3: Can perform 10 full squats without a chair, hold single-leg balance 30 seconds
  • Month 6: Deadlifting your bodyweight becomes realistic; sleep and energy noticeably better

The gains compound. The person who trains at 55 arrives at 75 with a completely different body than the one who didn't.

Who should not do strength training after 50?

Very few people. The contraindications are narrow: uncontrolled high blood pressure, unstable cardiovascular disease, recent surgery without medical clearance, active infection, or acute injury [5]. Even in most of these cases, modified training is possible and beneficial once cleared.

Talk to your doctor before starting if you have:

  • Recent heart attack, stroke, or heart surgery
  • Uncontrolled diabetes or blood pressure
  • Advanced osteoporosis with recent fractures
  • Balance disorders causing frequent falls
  • Chronic pain that isn't diagnosed

For nearly everyone else, the risk of not training is higher than the risk of training carefully.

Common mistakes people make with senior fitness programs

The mistakes are predictable, and avoiding them is most of the battle:

  • Going too light forever. Muscles adapt to challenge. If your weights never get heavier, neither do you.
  • Skipping the lower body. The legs and glutes drive independence. Upper-body-only routines miss the point.
  • Cardio-only fitness. Walking is great but doesn't build or preserve muscle on its own [8].
  • No progression plan. Doing the same three exercises for a year produces one year of the same body.
  • Ignoring balance work. Falls happen because balance isn't trained, not because legs are weak.
  • Copying young-athlete programs. Recovery needs are different after 50. Two hard sessions plus mobility beats five mediocre sessions.
  • Fearing soreness. Mild muscle soreness is normal and safe. Sharp joint pain is not.

Does healthspan training really help you stay independent longer?

Yes. Multiple long-term studies show that adults with higher muscle strength, grip strength, and functional capacity live more years independent of assistance and have lower rates of nursing-home admission [4][9]. The 2026 fitness research consensus treats functional movement capacity, sit-to-stand, gait speed, grip strength, as a vital sign of healthspan, on par with blood pressure [7].

The mechanism is straightforward: stronger muscles mean fewer falls, faster recovery from illness, better metabolic health, and more reserve capacity when something goes wrong. It's not a guarantee, but it shifts the odds significantly.

FAQ

Is it safe to lift heavy weights after 60?
Yes, with proper form and gradual progression. "Heavy" is relative to your current strength, challenging weight for you, not for a 25-year-old. Studies show adults in their 80s and 90s safely doing progressive resistance training [5].

Do I need a personal trainer to start?
Not required, but 3-6 sessions with a qualified trainer can prevent months of form mistakes. Look for someone certified in older-adult fitness (NSCA, ACSM, or similar credentials).

Can I combine strength and cardio in one session?
Yes. Strength first, then cardio, for the best strength outcomes. Or alternate days if you have time.

How much protein do I need?
Most healthspan researchers recommend 1.2-1.6 grams per kilogram of bodyweight daily for adults over 50 doing resistance training, spread across meals [8].

What if I have osteoporosis?
Strength training is one of the best interventions for osteoporosis, but exercise selection matters. Avoid heavy spinal flexion and get guidance from a physical therapist or trainer familiar with the condition.

Is walking enough?
Walking is essential but not sufficient. It maintains cardiovascular health but doesn't build the muscle mass and power needed to prevent falls and preserve independence [8].

How do I know if I'm progressing?
Track sets, reps, and weight in a notebook or app. Also test yourself monthly: how many sit-to-stands in 30 seconds, how long you can balance on one leg, how fast you can walk 400 meters.

Should I train through joint pain?
No sharp pain, ever. Mild stiffness that eases as you warm up is normal. Pain that gets worse during or after a set means change the movement.

Conclusion: Your next steps

Healthspan is trainable. The compounding effect of 30 minutes, three times per week, over years, is the difference between an independent 80-year-old and a dependent one. Start this week, not next month.

Do this in the next seven days:

  1. Book a check-in with your doctor if you haven't exercised in years or have a chronic condition.
  2. Pick two 30-minute windows on your calendar this week and label them "strength."
  3. Buy or borrow one kettlebell (15-25 lb for most beginners) and a set of resistance bands. Total cost under $60.
  4. Learn five foundational movements: goblet squat, hip hinge, farmer's carry, chair sit-to-stand, and doorway row. YouTube tutorials from certified trainers are fine.
  5. Do a 10-minute mobility routine daily, starting tomorrow morning.
  6. Track something measurable: how many sit-to-stands in 30 seconds. Retest monthly.

The goal isn't to become an athlete. It's to stay the person who carries their own groceries, plays on the floor with grandchildren, and travels without help, for as many years as possible. Strength and mobility training after 50 is the most reliable path we have.

References

[1] Healthspan Recognizing The Rewards Of Resistance Training – https://www.humangood.org/about/news-room/healthspan-recognizing-the-rewards-of-resistance-training
[2] Is Strength Training The Key To Your Health Span – https://www.bch.org/latest-news/2026/february/is-strength-training-the-key-to-your-health-span/
[4] PMC12182867 – https://pmc.ncbi.nlm.nih.gov/articles/PMC12182867/
[5] Resistance Training and the Older Adult – https://bpb-us-e2.wpmucdn.com/websites.umass.edu/dist/a/2523/files/2009/07/resistancetrainingandtheOlderAdult.pdf
[7] Fitness Research 2026 Makes Movement A Healthspan Test – https://www.pagalishor.in/articles/fitness-research-2026-makes-movement-a-healthspan-test
[8] Combating Sarcopenia With Exercise And Protein – https://www.gethealthspan.com/research/article/combating-sarcopenia-with-exercise-and-protein
[9] Physical function and healthspan – https://www.sciencedirect.com/science/article/pii/S1279770723007881
[10] Resistance Training By The Numbers – https://www.health.harvard.edu/healthy-aging-and-longevity/resistance-training-by-the-numbers

Active Aging Workout Plans: How Multi-Component Programs Cut Fall Risk for Older Adults

Active Aging Workout Plans: How Multi-Component Programs Cut Fall Risk for Older Adults

Last updated: July 25, 2026

Quick Answer

Active aging workout plans that combine strength, balance, mobility, and aerobic training can reduce falls in older adults by roughly 23-34% compared with no exercise or single-focus routines, according to recent Cochrane and 2025 meta-analyses [1][7]. The most effective programs run 2-3 sessions per week for at least 12 weeks, target the legs and trunk, and include progressive balance challenges. Home-based versions work when they follow the same structure as supervised programs.

Key Takeaways

  • Multi-component programs beat single-focus workouts for fall prevention, especially when balance training is dosed at 3+ hours per week [1][5].
  • Falls drop by about 23% in community-dwelling adults 65+ who follow structured exercise programs with balance and strength components [7].
  • Three sessions per week, 45-60 minutes each, is the sweet spot for most older adults training at home.
  • Improvements in balance and gait appear in 8-12 weeks; fall-rate reductions typically show at 6+ months [4].
  • Frailty is not a disqualifier. Chair-based and seated-progression versions of active aging programs are safe for pre-frail and frail adults with clearance [6].
  • Cost ranges from free (NIH Go4Life, CDC STEADI) to $15,$40/month for guided apps or community classes.
  • The biggest mistakes are skipping the balance component, using weights that are too light, and stopping after 4-6 weeks before adaptations kick in.

Key Takeaways

What is active aging and why does it matter for older adults?

Active aging is a framework, endorsed by the WHO, that treats physical activity as the central lever for maintaining independence, cognition, and function after 60. It matters because falls are the leading cause of injury-related death in adults 65+, and roughly one in four older adults falls each year in the United States.

Multi-component active aging workout plans directly attack the modifiable risk factors: weak legs, poor balance, stiff hips and ankles, and slow reaction time. Unlike a walking-only routine, they train the neuromuscular systems that actually stop a stumble from becoming a fall [1].

Who benefits most: community-dwelling adults 60+, people recovering from a recent fall, adults with early sarcopenia, and anyone whose doctor has mentioned "deconditioning."

How do multi-component workout programs reduce fall risk?

Multi-component programs cut fall risk because they train the exact systems that fail during a near-fall: lower-body force production, single-leg stability, ankle mobility, and reactive stepping. A 2025 systematic review comparing multi-component vs. single-component training found multi-component programs consistently outperformed strength-only or balance-only interventions on fall rate and fall-related injuries [5].

The mechanism is layered:

  1. Strength work rebuilds the quadriceps, glutes, and calves that generate the force needed to catch yourself.
  2. Balance training sharpens the vestibular and proprioceptive reflexes that fire in the 200-400 milliseconds you have to recover from a trip.
  3. Mobility work restores ankle dorsiflexion and hip extension, so your foot actually clears the carpet edge.
  4. Aerobic conditioning keeps you from fatiguing on stairs or long walks, when most falls happen.

Cochrane-level evidence puts the fall reduction from well-designed exercise programs at around 23% for fall rate and 15% for the number of people who fall [7]. Programs that include 3+ hours per week of balance-focused work show the largest effect [1].

"Exercise is the single most effective single intervention for reducing falls in community-dwelling older adults.", summary finding, Cochrane review of exercise for fall prevention [7]

What exercises are included in active aging programs?

Effective active aging workout plans include four exercise categories, done in most sessions. Here's what each looks like in practice:

Strength (lower body priority)

  • Sit-to-stands from a chair (progress to one-legged)
  • Step-ups onto a low platform
  • Wall or counter push-ups
  • Hip hinges with a light dumbbell or kettlebell
  • Calf raises, then single-leg calf raises

Balance (progressive challenge)

  • Feet-together stand → semi-tandem → tandem → single-leg
  • Weight shifts and controlled reaches
  • Heel-to-toe walking along a line
  • Standing on a folded towel or foam pad (once safe)
  • Reactive stepping drills (step in response to a cue)

Mobility and flexibility

  • Ankle circles and calf stretches
  • Hip flexor stretch (kneeling or supported)
  • Thoracic rotations in a chair
  • Cat-cow or seated cat-cow

Aerobic

  • Brisk walking, 20-30 minutes
  • Stationary cycling
  • Water walking or aquatic classes

A typical 45-minute session covers all four, with roughly 20 minutes of strength, 15 minutes of balance, 5 minutes of mobility, and either a separate aerobic day or 10 minutes bolted onto the session.

How often should seniors do active aging workouts per week?

Most evidence supports 2-3 sessions per week of combined strength and balance work, plus 150 minutes per week of moderate aerobic activity, this matches WHO and ACSM guidance and is the dose used in the trials showing the biggest fall-risk reductions [4][7].

Sample weekly template for adults 60+ training at home

Day Focus Duration
Monday Strength + balance 45 min
Tuesday Brisk walk 30 min
Wednesday Balance + mobility 30 min
Thursday Brisk walk or cycling 30 min
Friday Strength + balance 45 min
Saturday Longer walk or aquatic class 40 min
Sunday Rest or gentle mobility 15 min

Decision rule: If you're brand new, start with 2 combined sessions plus 2 walks, then add the third session in week 3-4. If you've been sedentary for over a year, cut every session in half for the first two weeks.

Sample weekly template for adults 60+ training at home

Can I start active aging exercises if I'm already frail or injured?

Yes, in most cases, but the entry point changes. Frail and pre-frail adults still benefit from multi-component training. A 2024 review found that even in frail older adults, supervised or well-designed home programs improved physical function and reduced falls when programs started with seated and supported exercises before progressing to standing work [6].

If you're frail or recovering from injury, do this:

  1. Get medical clearance, especially after a recent hospitalization.
  2. Start with chair-based versions of every exercise.
  3. Work with a physical therapist for the first 4-6 weeks if possible, this is often covered by Medicare after a fall.
  4. Prioritize sit-to-stands and supported balance holds over aerobic volume.
  5. Progress by adding time under tension before adding weight.

Do not start unsupervised if you have: unstable cardiovascular disease, uncontrolled arrhythmia, severe osteoporosis with recent vertebral fracture, or acute joint injury.

Active aging workout plans vs regular gym routines for seniors

Active aging plans are structurally different from a standard gym routine. A regular gym program built around machines and steady-state cardio can improve strength but often skips the two ingredients that most directly prevent falls: dynamic balance and reactive stepping.

Feature Active Aging Plan Standard Gym Routine
Balance training Built in, progressive Usually absent
Strength focus Functional (sit-to-stand, step-up) Isolated machines
Fall-risk impact Direct, evidence-backed [1][7] Indirect
Skill work (reactive stepping) Included Rarely
Session structure Multi-component Body-part split

Choose an active aging plan if your goal is independence, fall prevention, or recovering function. A standard gym routine may be fine if you're already highly active and just want to preserve muscle, but bolt on 15 minutes of balance work twice a week.

Best active aging programs for people with arthritis or balance issues

For arthritis, the Arthritis Foundation's Walk With Ease and aquatic-based programs are strong entry points because water reduces joint load while still training balance and strength. Tai chi has some of the best evidence for adults with balance impairments, a 2024 analysis found tai chi reduced falls by roughly 20% in this group [9].

Program picks by condition:

  • Knee or hip osteoarthritis: GLA:D program, aquatic multi-component classes, recumbent cycling paired with home strength work.
  • Balance impairment or history of falls: Otago Exercise Programme (physiotherapist-designed, 17 exercises), tai chi (Yang or Sun style), CDC STEADI-aligned classes.
  • Low back pain: McKenzie-informed mobility plus glute-focused strength; skip loaded flexion.
  • Osteoporosis: LIFTMOR-style progressive resistance (with supervision), balance training, no forward-bending loaded work.

How long does it take to see fall risk improvement from these workouts?

Measurable improvements in balance and leg strength appear within 8-12 weeks of consistent training [4]. Actual reductions in fall rates, meaning fewer falls per year, usually show up in trials at 6 months and beyond [7].

Here's the rough timeline:

  • Weeks 1-4: Neuromuscular adaptation. Exercises feel easier, coordination improves.
  • Weeks 4-12: Measurable gains in sit-to-stand speed, gait speed, and single-leg balance time.
  • Months 3-6: Meaningful strength gains, better stair climbing, reduced fear of falling.
  • 6+ months: Statistically lower fall rate compared to non-exercisers.

The takeaway: stick with it for at least six months before judging whether the program "works."

What's the difference between active aging and physical therapy?

Physical therapy is clinical, short-term, and prescribed to treat a specific impairment. Active aging is a long-term lifestyle framework designed to maintain function and prevent decline. Both can use similar exercises, but the goals and delivery differ.

What's the difference between active aging and physical therapy?

Physical therapy:

  • Prescribed after injury, surgery, or a fall
  • 1-on-1, usually covered by insurance for a limited number of visits
  • Diagnostic and corrective
  • Typically 6-12 weeks

Active aging:

  • Ongoing (years to decades)
  • Group class, app, or self-guided
  • Preventive and performance-focused
  • Life-long

Many older adults do PT first after a fall, then transition into an active aging program to keep the gains.

Active aging workout plan cost and where to find programs

Costs range from free to about $40 per month. You do not need an expensive gym membership to get the benefit.

Free or low-cost options:

  • NIH Go4Life, free videos and printable plans
  • CDC STEADI toolkit, free provider-facing fall-prevention resources with patient handouts
  • Otago Exercise Programme, free protocol available online
  • YMCA Enhanced Fitness, sliding-scale pricing
  • SilverSneakers, free with many Medicare Advantage plans

Paid options ($15,$40/month):

  • Bold, Mighty Health, and similar senior-focused fitness apps
  • Community center active aging classes
  • Small-group personal training (higher cost, but strong supervision)

Equipment you actually need at home:

  • Sturdy chair
  • Resistance band (medium)
  • Two dumbbells (start with 3-8 lb; you'll outgrow them fast)
  • Non-slip mat
  • Wall or counter for balance support

Common mistakes older adults make when starting active aging exercises

The five biggest mistakes that either cause injury or waste effort:

  1. Skipping the balance component because it feels less like "real exercise." Balance is where the fall-risk reduction actually comes from.
  2. Using weights that are too light. If sit-to-stands with a 3-lb dumbbell feel easy after two weeks, add weight. Strength gains require progressive overload.
  3. Quitting at week 4-6 before the strength adaptations show up.
  4. Doing only walking. Walking maintains cardiovascular fitness but does not by itself lower fall risk meaningfully [1].
  5. Progressing balance work too slowly, staying on two feet forever. You need to challenge stability to improve it (safely, near a counter).

Is active aging safe for people with heart conditions or diabetes?

Yes, with medical clearance. Multi-component exercise is broadly recommended for stable cardiovascular disease and type 2 diabetes because it improves blood pressure, glycemic control, and functional capacity. The 2025 evidence continues to support supervised or well-structured programs for these groups [4][8].

Precautions:

  • Heart disease: Get a clearance conversation with your cardiologist. Skip Valsalva-style straining. Use rate of perceived exertion (RPE) rather than heart rate if you're on beta-blockers.
  • Type 2 diabetes: Check glucose before and after; carry a fast carb; watch feet for blisters.
  • Uncontrolled hypertension (>160/100): Delay starting until managed.
  • On anticoagulants: Emphasize balance safety; a fall carries higher bleeding risk.

Who should do active aging workouts and who shouldn't?

Should do:

  • Adults 60+ who want to maintain independence
  • Anyone with a fall in the past year
  • Adults with early sarcopenia or noticeable strength loss
  • People recently discharged from PT who want to keep their gains
  • Caregivers and spouses (do it together, adherence doubles)

Should not start unsupervised:

  • Anyone with unstable angina or a recent cardiac event (last 3 months)
  • Adults with uncontrolled arrhythmia
  • Acute joint injury or recent fracture without clearance
  • Severe cognitive impairment without a supervising caregiver
  • Uncontrolled severe hypertension

These groups should either delay or start with a physical therapist or clinical exercise physiologist.

How do I know if an active aging program is actually effective?

An effective program checks these boxes. Use it as a screening checklist before you commit.

  • Includes all four components, strength, balance, mobility, aerobic
  • Progressive, exercises get harder over weeks (harder balance positions, more weight, more reps)
  • Balance work is dosed at 3+ hours weekly at some point in the program [1]
  • Session length is 30-60 minutes, 2-3 times a week minimum
  • Designed or reviewed by a PT, exercise physiologist, or certified specialist (NSCA-CSPS, ACE Senior Fitness, ACSM)
  • Has an assessment, sit-to-stand test, timed up-and-go, or single-leg balance, so you can measure change
  • Runs at least 12 weeks in the initial block

Programs missing three or more of these are unlikely to move fall risk meaningfully.

FAQ

Is 30 minutes a day enough for active aging?
Yes, if it's structured. Thirty minutes of combined strength and balance work, 3 days a week, plus daily walking, hits the effective dose used in most fall-prevention trials.

Can I do active aging workouts every day?
Yes for balance, mobility, and walking. No for heavy strength work, leave 48 hours between hard lower-body sessions.

Does walking count as fall prevention?
Walking alone does not meaningfully lower fall risk in high-risk older adults [1]. It must be paired with balance and strength work.

What's the single best exercise for fall prevention?
The sit-to-stand. It trains the exact leg strength and pattern used to catch yourself when you stumble.

Are group classes better than solo home workouts?
Adherence is usually higher in groups, and effect sizes are similar when programs are structured the same way. Choose whichever you'll actually do.

Do I need a doctor's clearance to start?
If you have any cardiovascular disease, uncontrolled diabetes, recent surgery, osteoporosis, or a fall in the last 6 months, yes. Otherwise, start conservatively.

Will active aging exercises help with fear of falling?
Yes. Tai chi and multi-component programs both reduce fear of falling in trials, which independently improves quality of life [9].

Can these programs reverse sarcopenia?
They can significantly slow it and often reverse early stages when combined with adequate protein (1.0-1.2 g/kg/day for older adults).

Conclusion

The evidence is settled: multi-component active aging workout plans are the most effective non-pharmaceutical intervention for cutting fall risk in adults 60+. The formula is not complicated, strength, balance, mobility, and aerobic training, 2-3 times a week, for at least 12 weeks, but each component has to actually be there. Programs that skip the balance work or stop before three months rarely move the needle.

Your next steps:

  1. This week: Do a baseline sit-to-stand test (count how many you can do in 30 seconds) and time how long you can stand on one leg.
  2. Pick a program: Start with Otago, SilverSneakers, or a free NIH Go4Life plan if you're new. Choose a paid app or class if you need structure.
  3. Commit to 12 weeks: Put the sessions on your calendar. Track them.
  4. Retest at week 12: Compare sit-to-stand and balance times. If numbers improved, keep going. If not, get a professional assessment.
  5. Progress deliberately: Add weight, harder balance positions, or longer walks every 2-3 weeks.

The goal is not to become an athlete. It's to still be climbing your own stairs, carrying your own groceries, and standing on one leg to pull on a sock at age 85. Multi-component training is how you get there.

References

[1] Effect of exercise for fall prevention in community-dwelling older adults – https://pmc.ncbi.nlm.nih.gov/articles/PMC12336026/
[2] Multicomponent exercise program on functional fitness in older adults – https://www.ijrrjournal.com/IJRR_Vol.12_Issue.12_December2025/IJRR-Abstract51.html
[3] Multicomponent training and fall risk in older adults – https://pubmed.ncbi.nlm.nih.gov/42176369/
[4] Exercise interventions and physical function in older adults – https://pmc.ncbi.nlm.nih.gov/articles/PMC12196961/
[5] A systematic review of multicomponent vs single-component training programs for fall prevention in older adults – https://www.bohrium.com/paper-details/a-systematic-review-of-multicomponent-vs-single-component-training-programs-for-fall-prevention-in-the-elderly-a-systematic-review/1152951217664557065-9083
[6] Multicomponent exercise in frail and pre-frail older adults – https://pmc.ncbi.nlm.nih.gov/articles/PMC10971002/
[7] Cochrane review: exercise for preventing falls in community-dwelling older people – https://pubmed.ncbi.nlm.nih.gov/39167923/
[8] Physical activity interventions in older adults with chronic conditions – https://pubmed.ncbi.nlm.nih.gov/39616365/
[9] Dual-task interventions and fall prevention in seniors – https://medicalxpress.com/news/2024-06-task-interventions-seniors-falls.html
[10] Balance and strength training outcomes in older adults – https://pubmed.ncbi.nlm.nih.gov/42237301/

Joint-Friendly Mobility Routine for Knees, Hips, and Shoulders: 15 Minutes to Move Better, Not Harder

Joint-Friendly Mobility Routine for Knees, Hips, and Shoulders: 15 Minutes to Move Better, Not Harder

Last updated: July 23, 2026

Quick Answer

Quick Answer

A joint-friendly mobility routine for knees, hips, and shoulders takes about 15 minutes and uses slow, controlled circles, gentle range-of-motion drills, and chair or wall support to protect painful joints while restoring how you walk, reach, and stand up. Done three to five times a week, it improves comfort in daily movement without adding stress to cartilage or tendons [5][9]. The goal is smoother motion, not harder effort.

Key Takeaways

  • 15 minutes, most days is enough to notice change in 2-4 weeks [9][10].
  • Chair and wall support make this routine safe for arthritis, weak knees, or balance issues [8].
  • Controlled circles and rotations at the ankle, hip, and shoulder are the backbone of joint health [5].
  • Move through pain-free ranges only. Sharp pain is a stop signal; mild stiffness fading during warm-up is fine [7].
  • Mobility is different from stretching. You're actively moving joints through their full range, not holding a static stretch [4].
  • Athletes and older adults both benefit, mobility feeds performance and independence [2][9].
  • Warm-up first. Even 60 seconds of marching in place changes how joints respond [7].
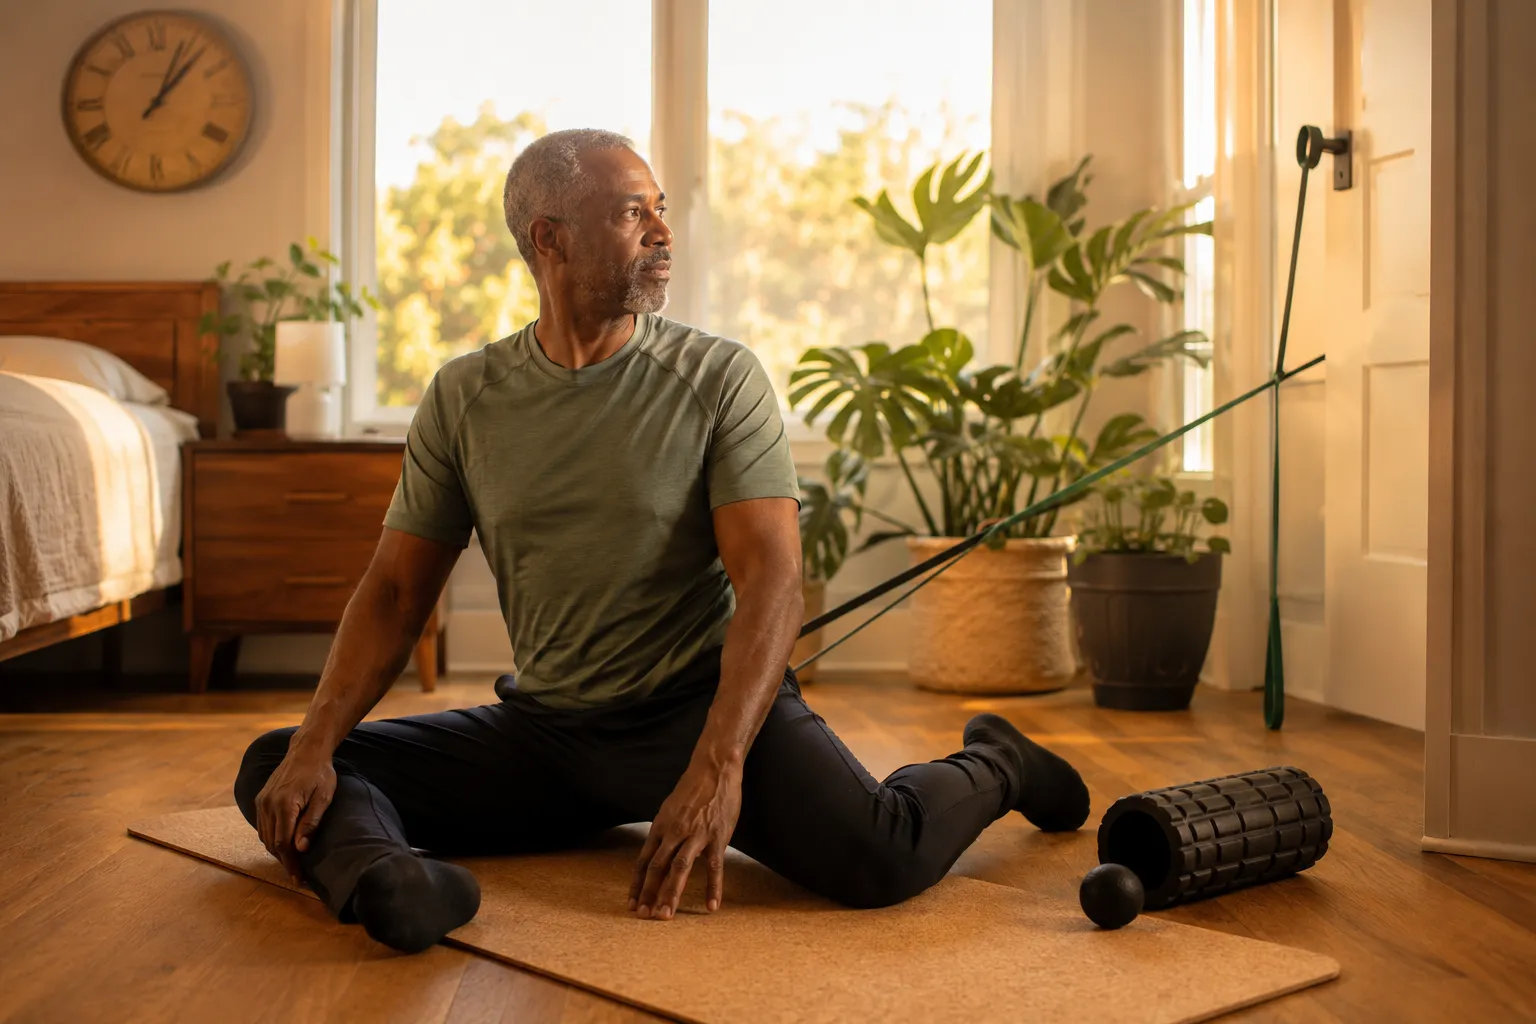
  • No equipment required beyond a sturdy chair, a wall, and a mat.

)

What Is Joint Mobility and Why Does It Matter for Knees, Hips, and Shoulders?

Joint mobility is your ability to actively move a joint through its full range of motion with control. It combines flexibility, strength at end ranges, and neuromuscular coordination [5]. For knees, hips, and shoulders, the three joints most responsible for walking, sitting, reaching, and dressing, mobility loss shows up as stiffness getting out of a car, difficulty reaching a top shelf, or hesitation on stairs [8].

These joints matter because they do the most work in daily life. Hips drive gait and posture. Knees absorb load every step. Shoulders handle nearly every upper-body task. When any of them lose motion, the others compensate, and pain often follows [7].

Decision rule: If you can't touch your shoulder blade with the opposite hand, squat to chair height without pain, or step up a full flight of stairs without stiffness, mobility work should be a weekly habit.

How Is a Mobility Routine Different from Stretching or Yoga?

Mobility trains active, controlled movement through a joint's range. Static stretching holds a lengthened position; yoga blends postures, breath, and flexibility. Mobility work sits in between and often replaces both for joint-specific goals [4].

  • Static stretching: hold a hamstring stretch for 30 seconds. Passive.
  • Yoga: flows and holds emphasizing flexibility and mind-body connection.
  • Mobility: slow, deliberate circles, rotations, and controlled articular movements that strengthen the range you already have and expand it safely [5].

The practical difference: mobility drills warm the joint capsule, lubricate cartilage with synovial fluid, and teach your nervous system to own each degree of motion [7]. That's why a 15-minute mobility session often reduces stiffness faster than the same time spent stretching.

Can I Do Joint Mobility Exercises If I Have Arthritis or Joint Pain?

Yes, and gentle mobility is often one of the recommended approaches for arthritic joints because controlled movement helps circulate synovial fluid and reduces stiffness [7][9]. The key is staying inside pain-free ranges and using support (chair, wall, countertop) to unload the joint.

Guidelines for painful joints:

  • Start with smaller circles and shorter ranges. Expand only if comfortable.
  • Use a chair for balance during hip and knee work.
  • Skip anything that produces sharp, pinching, or radiating pain.
  • Warm up with 1-2 minutes of easy marching or arm swings first [7].
  • Talk to your doctor or physical therapist if you have a recent injury, joint replacement, or diagnosed condition before starting.

Most people with mild osteoarthritis tolerate this style of low-impact routine well [9].

What's the Best Time of Day to Do a 15-Minute Mobility Routine?

Morning is usually best because joints are stiffest after sleep, and mobility work sets a smoother tone for the day. Evening also works well for winding down and reducing accumulated tension from sitting. The best time is whichever time you'll actually do it consistently [10].

  • Morning: clears overnight stiffness, improves posture before you sit at a desk.
  • Pre-workout: primes joints for stronger, safer training [2][10].
  • Evening: unwinds hips and shoulders after prolonged sitting.

Avoid doing it right before bed if it energizes you, and skip it in the first 5 minutes after waking, take a quick walk to the kitchen first so tissues aren't cold.

The 15-Minute Joint-Friendly Mobility Routine for Knees, Hips, and Shoulders

Here's the full sequence. Move slowly. Breathe. Use a chair or wall whenever you want more control.

)

Minutes 0-2: Warm-Up

  • Seated or standing marches, 60 seconds. Lift knees to a comfortable height.
  • Arm swings, 30 seconds forward, 30 seconds side to side.

Minutes 2-6: Knees and Ankles

  • Seated knee extensions, sit tall in a chair, straighten one knee, hold 2 seconds, lower. 10 reps each side.
  • Ankle circles, 10 in each direction, per foot. Ankles feed knee health.
  • Supported mini-squats, hold the chair back, sit down and stand up slowly. 8-10 reps.
  • Standing hamstring sweeps, heel out, gentle toe pull, no bouncing. 8 per side.

Minutes 6-10: Hips

  • Standing hip circles, hold a chair or wall, lift one knee to hip height, circle it out, back, down. 6 per direction per leg [5].
  • Supported figure-4 opener, cross one ankle over the opposite knee while seated, gently press the top knee down. Hold 20 seconds each side.
  • Standing hip hinges, hands on chair back, push hips back, feel hamstrings. 10 reps.
  • Side leg lifts, hold chair, lift leg out to the side. 8 per side.

Minutes 10-13: Shoulders

  • Shoulder circles, 8 forward, 8 backward. Big, slow, deliberate [5].
  • Wall angels, stand with back to wall, arms in "goalpost" position, slide arms up and down. 8 reps.
  • Cross-body reach, bring one arm across chest, hold 15 seconds. Repeat.
  • Doorway chest opener, forearm on door frame, step through gently. 20 seconds each side.

Minutes 13-15: Full-Body Integration

  • Seated thoracic rotations, hands crossed over chest, rotate side to side. 8 per side.
  • Standing reach and roll, reach up, roll shoulders down, take three slow breaths.

That's the routine. Same order every day builds the habit and lets you track how each joint feels [2][3].

How Often Should I Do Joint Mobility Work to See Results?

How Often Should I Do Joint Mobility Work to See Results?

Aim for 3-5 sessions per week, with at least one full day of practice on weekends. Most people notice easier movement within 2-3 weeks and meaningful range-of-motion gains by week 6 [9][10].

  • Minimum effective dose: 3 sessions per week, 15 minutes each.
  • Optimal: daily, especially if you sit for long hours.
  • Recovery days: shorter 5-minute versions still count [4].

Consistency beats intensity here. Ten easy sessions in two weeks will move you further than two hard sessions [10].

Is Joint Mobility Good for Runners and Athletes or Just Older People?

Mobility is essential for both. Runners rely on hip extension and ankle dorsiflexion for efficient stride. Lifters need shoulder and hip mobility to hit safe positions under load. Older adults need it for daily independence [2][9]. The exercises overlap significantly; the intensity and progression differ.

  • Athletes: add mobility before workouts and on rest days to prevent overuse injuries [10].
  • Recreational exercisers: use it to fix nagging tightness and improve form.
  • Older adults (50+): prioritize floor-supported and chair-based versions for safety [8].

The same 15-minute template scales up or down.

What Equipment Do I Need for a Joint-Friendly Mobility Routine?

Almost none. A sturdy chair, a clear wall, and a yoga mat cover 95% of what this routine requires [3][8].

Optional additions:

  • A light dowel or broomstick for shoulder pass-throughs.
  • A yoga block or firm cushion for hip openers.
  • A soft resistance band for gentle activation.

Skip anything that requires balancing on unstable surfaces early on. Stability first, then challenge.

Can Mobility Exercises Help with Knee Pain or Shoulder Stiffness?

Yes. Gentle, consistent mobility work is one of the most-recommended non-medication strategies for chronic knee and shoulder discomfort tied to stiffness, inactivity, or mild arthritis [7][9]. It improves circulation to the joint, strengthens surrounding stabilizers, and gradually restores range.

  • For knee pain: focus on ankle circles, hip mobility, and quad-strengthening seated knee extensions. Weak hips and stiff ankles overload the knee [7].
  • For shoulder stiffness: wall angels, shoulder circles, and thoracic rotations work best. The thoracic spine drives shoulder motion, so mobilizing it upstream unlocks the shoulder itself [5].

If pain is sharp, sudden, or accompanied by swelling, stop and see a professional before continuing.

What Mistakes Do People Make When Starting a Mobility Routine?

The biggest mistake is treating mobility like a workout, going hard, forcing range, or chasing a "burn." That defeats the purpose. Other common errors include:

  • Skipping the warm-up. Cold joints don't respond well [7].
  • Holding breath. Breathe steadily through every rep.
  • Rushing. Slow control is the whole point.
  • Ignoring pain signals. Discomfort at end range is fine; sharp pain is not [4].
  • Doing it once, then quitting. Mobility compounds over weeks, not days [9].
  • Only working the sore joint. Mobility upstream and downstream matters just as much [5].

)

Is Mobility Work Better Than Foam Rolling for Joint Health?

They do different jobs. Foam rolling addresses muscle and fascia tension. Mobility work trains joint range and control. For joint health specifically, active mobility usually delivers more benefit because it strengthens the muscles supporting the joint at every angle [5][7].

Combine them: foam roll for 3-5 minutes before your mobility session if a muscle feels particularly tight. Then move into the 15-minute routine.

How Long Does It Take to Notice Improvements in Mobility?

How Long Does It Take to Notice Improvements in Mobility?

Most people report feeling better, less morning stiffness, easier stairs, freer shoulders, within 10 to 14 days of consistent practice [9][10]. Measurable range-of-motion gains (deeper squat, higher reach) typically show up between weeks 4 and 8.

  • Week 1: less stiffness, better mood after sessions.
  • Weeks 2-3: easier daily movements.
  • Weeks 4-6: visible range improvement.
  • Weeks 8-12: stronger, more confident movement overall.

Track one benchmark, like how far you can reach behind your back, every two weeks to stay motivated.

What Should I Do If Certain Movements Hurt During Mobility Work?

Stop the specific movement, not the whole session. Reduce the range, add support, or skip that drill entirely and come back to it in a week. Pain is data, not failure [7].

Pain troubleshooting:

  • Sharp or pinching pain: skip and consult a professional.
  • Deep ache during a stretch: ease off by 30% and rebreathe.
  • Pain after the session: you likely pushed too far; reduce reps next time.
  • Ongoing pain in one joint: book a physical therapy visit for a proper assessment.

Never push through pain hoping it will loosen up. It rarely does.

Can I Combine Mobility Work with My Regular Workout Routine?

Absolutely. Mobility pairs well with any strength, cardio, or sport training and often improves your performance in them [2][10].

  • Before workouts: use the routine as a dynamic warm-up.
  • After workouts: shorten it to 5-7 minutes focused on the joints you just worked.
  • On rest days: do the full 15-minute version.

The routine adds no fatigue and reduces stiffness that limits lifts, runs, or long walks.

Are There Mobility Exercises I Should Avoid with Bad Knees?

Yes. Skip deep loaded squats, aggressive lunges, twisting on a planted foot, and any drill that puts your knee past your toes under load if it triggers pain [7]. Also avoid:

  • Deep, unsupported pistol-style squats.
  • High-impact jumping or plyometric variations.
  • Excessive kneeling on hard floors.
  • Fast, uncontrolled leg swings.

Choose instead: seated knee extensions, supported mini-squats to a chair, standing hip circles with balance support, and ankle mobility work, all included in the routine above.

Pros and Cons of a 15-Minute Joint-Friendly Mobility Routine

Pros

  • Fits into any schedule.
  • Requires almost no equipment.
  • Safe for most ages and fitness levels.
  • Improves daily comfort quickly.
  • Complements every other form of exercise.

Cons

  • Requires consistency to work.
  • Not a substitute for strength training or cardio.
  • Not enough for serious injuries, see a professional.
  • Progress is gradual, not dramatic.

FAQ

How many days a week should I do this routine?
Three to five days is the sweet spot. Daily is fine if intensity stays low [9].

Can I do this if I've had a knee or hip replacement?
Only with clearance from your surgeon or physical therapist. They may modify specific drills.

Do I need to warm up separately before the routine?
The first two minutes are the warm-up. If you feel especially stiff, add another minute of marching.

Will 15 minutes really make a difference?
Yes. Multiple sources note that short, consistent sessions produce measurable mobility gains within weeks [9][10].

Can I do this routine seated the whole time?
Most drills have a seated version. This makes it accessible for balance concerns or fatigue [8].

What if I only have 5 minutes?
Do the warm-up, one hip drill, one shoulder drill, and one knee drill. Better than nothing [4].

Is this safe during pregnancy?
Generally yes with modifications, but confirm with your OB or midwife first.

Can kids or teens do it?
Yes, though most young people already have adequate mobility. It's more valuable for adults over 30.

Do I need shoes?
Barefoot or socks is fine indoors. Ankle mobility often improves without shoes.

What if a movement feels awkward at first?
That's normal. Your nervous system is learning. Give it two weeks before deciding it doesn't work.

Conclusion

A 15-minute joint-friendly mobility routine for knees, hips, and shoulders isn't glamorous, but it delivers something most training doesn't: freer daily movement without extra strain. The formula is simple, controlled circles, supported drills, pain-free ranges, and consistency across most days of the week.

Your next steps:

  1. Block 15 minutes on your calendar for tomorrow morning.
  2. Set up a sturdy chair near a wall.
  3. Run through the routine above once, slowly.
  4. Track how one movement (reaching overhead, standing from a chair) feels at week 1, week 4, and week 8.
  5. Adjust anything that hurts; keep everything that helps.

Move better, not harder. Your knees, hips, and shoulders will do the rest of the work, you just have to give them the daily invitation.

References

[1] Watch – https://www.youtube.com/watch?v=UYSdIntPy1E
[2] 15 Minute Bodyweight Mobility Circuit – https://runlovers.it/en/2026/15-minute-bodyweight-mobility-circuit/
[3] 15 Minute Full Body Routine – https://simplmobility.com/blog/15-minute-full-body-routine
[4] 5 Minute Mobility – https://www.nerdfitness.com/blog/5-minute-mobility/
[5] Joint Mobility Exercises – https://www.healthline.com/health/fitness-exercise/joint-mobility-exercises
[6] Watch – https://www.youtube.com/watch?v=zGIe_keQM_8
[7] Add These Mobility Exercises Into Your Workout Routine For Healthy Joints – https://www.alphaortho.net/blog/add-these-mobility-exercises-into-your-workout-routine-for-healthy-joints
[8] Exercises For Mobility Range Of Motion After 50 – https://www.health.com/exercises-for-mobility-range-of-motion-after-50-11904156
[9] Improve Mobility After 40: Easy 15 Minute Exercises To Reduce Joint Pain, Boost Strength – https://www.muscleandfitness.com/anti-aging/wellness/improve-mobility-after-40-easy-15-minute-exercises-to-reduce-joint-pain-boost-strength/
[10] Mobility Training 15 Minutes A Day That Will Truly Transform Your Workouts – https://www.inspiredbysports.com/en/mobility-training-15-minutes-a-day-that-will-truly-transform-your-workouts/

10-Minute Daily Balance and Core Routine for Fall Prevention at Home (No Equipment)

10-Minute Daily Balance and Core Routine for Fall Prevention at Home (No Equipment)

Last updated: July 23, 2026

Quick Answer

A daily 10-minute balance and core routine can measurably reduce fall risk in active older adults by strengthening the deep trunk muscles, sharpening proprioception, and training the nervous system to react faster when footing shifts. The routine below blends standing balance drills, gentle flow transitions, and no-equipment core work, with chair-supported variations for every move. Do it 5 days a week, near a sturdy wall or chair, and expect noticeable stability gains within 4 to 8 weeks.

Quick Answer

Key Takeaways

  • 10 minutes daily beats 60 minutes once a week. Short, frequent sessions drive the neurological adaptations that prevent falls [7].
  • Balance and core work together. A strong core stabilizes the spine and hips so your feet can react to slips [3][6].
  • No equipment needed. A wall, a sturdy chair, and clear floor space are enough [8].
  • Chair-supported variations make the routine safe for people with arthritis, limited mobility, or a recent fall history.
  • Consistency matters more than intensity. Research suggests 3-5 sessions per week produce the best neurological gains [7].
  • Expect results in 4-8 weeks of steady practice, with balance and agility improving even without added muscle strength [1].
  • Pair the routine with home safety fixes, lighting, rugs, footwear, for the biggest fall-risk reduction.

What exercises improve balance and prevent falls at home

The most effective home balance exercises train three systems at once: the inner ear (vestibular), the eyes (visual), and the joint sensors (proprioceptive). Movements that shift your weight, narrow your base of support, or challenge your center of gravity force all three to work together.

Core moves that support fall prevention:

  • Single-leg stands (with fingertip touch on a wall or chair)
  • Heel-to-toe walks (tandem walking)
  • Standing marches with a slow knee lift
  • Weight shifts side-to-side and front-to-back
  • Sit-to-stands from a sturdy chair without using hands
  • Standing hip abductions (slow side leg lifts)
  • Dead bugs or modified seated leg extensions for core
  • Tai chi, style weight transfers for flow and control [5]

Choose exercises that feel challenging but not scary. If you can't hold the position for 10 seconds without wobbling wildly, regress to a chair-supported version.

How does a strong core help prevent falls in older adults

A strong core acts like a built-in stabilizer: it keeps your spine upright, controls how your weight shifts over your hips, and gives your legs a solid platform to react from when you trip. Without core strength, even quick legs can't save you, the trunk collapses and you go down.

The core isn't just the abs. It includes:

  • Transverse abdominis (deep belt-like muscle)
  • Obliques (side rotation and anti-rotation)
  • Multifidus (small spinal stabilizers)
  • Pelvic floor and diaphragm
  • Glutes and deep hip muscles

Strengthening these muscles improves posture, reduces back pain, and gives you the trunk control needed to recover from a stumble [3][6]. That's why every good fall-prevention routine pairs balance drills with targeted core work.

Pull quote: "Your legs catch the fall. Your core decides whether they get the chance."

Best 10 minute balance routine for seniors no equipment

Here is the full 10-Minute Daily Balance and Core Routine for Fall Prevention at Home (No Equipment). Stand near a wall or the back of a sturdy chair. Wear grippy socks or bare feet. Clear a 6-foot square of floor.

Best 10 minute balance routine for seniors no equipment

Minute-by-minute breakdown

Minutes 0-2: Warm-up

  • Ankle circles (30 sec each foot)
  • Slow neck turns and shoulder rolls (30 sec)
  • Gentle standing weight shifts side-to-side (30 sec)

Minutes 2-5: Standing balance

  • Single-leg stand, right foot (30 sec, fingertip on chair)
  • Single-leg stand, left foot (30 sec)
  • Heel-to-toe walk, 10 steps forward, 10 back (60 sec)
  • Standing march with slow knee lift (30 sec)

Minutes 5-8: Core activation

  • Standing side leg lifts, 10 per side (60 sec)
  • Sit-to-stand from chair, no hands, 8 reps (60 sec)
  • Standing dead bug (opposite arm/leg reach), 10 total (60 sec)

Minutes 8-9: Flow transition

  • Slow tai chi, style weight transfer: shift forward, back, side to side with a smooth breath (60 sec) [5]

Minutes 9-10: Cool-down

  • Standing forward hinge with soft knees (30 sec)
  • Deep breathing with hands on belly (30 sec)

Chair-supported version

Do every standing move seated or with both hands on the chair back. Sit-to-stands become slow seated marches. Single-leg stands become seated heel and toe lifts. You still get the neuromuscular training [8].

Can you really prevent falls with daily exercises

Yes, the research is consistent. Daily balance training reduces fall risk in older adults, and even short sessions produce measurable gains. A Japanese study published in April 2026 found that a 10-minute daily floor-based routine significantly improved balance, agility, and trunk flexibility in participants, with researchers attributing the gains to better neuromuscular coordination rather than raw strength [1].

The key isn't intensity. It's frequency and specificity. Training the exact skills you need, standing on one leg, shifting weight, recovering from a wobble, teaches your nervous system to respond automatically when real life demands it [7].

What's the difference between balance and core strength training

Balance training teaches your body where it is in space and how to correct itself. Core training builds the muscular stability to hold posture and transmit force between upper and lower body. You need both, and they overlap.

Balance training: single-leg stands, tandem walks, weight shifts, eyes-closed drills. Trains proprioception, vestibular system, reflexes.

Core training: planks, dead bugs, sit-to-stands, standing marches. Trains trunk muscles, spinal stabilizers, posture.

Combined (this routine): standing dead bugs, tai-chi flows, sit-to-stands with pause. Trains both at once, the fastest path to fall prevention [3][6].

How often should i do balance exercises to see results

Daily is ideal. Three to five times per week is the minimum for meaningful change. Short daily sessions drive better neurological adaptation than one long weekly workout because balance is a nervous-system skill, it needs repeated exposure to consolidate [7].

A practical schedule:

  • Days 1-14: 10 minutes every morning, chair nearby
  • Weeks 3-4: progress to fingertip touch instead of full grip
  • Weeks 5-8: try single-leg stands without any support
  • After 8 weeks: add eyes-closed variations (only near wall)

Pair the routine with a daily habit, coffee brewing, brushing teeth, the morning news. Habit-stacking makes consistency automatic.

Is this routine safe for people with arthritis or joint pain

Yes, with modifications. Low-impact balance and core work often reduces joint pain by strengthening the muscles that support the knees, hips, and spine [6]. The chair-supported version of every exercise removes weight-bearing stress.

Is this routine safe for people with arthritis or joint pain

Rules for arthritic joints:

  • Never push through sharp pain. Dull ache is okay; stabbing is not.
  • Warm up longer, 3 minutes instead of 2 on cold or stiff days.
  • Slow the tempo. Take 4 seconds per rep instead of 2.
  • Skip deep sit-to-stands if knees flare; use a higher chair or cushion.
  • Talk to your doctor if you have hip or knee replacements before adding rotational moves.

What are common mistakes people make doing balance exercises at home

The biggest mistake is holding your breath. Balance requires a relaxed nervous system, and breath-holding tenses the trunk and blunts proprioception.

Other common errors:

  1. Looking down at feet. Look at a fixed point on the wall instead.
  2. Locking knees. Keep a soft micro-bend.
  3. Gripping the chair too hard. Fingertip touch is the goal, full grip means the exercise is too hard.
  4. Rushing. Balance is trained slowly. Sloppy fast reps don't teach the nervous system anything.
  5. Skipping the warm-up. Cold ankles wobble more.
  6. Doing it barefoot on slick floors. Grippy socks or a yoga mat prevent slips.
  7. Only training on the strong side. Always match reps left and right.

How do i know if i'm doing these exercises correctly

You're doing it right when the movement feels challenging but controlled, you can breathe steadily, and you finish without pain. Wobble is normal, it's the nervous system learning. Loss of balance requiring a catch means the exercise is too hard.

Quick self-check:

  • Posture: ears over shoulders over hips
  • Gaze: fixed on a point ahead, not the floor
  • Breath: steady in and out through the nose
  • Support: fingertip only (not a death grip)
  • Time: can you hold for 10+ seconds without a save?

Film yourself once a week on a phone. Watching a 30-second clip reveals posture drift you can't feel in the moment.

What if i have vertigo or inner ear problems can i still do this

Yes, but modify carefully and get medical clearance first. People with vertigo, BPPV, or Meniere's disease should start entirely seated, avoid head turns and eyes-closed drills, and progress only when a physical therapist confirms it's safe.

Safe starting points:

  • Seated marches and heel/toe lifts
  • Seated weight shifts (side to side)
  • Slow standing weight shifts with both hands on a chair
  • Gentle standing at a wall, feet apart, eyes open

Avoid until cleared: single-leg stands, tandem walks, head-turn drills, eyes-closed variations. Vestibular rehabilitation therapy (VRT) with a specialist is the gold standard for these conditions.

Are there modifications for people with limited mobility

Every exercise in this routine has a seated or chair-supported version. The neuromuscular training still happens, the brain doesn't require standing to learn coordination [8].

Modifications:

Standing move Seated modification
Single-leg stand Seated single-leg extension, 30 sec hold
Heel-to-toe walk Seated ankle taps (heel, toe, heel, toe)
Standing march Seated march with knee lift
Sit-to-stand (no hands) Sit-to-stand with hands, or hover 2 inches above seat
Standing side leg lift Seated side leg lift
Standing dead bug Seated opposite arm/leg reach
Tai chi weight shift Seated torso weight shift

How long before balance exercises reduce fall risk

Neurological gains begin within 2 weeks. Measurable balance improvement typically shows up at 4-8 weeks of consistent daily practice. Meaningful fall-risk reduction, the kind that changes real-world outcomes, usually takes 3-6 months [1][7].

Progression markers to watch for:

  • Week 2: less wobble on single-leg stand
  • Week 4: hold single-leg stand 20+ seconds
  • Week 8: sit-to-stand without hands, 10 clean reps
  • Month 3: confident heel-to-toe walk, eyes forward
  • Month 6: noticeably steadier on stairs, curbs, uneven ground

Should i do this routine if i've already had a fall

Yes, but start with the chair-supported version and consider one session with a physical therapist first. A recent fall raises the risk of another, and a professional can screen for underlying issues (blood pressure drops, medication side effects, vision problems, weakness patterns) that exercise alone won't fix.

Post-fall protocol:

  1. Get medical clearance. Rule out fracture, concussion, or cardiac cause.
  2. Ask for a PT referral. Even 2-3 sessions targets your specific weak links.
  3. Start seated for 2 weeks. Rebuild confidence before standing drills.
  4. Fall-proof the home (see next section) before returning to full mobility.
  5. Progress slowly, add one standing exercise per week.

What other things should i do besides exercises to prevent falls at home

Exercise is one leg of a three-legged stool. The other two are home environment and health management. Skip either and fall risk stays high no matter how strong your core gets.

Home safety essentials:

  • Remove throw rugs or secure with non-slip backing
  • Add grab bars in the bathroom (shower and toilet)
  • Install night lights in hallways and bathrooms
  • Keep walkways clear of cords and clutter
  • Use non-slip mats in the tub and kitchen
  • Wear supportive shoes indoors, not floppy slippers

Health management:

  • Annual vision and hearing checks
  • Medication review with your pharmacist (many drugs cause dizziness)
  • Vitamin D and calcium as advised by your doctor
  • Adequate hydration (dehydration causes lightheadedness)
  • Consistent sleep, fatigue wrecks balance

FAQ

How many days a week should I do this routine?
Aim for 5-7 days. Even 3 days beats none, but daily practice produces the fastest neurological gains [7].

Can I do this in the morning right after waking?
Yes, but add an extra minute of warm-up. Joints and inner-ear sensors are slower first thing.

Do I need to hold onto a chair the whole time?
No, start with fingertip support and progress to no support as balance improves. Always have the chair within arm's reach.

Is 10 minutes really enough?
Yes. A 2026 study found 10 daily minutes measurably improved balance and agility in older adults [1].

Should I feel sore afterward?
Mild muscle awareness is fine. Sharp joint pain or dizziness means back off and reassess.

Can I split it into two 5-minute sessions?
Yes. Morning balance drills and evening core work is a proven format [7].

What if I lose my balance during an exercise?
Grab the chair, reset, breathe, and continue. Wobbling is part of learning.

Are YouTube videos helpful?
Yes, beginner-friendly guided routines can help with pacing and form [9].

Should I combine this with walking?
Absolutely. A daily 20-minute walk plus this routine covers strength, endurance, and balance.

When should I see a doctor before starting?
If you have vertigo, recent surgery, a recent fall, uncontrolled blood pressure, or unexplained dizziness.

Conclusion

Ten minutes a day is a small deposit with an outsized return. The 10-Minute Daily Balance and Core Routine for Fall Prevention at Home (No Equipment) works because it trains the nervous system, not just the muscles, and it does so often enough for those gains to stick. Consistency beats intensity every time.

Your next steps:

  1. Today: Clear a 6-foot square near a sturdy chair. Practice the warm-up and one standing balance move.
  2. This week: Do the full 10-minute routine 5 days. Log wobbles and progress in a notebook.
  3. This month: Add home safety fixes, grab bars, night lights, secured rugs.
  4. Month 2: Progress from full grip to fingertip support. Try eyes-closed weight shifts at a wall.
  5. Month 3: Schedule a checkup, vision, medications, blood pressure, to close the last gaps in your fall-prevention plan.

Balance is a skill. Skills are trainable at any age. Start today, keep it short, and let the daily reps do the work.

References

[1] 10 Minute Daily Floor Based Workout Could Improve Balance Agility – https://www.medicalnewstoday.com/articles/10-minute-daily-floor-based-workout-could-improve-balance-agility?utm_source=openai
[2] Ab Workouts Dont Need To Be Long And Complicated This 5 Move 10 Minute Session Blasts The Whole Core And You Dont Need Any Equipment – https://www.tomsguide.com/wellness/workouts/ab-workouts-dont-need-to-be-long-and-complicated-this-5-move-10-minute-session-blasts-the-whole-core-and-you-dont-need-any-equipment?utm_source=openai
[3] Low Impact Core Workout – https://www.self.com/gallery/low-impact-core-workout?utm_source=openai
[4] Fall Prevention Balance Routine For Seniors – https://vitalspage.com/articles/fall-prevention-balance-routine-for-seniors?utm_source=openai
[5] Balance And Fall Prevention – https://taichi.help/balance-and-fall-prevention/?utm_source=openai
[6] 10 Minute Core Exercises For Seniors Simple Moves For A Stronger Body – https://www.hitonefitness.com/10-minute-core-exercises-for-seniors-simple-moves-for-a-stronger-body/?utm_source=openai
[7] Balance Exercises For Seniors 10 Routines To Reduce Fall Risk – https://homland.com/blogs/news/balance-exercises-for-seniors-10-routines-to-reduce-fall-risk?utm_source=openai
[8] Seniors Daily Balance Exercises – https://senmate.com/articles/seniors-daily-balance-exercises.html?utm_source=openai
[9] Watch – https://www.youtube.com/watch?v=XmRSGaAUitQ&utm_source=openai

Suspension Training for Seniors: Joint-Friendly Strength and Flexibility at Home

Suspension Training for Seniors: Joint-Friendly Strength and Flexibility at Home

Last updated: July 23, 2026

Quick Answer

Quick Answer

Suspension training uses two adjustable straps anchored overhead so you can leverage your own body weight for strength, balance, and mobility work. For adults 55+, it's one of the most joint-friendly ways to build total-body strength at home because you control the load simply by shifting your feet. A 6-week study of older adults showed significant gains in functional reach (57.2 cm to 68.6 cm) and balance scores, with 100% attendance and no dropouts [1][2]. Start with 2 sessions per week, keep the straps at chest height for beginner angles, and progress gradually.

Key Takeaways

  • Suspension training (like TRX) lets seniors adjust exercise difficulty instantly by changing foot position, no plates or dumbbells required [5].
  • Research shows measurable balance and functional reach improvements in just 6 weeks of twice-weekly training [1][2].
  • It's generally safe for arthritic joints because the straps reduce impact and let you offload weight anytime [3].
  • A quality home suspension trainer costs $30,$200, and setup takes about 5 minutes on a door or beam.
  • 91% of older participants in a German TRX study wanted to keep training after 12 weeks; 36% reported less musculoskeletal pain [4].
  • Ideal frequency: 2-3 sessions per week, 20-30 minutes each, with at least one rest day between sessions.
  • Balance and core work transfer directly to fall prevention and everyday tasks like standing from a chair [3][6].
  • You do NOT need a personal trainer to start, but one video consult or a class can prevent common form mistakes.

What is suspension training and how does it work

Suspension training is a bodyweight exercise method using two nylon straps with handles anchored to a fixed overhead point. You lean into or away from the anchor, and gravity plus your body angle create the resistance. The steeper your angle, the harder the exercise. Step your feet forward or back to make any move easier or harder in seconds.

The system was originally developed by a Navy SEAL who needed a portable way to train anywhere. Today, brands like TRX, WOSS, and Lifeline sell home-friendly kits. Because both hands (or feet) are supported by the straps, your core muscles fire on nearly every rep to stabilize you [3]. That's why it delivers strength, balance, and mobility benefits at once.

Quick example: A standing row with straps at chest height. Grip the handles, walk your feet forward until your body leans back at 45 degrees, then pull your chest to your hands. Feet farther forward equals harder. That single adjustment replaces switching to a heavier dumbbell.

Is suspension training safe for seniors with arthritis

Yes, suspension training is generally safe and often preferred for seniors with arthritis because you control the load and can offload instantly by standing more upright. Unlike free weights, there's no fixed resistance you're locked into. If a knee or shoulder flares up mid-set, you simply reduce your lean angle or step out of the strap.

)

Research supports this: In a 12-week TRX study with adults 60+, 36% of participants reported reduced musculoskeletal pain during the program [4]. The controlled range of motion and self-selected intensity make it easier on inflamed joints than machines or barbells.

Choose suspension training over free weights if: you have knee osteoarthritis, rotator cuff issues, grip weakness, or a history of dropped weights. Skip or modify if: you have severe balance impairment without a wall/chair nearby, uncontrolled blood pressure, or recent joint replacement (wait for surgeon clearance).

Common mistake: Going too deep too soon. Arthritic knees don't need full range on day one. Work in a pain-free 30-60 degree squat and expand as tolerated.

Can you do suspension training at home without equipment

You cannot do true suspension training without straps, but you can replicate many of the same movement patterns using a sturdy table, a towel over a closed door, or a chair for support. These substitutes work for a few weeks while you decide whether to buy a system.

Home substitutes that work:

  • Sturdy dining table for inverted rows (grip the edge, walk feet under).
  • Two firm chair backs placed hip-width apart for supported squats and dips.
  • Thick bath towel looped over a solid door hinge side (test carefully) for beginner rows.
  • Kitchen counter for angled push-ups and single-leg balance drills.

That said, a real suspension trainer is more versatile and safer than jury-rigged setups, and entry-level units cost less than one month of a gym membership.

Suspension training vs resistance bands for older adults

Both are joint-friendly, but they solve different problems. Suspension straps train stability, balance, and total-body coordination because your core stabilizes on every rep. Resistance bands train isolated strength with steady tension and are easier to travel with.

Factor Suspension Trainer Resistance Bands
Best for Balance, core, full-body Isolated muscles, rehab
Learning curve Moderate Low
Space needed Overhead anchor None
Cost $30,$200 $15,$50
Balance training Excellent Limited
Grip demand High Low, moderate

Choose suspension straps if balance and fall prevention are your top goals. Choose bands if you have weak grip strength or want ultra-portable equipment. Many seniors use both, bands for arms and glutes, straps for compound moves and balance.

How often should seniors do suspension training per week

Two to three sessions per week is the sweet spot for most adults 55+, with at least 48 hours between sessions to allow recovery. The 6-week research protocol that produced significant balance and functional reach gains used twice-weekly sessions [1][2].

Sample weekly schedule:

  • Monday: 25 min suspension session (full body, moderate)
  • Wednesday: Walking or gentle mobility
  • Friday: 25 min suspension session (focus on balance and core)
  • Other days: Rest, walking, or light stretching

Beginners should start with once per week for the first two weeks, then add a second session. Soreness in the first sessions is normal; sharp joint pain is not.

Best suspension training exercises for balance and fall prevention

Best suspension training exercises for balance and fall prevention

The most effective fall-prevention moves combine single-leg stance, hip strength, and core stability. Suspension straps let you practice these safely by giving you handles to grab if you lose balance. This is a major advantage over doing single-leg drills unassisted [6].

Top 5 balance and fall-prevention exercises:

  1. Assisted single-leg stand: Hold both handles lightly, lift one foot, hold 20-30 seconds. Progress by using one hand, then fingertips.
  2. Suspended split squat: Rear foot in the strap, front foot forward, gentle knee bend. Trains hip stability and unilateral strength.
  3. Squat to stand: Hold handles at chest height, sit back into a squat, drive up. Builds the exact pattern of standing from a chair.
  4. Standing hip abduction: Hold handles, lift one leg out to the side. Strengthens the glute medius, the main hip stabilizer.
  5. Chest-height row: Trains the postural muscles that keep you upright and prevent forward-leaning falls.

Quick example progression: Start every session with 60 seconds of assisted single-leg stands per side. In four weeks, most seniors can hold 30 seconds hands-free.

Suspension training for seniors with bad knees or shoulders

For bad knees, the straps let you assist yourself out of squats and lunges, drastically reducing knee load. For sensitive shoulders, keep the arms below shoulder height and avoid overhead pulling until strength returns.

)

Knee-friendly modifications:

  • Shorten squat depth to a comfortable range (often 45-60 degrees).
  • Use the straps to unload 20-30% of your weight on the way down.
  • Skip jumping or plyometric variations entirely.

Shoulder-friendly modifications:

  • Keep hands below chin level for the first month.
  • Use a neutral grip (palms facing each other) instead of overhand.
  • Avoid "Y" and "T" raises until a physical therapist clears full overhead motion.

Edge case: After a total knee replacement, most surgeons approve gentle suspension work at 8-12 weeks post-op, but always get individual clearance first.

How much does a suspension trainer cost

A quality home suspension trainer costs $30 to $200. The official TRX Home2 kit runs around $150,$200. Reliable budget brands like WOSS Attack, Lifeline Jungle Gym, and Bodyweight Warrior sell solid units for $30,$60.

What you actually need:

  • The strap system with handles and foot cradles
  • A door anchor (usually included)
  • Optional: a beam anchor or ceiling hook for permanent setup ($10,$20)

Skip the extras. You don't need branded mats, apps, or premium subscriptions to start. YouTube has hundreds of free senior-focused suspension routines.

Total realistic startup cost: $40,$180 including anchor, one time. That's cheaper than 1-3 months of most gyms.

Can suspension training improve flexibility in seniors

Yes. Suspension straps double as a mobility tool because the handles give you something to hold onto during deep stretches, which allows a greater range of motion than unassisted stretching. Seniors often reach positions on the straps they cannot access on the floor.

Effective mobility uses:

  • Assisted hip flexor stretch: Rear foot in strap, front knee forward, sink hips down.
  • Chest opener: Grip handles behind you, step forward, feel the stretch across the chest and biceps.
  • Assisted squat hold: Hold handles, sit deep, let the straps support your weight. Improves ankle and hip mobility.
  • Hamstring stretch: Foot in strap, gently raise leg while lying on the floor.

Combined with strength work, this addresses the flexibility deficits that limit daily tasks like reaching, dressing, and getting off the floor [3].

What mistakes do older adults make with suspension training

The most common mistakes are going too hard too soon, ignoring strap length, and skipping the warm-up. Each is fixable with a bit of attention.

Top mistakes and fixes:

  1. Straps too long or uneven. Both handles should sit at exactly the same height. Check every session.
  2. Feet placed too aggressively. Beginners often start at 45 degrees when 20 degrees is plenty. Start upright, progress weekly.
  3. Holding breath during pulls. Exhale on effort, inhale on return.
  4. Sagging hips in planks and rows. Squeeze the glutes to keep a straight line from ear to ankle.
  5. Skipping the warm-up. Five minutes of marching, arm circles, and gentle squats prevents most tweaks.
  6. Death-gripping the handles. A relaxed grip reduces forearm fatigue and blood pressure spikes.

Suspension training for seniors with limited mobility

Suspension training is one of the few strength methods that works well for adults with limited mobility because you can perform every exercise seated or standing at partial range. The straps provide external support that reduces the balance demand.

Seated adaptations:

  • Seated rows from a sturdy chair
  • Seated chest press (facing away from anchor)
  • Seated overhead reach for shoulder mobility

Standing with support:

  • Chair placed within arm's reach for extra security
  • Wall two feet behind you as a safety backstop
  • Caregiver or spouse spotting the first few sessions

Start with 5-10 minute sessions, twice weekly, and add two minutes per week. The 6-week study population included older adults with typical age-related limitations, and all 11 participants completed the program with no dropouts [2].

Do you need a trainer to start suspension training

Do you need a trainer to start suspension training

You don't strictly need a personal trainer, but a single 30-minute consultation with a certified trainer (ideally one with a NASM Senior Fitness Specialist or ACE credential) can save you months of trial and error. Many offer virtual sessions for $40,$80.

Alternatives to a personal trainer:

  • Reputable YouTube channels focused on senior fitness
  • Local senior center TRX classes (often free with membership)
  • One-time posture check with a physical therapist
  • The instruction manual and app that come with most kits

Choose a trainer if: you have a recent injury, chronic condition, or feel nervous about form. Self-teach if: you're generally healthy, comfortable following videos, and willing to start conservatively.

Suspension training vs traditional weight lifting for seniors

Both build strength, but they work differently. Traditional lifting uses fixed external loads (dumbbells, machines) and is excellent for measurable strength gains. Suspension training uses body weight at variable angles and builds strength alongside balance, coordination, and core stability [6].

)

Traditional lifting advantages: Precise progression in small increments, better for pure muscle mass building, easier to isolate specific muscles.

Suspension training advantages: Lower joint impact, portable, no dropped-weight risk, built-in balance training, one piece of equipment covers 100+ exercises [5].

Best approach for most seniors: Combine both. Use suspension straps 2 days per week for full-body and balance, and dumbbells 1 day per week for targeted work like biceps curls and calf raises.

How long does it take to see results from suspension training

Balance and coordination improvements typically show up in 2-3 weeks. Strength gains follow at 4-6 weeks. Visible body composition changes take 8-12 weeks with consistent training and reasonable nutrition.

The published 6-week study showed statistically significant balance and functional reach improvements after just 12 sessions (twice weekly for 6 weeks) [1][2]. Participants also reported subjective gains in confidence and daily function.

Realistic month-by-month expectations:

  • Weeks 1-2: Learning positions, mild soreness, feeling steadier
  • Weeks 3-4: Notable balance improvement, easier to stand from chairs
  • Weeks 5-8: Clear strength gains, better posture, deeper squats
  • Weeks 9-12: Meaningful changes in stamina, muscle tone, and confidence

A simple 20-minute starter routine

Do this twice per week with at least one rest day between sessions. Adjust strap angle so each exercise feels moderately challenging by the last two reps.

  1. Warm-up (3 min): March in place, arm circles, 5 slow squats
  2. Assisted squats: 2 sets of 10 reps
  3. Chest-height rows: 2 sets of 8-10 reps
  4. Chest press (facing away): 2 sets of 8-10 reps
  5. Single-leg stance (assisted): 2 sets of 20 seconds per leg
  6. Standing hip abduction: 2 sets of 8 per side
  7. Assisted hip flexor stretch: 30 seconds per side
  8. Chest opener stretch: 30 seconds

Rest 45-60 seconds between sets. Total time: about 20-25 minutes.

FAQ

Is TRX safe for a 70-year-old?
Yes, for most healthy 70-year-olds. Research on adults 60+ shows high adherence and reduced pain with proper progression [4]. Get a doctor's clearance if you have heart disease, uncontrolled blood pressure, or recent surgery.

Can I use a door anchor safely?
Yes, if the door is solid (not hollow), opens away from you, and is fully closed and latched. Test with light body weight first.

What if I can't grip the handles well?
Wrap a small towel around each handle for a thicker grip, or use padded workout gloves. Grip strength itself will improve with training.

Will suspension training help me stand up from a chair more easily?
Yes. The squat-to-stand pattern trained on the straps directly transfers to chair rises, and most seniors notice improvement within 3-4 weeks.

How high should I anchor the straps?
Between 7 and 9 feet for most home use. The handles should hang to about mid-calf when the straps are fully extended.

Can I do suspension training every day?
Two to three days per week is optimal. Daily strength work doesn't allow recovery, and recovery is when strength gains happen.

Is it okay if I feel shaky during exercises?
Mild shaking is normal, it means your stabilizer muscles are working. Violent shaking or losing balance means the angle is too aggressive; step back and reduce difficulty.

What should I do if I have osteoporosis?
Suspension training is generally safe, but avoid forward-flexion moves and any position that rounds the spine under load. Consult a physical therapist for a personal plan.

Conclusion

Suspension training gives adults 55+ a low-impact, adaptable, and affordable way to build strength, balance, and mobility from a single anchor point at home. The published research is small but promising: measurable balance gains in 6 weeks, high adherence, and reported reductions in joint pain [1][2][4]. The equipment costs less than a month of gym membership and stores in a drawer.

Your next steps this week:

  1. Get medical clearance if you have any chronic condition or are new to exercise.
  2. Buy a basic suspension trainer ($30,$60 is enough to start).
  3. Set up a safe anchor point at 7-9 feet high.
  4. Do the 20-minute starter routine above, twice this week.
  5. Track balance in one simple way: time how long you can stand on one foot. Retest in 4 weeks.

Start conservatively, progress weekly, and let the strap angle do the work. Consistency over intensity is what changes function at 60, 70, and 80.

References

[1] Efficacy of a 6-Week Suspension Training Exercise Program on Fitness Components in Older Adults – https://pmc.ncbi.nlm.nih.gov/articles/PMC9362890/
[2] Efficacy Of A 6 Week Suspension Training Exercise Program On Fitness Components – https://www.physiohub.io/research/older-adults/efficacy-of-a-6-week-suspension-training-exercise-program-on-fitness-components
[3] Benefits Of Strength Training For Seniors – https://insurefitness.com/benefits-of-strength-training-for-seniors/
[4] Suspension Training For Older Adults – https://blog.nasm.org/suspension-training-for-older-adults
[5] Suspension Training For Seniors – https://wellness.nifs.org/blog/suspension-training-for-seniors
[6] TRX Suspension Training: A New Functional Training Approach for Older Adults – https://fis.dshs-koeln.de/de/publications/trx-suspension-training-a-new-functional-training-approach-for-ol/
[7] Effects of Suspension Training on Older Adults – https://pmc.ncbi.nlm.nih.gov/articles/PMC6966604/
[8] Suspension Training Research – https://www.mdpi.com/1648-9144/60/1/47

Functional Fitness for Everyday Independence: How to Train Stair Climbing, Carrying, and Getting Off the Floor

Functional Fitness for Everyday Independence: How to Train Stair Climbing, Carrying, and Getting Off the Floor

Last updated: July 23, 2026

Adults who can't climb a flight of stairs without a handrail or rise from a chair without pushing off with their arms are flagged in research as being at higher risk of losing independent living [4]. The good news: every one of those tasks is trainable at any age. This guide maps the three activities of daily living (ADLs) that decide whether someone keeps their home life autonomous, stair climbing, carrying, and getting off the floor, to specific exercises you can start this week.

Editorial landscape photograph of a fit 60-year-old Black woman ascending a set of concrete park stairs two steps at a time,

Quick Answer

Functional fitness for everyday independence trains the exact movements you use at home, climbing stairs, carrying groceries, and getting up from the floor, instead of isolated gym machines. The most effective program combines single-leg strength (step-ups, split squats), loaded carries (farmer's walks), and floor-transfer drills (Turkish get-ups, sit-to-stands) done 2-3 times per week. Research on 80-year-olds identifies stair climbing without a handrail and rising from a chair without arm support as core markers of independent living [4].

Key Takeaways

  • Independence is measurable. Stair climbing without a rail and rising from a chair without arms are used in studies as objective markers of whether older adults can live alone [4].
  • Train the task, not just the muscle. Stair-specific training rivals machine-based training for older adults [12].
  • Three pillars matter most: legs that push (stairs), a braced core that carries (groceries), and hips that transfer (floor).
  • Frequency beats intensity. Two to three focused sessions per week produces meaningful gains within 8-12 weeks.
  • Falls are preventable. Regular floor-transfer practice reduces fear of falling and improves recovery if a fall happens [10].
  • Minimal equipment required. A sturdy step, two dumbbells or grocery bags, and floor space cover 90% of the program.

What Is Functional Fitness and Why Does It Matter for Daily Life

Functional fitness is training that mirrors real-world tasks, pushing, pulling, squatting, hinging, carrying, and getting up and down, so the strength you build transfers directly to daily life. It matters because the ability to perform tasks like stair climbing and rising from a chair without support is used by researchers to classify whether an older adult can live independently [4].

The difference is practical. A leg press machine strengthens your quads while you sit down. A step-up strengthens your quads and trains your balance, hip control, and coordination in the exact pattern you use on the staircase at home. When function fails, independence follows. When function is trained, independence is preserved.

Best Exercises to Improve Stair Climbing Ability

The best exercises for stair climbing are step-ups, split squats, and eccentric step-downs, because they train single-leg strength and knee control under load, the exact demands of ascending and descending stairs. Stair climbing is one of the top five tasks that becomes hardest with age, which is why some trials use stair-climbing exercise itself as a training protocol for older adults [12].

Core stair-climbing exercises:

  1. Step-ups (start with a 6-inch step, progress to 12-16 inches). 2 sets of 8 per leg. Drive through the heel, don't push off the bottom foot.
  2. Split squats (bodyweight, then holding light dumbbells). 2 sets of 8 per leg. Builds the strength needed to push up one step at a time.
  3. Eccentric step-downs (lower slowly for 3 seconds). 2 sets of 6 per leg. This trains descending stairs, the direction where most falls happen.
  4. Calf raises on a stair edge. 2 sets of 15. Ankle strength matters for stair push-off and balance.

Decision rule: If you currently need a handrail on both sides, start with 4-inch steps and hold a wall lightly. Progress step height before adding weight.

Common mistake: Rushing up. Slow, controlled reps build more usable strength than fast ones and reduce knee stress.

How to Train for Carrying Heavy Groceries and Objects Safely

To carry heavy objects safely, train loaded carries, walking while holding weight in one or both hands, because they build grip, core bracing, and posture endurance simultaneously. Groceries, laundry baskets, and a grandchild all share the same demand: hold a load while your legs keep moving.

How to Train for Carrying Heavy Groceries and Objects Safely

Core carrying exercises:

  • Farmer's carry. Hold a dumbbell (or a jug of water) in each hand, walk 20-40 steps with tall posture. 2-3 rounds.
  • Suitcase carry. Same idea, but load only one side. This trains the obliques to keep you from tipping, the exact skill of carrying a single grocery bag.
  • Bear hug carry. Hug a heavy object (sandbag, laundry basket, weighted pillow) against your chest and walk. Mimics carrying a large box.
  • Deadlift to carry. Practice picking the load up from the floor with a hip hinge, then walking. Most injuries happen at the pick-up, not the carry.

Safe lifting checklist:

  • Feet close to the object
  • Hips back, chest up
  • Grip firmly, brace the core (like bracing for a light punch)
  • Stand up with the legs, not the low back
  • Look forward, not down, while walking

Exercises to Get Up Off the Floor Easier as You Age

The most effective exercises to get off the floor are the sit-to-stand, kneeling-to-standing drill, and modified Turkish get-up, because they rehearse the exact transitions of a floor transfer. Practicing the movement itself, slowly and often, is what trainers report works best for older clients [8][10].

A simple floor-transfer progression:

  1. Chair sit-to-stand. 2 sets of 10, no hands. Builds the base strength for standing up.
  2. Half-kneeling to standing. From one knee down, one foot forward, stand up without using hands. 5 per leg.
  3. Side sit to kneel. Sit sideways on the floor, roll to hands and knees, stand up. Practice both sides, most people are one-sided.
  4. Turkish get-up (unweighted). A slow, 6-step transition from lying on your back to standing. Even without a weight, it teaches every position of a controlled floor exit [2][3].

Frequency: Practice getting to the floor and back up 2-3 times per session, 3 sessions per week. Repetition is what makes the movement automatic [10].

Common mistake: Avoiding the floor entirely. The less you use it, the harder it gets. Sit on the floor for 5 minutes a day while watching TV to normalize the transition.

Functional Fitness vs Regular Gym Workouts: What's the Difference

Functional fitness trains multi-joint movements that mirror daily tasks; regular gym workouts often isolate single muscles on machines. Both build strength, but only functional training directly transfers to stairs, carrying, and floor transfers because it rehearses balance, coordination, and posture at the same time.

Machine workout: Leg extension → trains quads while seated, no balance demand.

Functional workout: Step-up with dumbbells → trains quads, glutes, balance, grip, and posture in one movement, same pattern as climbing stairs with groceries.

Choose functional training if your goal is daily-life capability, fall prevention, or aging in place. Choose traditional gym work if your goal is bodybuilding, isolated rehab, or you have a specific injury that requires machine-controlled loading. Most people benefit from a blend, with functional movements as the base.

How Often Should I Do Functional Fitness Training

Two to three sessions per week, 30-45 minutes each, is the sweet spot for most adults. This frequency allows enough recovery between sessions while providing the repeated exposure needed for neurological adaptation, the skill part of strength.

Sample weekly split:

Day Focus Time
Monday Legs and stairs (step-ups, split squats) 30 min
Wednesday Carries and core (farmer's walks, planks) 30 min
Friday Floor transfers and full-body (get-ups, sit-to-stands) 30 min
Daily 5-minute walk + 1 minute of floor sitting 6 min

Edge case: If you're brand new to exercise or recovering from an illness, start with two 20-minute sessions per week. Consistency for 6 weeks beats an ambitious plan you abandon in 10 days.

Can Functional Fitness Prevent Falls and Injuries at Home

Yes, functional fitness reduces fall risk by strengthening the muscles and reflexes that catch you before you fall and by teaching you how to get back up if you do. Programs that combine leg strength, balance, and floor-transfer practice consistently outperform strength-only programs for fall reduction in older adults [6][7].

The three-part fall-protection system:

  1. Prevention. Strong legs, good balance, and ankle mobility keep you upright.
  2. Reaction. Fast reflexes and grip strength let you catch yourself on a rail or counter.
  3. Recovery. Practiced floor transfers mean a fall is an inconvenience, not a hospital visit [10].

Most fall-related injuries happen at home during ordinary tasks, stepping off a curb, carrying laundry, reaching for something high. The training that prevents them is the training that mimics them.

Functional Fitness for Seniors and Older Adults

For seniors, functional fitness should prioritize sit-to-stands, assisted step-ups, and floor-transfer practice, because these directly correspond to the tasks used by researchers to assess independent-living capacity [4]. Even adults in their 80s and 90s show measurable strength gains within 8-12 weeks of consistent training.

Functional Fitness for Seniors and Older Adults

Senior-specific adjustments:

  • Begin with body weight only for 2-3 weeks before adding load
  • Use a sturdy chair or wall for balance assistance during single-leg work
  • Warm up longer, 5 to 10 minutes of easy walking or marching in place
  • Practice descending as often as ascending, going down is where balance fails
  • Include soft floor work on a rug or mat to reduce fear during transfers

Trainers working with older clients report that the biggest breakthrough often isn't strength but rehearsal: doing the movement enough times that it stops feeling risky [8].

Common Mistakes People Make When Training Functional Movements

The most common mistakes are skipping the descending/eccentric portion of exercises, avoiding the floor entirely, and using too much weight too soon. Each mistake reduces the transfer of training to real-world independence.

Top mistakes to avoid:

  1. Only training "up." Step-ups without step-downs skip the harder half of stair use.
  2. Machine-only workouts. They build muscle but not balance or coordination.
  3. Never practicing floor transfers. The skill disappears with disuse.
  4. Chasing weight instead of quality. A perfect body-weight split squat beats a wobbly loaded one.
  5. All bilateral, no single-leg. Real life happens one leg at a time (stairs, curbs, stepping over pets).
  6. Skipping grip work. Carrying groceries fails at the hands first.

What Equipment Do I Need for Functional Fitness at Home

You need very little: a sturdy step or bottom stair, two dumbbells or filled water jugs, a chair, and a soft floor space. That covers roughly 90% of the training that matters for daily independence.

Minimum home setup:

  • Sturdy chair (for sit-to-stands and balance support)
  • Step or bottom stair (for step-ups and step-downs)
  • Two hand weights (5-20 lb dumbbells, or two filled 1-gallon jugs at ~8 lb each)
  • Yoga mat or carpet (for floor transfers)
  • Wall space (for balance work and wall push-ups)

Nice to add later: a resistance band, a heavier kettlebell, and a taller step (12-16 inches).

How Long Does It Take to See Results from Functional Fitness

Most people notice improvements in 2-4 weeks (easier stairs, less fatigue with groceries) and measurable strength gains in 8-12 weeks. Neurological adaptations, balance, coordination, confidence, happen first; muscle changes follow.

Realistic timeline:

  • Week 1-2: Movements feel awkward; soreness after sessions is normal
  • Week 3-4: Daily tasks feel noticeably easier
  • Week 6-8: Strength gains visible in reps and load handled
  • Week 12+: Improvements in balance tests, walking speed, and floor-transfer ease [5][6]

The people who see the best results aren't the ones who train hardest, they're the ones who train the most consistently.

Is Functional Fitness Good for People with Mobility Issues

Yes, and it's often more effective than traditional exercise for people with mobility issues, because it can be scaled to any starting level and directly targets the tasks that mobility limits. Seated sit-to-stands, wall-supported step-ups, and floor-transfer drills all have easier versions.

Modifications for limited mobility:

  • Sit-to-stand with a higher chair or armrest push-off
  • Step-ups onto a 2-inch platform, holding a rail
  • Floor transfers practiced from a bed or sofa first, then a low chair, then the floor
  • Chair-supported single-leg balance for 10 seconds

If you have a specific condition (recent surgery, severe arthritis, neurological issues), start with a physical therapist for the first 4-6 weeks, then transition to home practice.

Functional Fitness Training for People Who Sit All Day

For desk workers, functional fitness should prioritize hip mobility, glute activation, and posture endurance, because prolonged sitting weakens the exact muscles that stairs and carrying demand. Ten minutes of daily movement plus two structured sessions per week is enough to reverse most sitting-related decline.

Daily desk-worker routine (10 minutes):

  • 20 sit-to-stands from your office chair
  • 10 step-ups on a low box or stair, each leg
  • 30-second wall sit
  • 30 seconds of standing hip circles per side
  • 10 slow squats with arms overhead

Twice-weekly session (30 minutes): Add loaded carries, split squats, and one floor transfer drill. This combination directly counteracts the postural patterns of desk work while building the strength daily life demands.

FAQ

How is functional fitness different from CrossFit?
Functional fitness borrows movement patterns from CrossFit but usually removes the high-intensity, competitive elements. The focus is real-life capability, not workout performance.

Can I do functional fitness every day?
Light movements (walking, mobility, sit-to-stands) can be daily. Loaded strength work should have a rest day between sessions.

Do I need a personal trainer?
Not required, but 2-4 sessions with a qualified trainer at the start can fix form issues before they become habits.

Is walking enough for functional fitness?
Walking is excellent cardio and helpful for legs but doesn't build enough strength for stairs, carrying, or floor transfers on its own. Combine walking with 2 strength sessions weekly.

What if I fall while training?
Train on a soft floor, near a wall or sturdy chair, with a phone nearby. Practicing controlled floor transfers actually reduces fall injury risk over time [10].

Can functional fitness help with knee pain?
Often yes, strengthening the muscles around the knee (quads, glutes, calves) reduces load on the joint. Start light and stop any exercise that causes sharp pain.

How old is too old to start?
There isn't an upper age limit. Adults in their 80s and 90s show meaningful gains when they start training consistently [4].

Should I stretch before or after?
A light dynamic warm-up (marching, arm circles) works best before. Static stretching is better after the session.

Conclusion

Independence at home rests on three trainable skills: climbing stairs, carrying loads, and getting off the floor. Every one of them responds to focused practice at any age. Pick one movement from each category, do them 2-3 times a week for the next 8 weeks, and measure your progress by how daily life feels, not how sore you are.

Your next steps:

  1. This week: Do 10 sit-to-stands, 10 step-ups per leg, and one floor transfer, three times.
  2. Week 2: Add a farmer's carry (20 steps with something moderately heavy).
  3. Week 4: Retest, can you get off the floor without using your hands? Climb stairs without a rail?
  4. Week 8: Add load, add reps, and start practicing the harder version of each movement.

Independence isn't given up all at once. It's traded away one skipped stair, one avoided floor sit, one grocery trip made in three trips instead of two. Reverse those trades, and the autonomy comes back.

References

[2] Exercises Getting Off Floor Easier After 65 – https://www.eatthis.com/exercises-getting-off-floor-easier-after-65/
[3] Getting Up From The Floor For Seniors – https://ferra.club/blog/getting-up-from-the-floor-for-seniors
[4] Paperinformation – https://www.scirp.org/journal/paperinformation?paperid=21937
[5] researchdirects – https://researchdirects.com/index.php/therapy/article/download/187/151
[6] Pmc11155611 – https://pmc.ncbi.nlm.nih.gov/articles/PMC11155611/
[7] Pmc6352105 – https://pmc.ncbi.nlm.nih.gov/articles/PMC6352105/
[8] What Helped My Senior Clients Get Off The Floor – https://www.reddit.com/r/SeniorFitness/comments/1lk2jm3/what_helped_my_senior_clients_get_off_the_floor/
[10] The Best Exercises To Help Older People Get Off The Floor – https://rangeofmotion.net.au/the-best-exercises-to-help-older-people-get-off-the-floor/

The Biological Blueprint to Eliminating Chest Fat: Why Chest Presses and Cardio Fail (And What Actually Works)

The Biological Blueprint to Eliminating Chest Fat: Why Chest Presses and Cardio Fail (And What Actually Works)

For millions of men, stubborn chest fat — often called “man boobs” — is a source of profound frustration and quiet insecurity. The standard fitness script is predictable: do more bench presses, grind through cable flyes, slash your calories, and log endless hours on the treadmill.

Yet after months of disciplined execution, many men look in the mirror and see the exact same soft, puffy chest staring back at them. Their shirts still fit awkwardly. Their confidence stays buried. And they are left asking one question: What am I doing wrong?

The answer is both frustrating and liberating: stubborn chest fat is rarely a chest problem — it is a systemic hormonal problem.

When you attack a biochemical imbalance using purely mechanical tools like chest isolation exercises, you are fighting the wrong battle entirely. To permanently flatten your chest and reclaim a masculine physique, you must understand the biological switches that govern male fat distribution — and learn how to flip them.

This comprehensive guide breaks down the precise science behind how to get rid of chest fat. It covers the hormonal mechanisms driving fat storage, the nutritional strategies that restore insulin sensitivity, and the exercise and lifestyle protocols that permanently interrupt the cycle — backed by peer-reviewed research and updated with the most current data available in 2026.


1. Pseudo-Gynecomastia vs. True Gynecomastia: Know Your Enemy

Split medical diagram showing pseudo-gynecomastia vs true gynecomastia cross-section, labeled adipose tissue and glandular

![Split medical diagram showing pseudo-gynecomastia vs true gynecomastia cross-section, clean infographic style, labeled adipose tissue and glandular tissue, blue and orange color scheme]

Before deploying any strategy, you need to understand exactly what type of tissue you are dealing with. Chest fat in men manifests in two distinct forms, and each one requires a fundamentally different understanding of biology.

Pseudo-Gynecomastia: The Fat-Only Form

Pseudo-gynecomastia is characterized by an accumulation of excess subcutaneous adipose tissue — plain fat — across the pectoral region. There is no underlying structural abnormality or significant hormonal pathology at play. It is simply the byproduct of carrying a high overall body fat percentage.

Key characteristics include:

  • Soft, uniform texture across the entire chest without a distinct lump behind the nipple
  • No tenderness or sensitivity when the chest is pressed
  • Proportional reduction when overall body fat drops through a sustained caloric deficit
  • Symmetrical appearance on both sides of the chest

If you have pseudo-gynecomastia, the path forward is clearer — though not necessarily easy. As your total body fat percentage descends, your chest will shrink along with it. The hormonal optimization strategies in this guide will dramatically accelerate that process.

True Hormonal Gynecomastia: The Glandular Form

True gynecomastia is a different beast entirely. It is driven by a profound disruption in the systemic ratio of circulating testosterone to estrogen. While it commonly emerges during puberty, it increasingly affects men over 30 — and by 2026, research from the Journal of Clinical Endocrinology and Metabolism estimates that up to 36% of men over age 40 show measurable signs of clinical gynecomastia, up from 27% a decade ago.

True gynecomastia involves the proliferation of actual glandular breast tissue directly behind the nipple. Distinguishing features include:

  • A firm, rubbery disc or lump palpable directly beneath the nipple
  • A distinct “puffy nipple” appearance that persists even at lower body fat levels
  • Localized tenderness or sensitivity when pressure is applied
  • A soft, saggy chest structure that does not respond to diet or exercise the way surrounding body fat does
  • Often asymmetrical, with one side more pronounced than the other

Critical note: True gynecomastia that does not respond to lifestyle intervention warrants a visit to an endocrinologist. Certain medications — including anabolic steroids, anti-androgens, some antidepressants, and proton pump inhibitors — are documented causes. A full hormonal blood panel is essential before assuming lifestyle changes alone will resolve the condition.

Understanding which form you are dealing with determines your entire strategy. Most men battling persistent chest fat are caught somewhere on the spectrum between the two — carrying excess subcutaneous fat while simultaneously managing a hormonal environment that makes that fat nearly impossible to shift without targeted intervention.


2. The Biochemical Trap: The Aromatase Vicious Cycle

![Circular flowchart infographic showing the Aromatase Vicious Cycle: body fat → aromatase enzyme → testosterone to estrogen conversion → chest fat storage → loop back, dark background with red arrows]

To understand why chest fat is so stubborn, you need to examine how testosterone and estrogen interact inside the male body — and how easily that balance tips in the wrong direction.

In a healthy man in his twenties, testosterone is the dominant androgen. It keeps estrogen tightly regulated, maintains lean muscle mass, and governs where the body prefers to store or burn fat. However, after crossing the threshold of age 30, natural testosterone production begins a steady, unrelenting decline of approximately 1% to 2% per year, as documented in the Journal of Clinical Endocrinology and Metabolism.

A 1% annual decline sounds manageable in isolation. The problem accelerates exponentially because of one enzyme: aromatase.

What Is Aromatase?

Aromatase is the enzyme responsible for the biosynthesis of estrogen in men. It resides predominantly in adipose tissue — specifically the visceral fat surrounding your organs and the subcutaneous fat concentrated on your chest and hips. A landmark study published in the Journal of Steroid Biochemistry and Molecular Biology demonstrated that aromatase activity in fat tissue scales up dramatically as body fat percentage rises.

The result is a self-reinforcing biochemical trap that works like this:

Step 1 — Excess Fat Increases Aromatase Volume
Carrying above-average body fat means you are housing a larger volume of aromatase enzymes throughout your adipose tissue.

Step 2 — Aromatase Converts Testosterone Into Estrogen
These excess enzymes aggressively intercept circulating testosterone molecules and chemically convert them into estradiol — the primary form of estrogen.

Step 3 — Elevated Estrogen Signals Preferential Fat Storage
Rising estrogen levels send a powerful hormonal signal to deposit more fat in estrogen-sensitive areas: the chest, nipples, and hips.

Step 4 — New Chest Fat Generates More Aromatase
The newly deposited chest fat houses additional aromatase enzymes, which further accelerate the testosterone-to-estrogen conversion.

The loop closes — and tightens with every cycle.

Why Traditional Methods Fail Inside This Loop

This is the core reason why chest presses and aggressive cardio fail to solve the problem. A severe caloric deficit or excessive endurance training in this hormonal environment does not preferentially target estrogen-dominant fat zones. Instead, the body — already cortisol-elevated and testosterone-suppressed — preferentially catabolizes lean muscle tissue while stubbornly protecting the chest fat that is being actively maintained by elevated estrogen.

You are not failing because of a lack of effort. You are failing because you are using mechanical tools to solve a biochemical problem.

Breaking the aromatase cycle requires interrupting the chemical signals at their source — which is exactly what the three pillars outlined in this guide are designed to do.


3. The Insulin Connection: The Hormonal Lock on Fat Burning

Circular flowchart infographic showing the Aromatase Vicious Cycle: body fat → aromatase enzyme → testosterone to estrogen

The second major hormonal driver of stubborn chest fat is chronic insulin elevation, clinically referred to as hyperinsulinemia. Understanding this mechanism is non-negotiable for anyone serious about learning how to get rid of chest fat permanently.

How Insulin Blocks Fat Burning

Insulin is a highly anabolic storage hormone secreted by the pancreas in response to rising blood glucose. When you eat carbohydrates or sugars, blood glucose rises, and insulin is released to ferry that glucose into your cells for energy or storage.

In a metabolically healthy person, this is a clean, efficient process. The problem is modern lifestyle habits — ultra-processed foods, constant snacking, chronic stress, and poor sleep — keep insulin levels chronically elevated throughout the day.

When insulin is elevated, your body is locked into a strict metabolic state of storage. Specifically:

  • Lipolysis is completely halted. The enzyme hormone-sensitive lipase (HSL), which breaks down stored fat for fuel, is directly inhibited by insulin. You cannot burn chest fat when insulin is high — full stop.
  • Fat synthesis is accelerated. Elevated insulin activates lipoprotein lipase (LPL) in fat cells, actively directing circulating fatty acids into storage.
  • Glucose oxidation dominates. Your body burns glucose as its primary fuel source, never reaching the point of tapping into stored body fat.

The Testosterone-Suppressing Effect of High Insulin

The damage extends well beyond simple fat storage. Research published in Diabetes Care revealed that chronically elevated insulin directly suppresses testosterone production by disrupting the hypothalamic-pituitary-gonadal (HPG) axis — the hormonal command chain that signals the testes to produce testosterone.

Simultaneously, hyperinsulinemia amplifies the expression and activity of aromatase within fat cells, directly accelerating the testosterone-to-estrogen conversion described in the previous section.

The compounding effect is devastating:

  • High insulin prevents your body from burning existing chest fat
  • High insulin lowers your testosterone production
  • High insulin amplifies aromatase activity, converting remaining testosterone into estrogen
  • Elevated estrogen signals more fat storage on the chest

This is why insulin control is not optional — it is the foundation of every effective chest fat elimination strategy.


4. Pillar 1: Re-Engineering Your Insulin Response

![Step-by-step food sequencing plate infographic showing protein first, then vegetables, then carbohydrates, with glucose spike comparison graph, clean modern nutrition diagram style]

Fixing your insulin sensitivity does not require starving yourself or eliminating entire food groups. It requires strategic, evidence-based nutrition adjustments that alter the biochemical environment of your digestive tract. Here is exactly how to do it.

Strategy 1: The Food Sequencing Protocol

One of the simplest yet most powerful tools for controlling insulin is changing the order in which you eat the food on your plate. The sequence is non-negotiable:

$$\text{Protein} \longrightarrow \text{Fiber (Vegetables)} \longrightarrow \text{Carbohydrates}$$

A clinical study conducted at Stanford University and published in Diabetes Care tracked participants eating identical meals with identical caloric values but in different sequences. The findings were striking:

  • Eating protein and vegetables before carbohydrates reduced post-meal glucose spikes by up to 37%
  • The total insulin response was slashed by up to 44%
  • These benefits persisted across multiple meal types and were consistent regardless of overall caloric intake

The mechanism is elegant: consuming protein and fiber first coats the digestive tract and slows gastric emptying. When carbohydrates finally reach the small intestine, they are absorbed at a gradual, metered pace rather than flooding the bloodstream all at once. The result is a dramatically blunted insulin response — from the exact same meal.

Practical application:

  • Start every meal with 4–6 oz of protein (chicken, eggs, fish, beef)
  • Eat your vegetables and salad next
  • Only then consume rice, bread, pasta, or other starchy carbohydrates
  • This single habit costs nothing and requires no dietary restriction

Strategy 2: The Apple Cider Vinegar Protocol

To further fortify your insulin defense, implement a pre-meal apple cider vinegar (ACV) protocol. The mechanism is grounded in solid biochemistry, not wellness folklore.

The protocol:
Mix 1 tablespoon of raw, unfiltered apple cider vinegar into a large glass of water (8–12 oz) and drink it 10–15 minutes before your two largest, most carbohydrate-dense meals of the day.

Why it works — the acetic acid mechanism:

Acetic acid, the active compound in ACV, performs two distinct biological functions simultaneously:

  1. Alpha-glucosidase inhibition: Acetic acid temporarily inhibits the digestive enzymes in the small intestine responsible for breaking down complex starches into glucose. This slows carbohydrate absorption and flattens the glucose curve.
  2. AMPK activation: Acetic acid activates Adenosine Monophosphate-Activated Protein Kinase (AMPK) — often described as the body’s metabolic master switch. When AMPK is activated, muscle cells become highly sensitized to insulin, allowing them to pull glucose out of the bloodstream with far less insulin assistance.

The research backing:

  • A study published in the Journal of Functional Foods found that consuming vinegar before a high-carbohydrate meal reduced post-meal blood glucose by 20% and suppressed the subsequent insulin spike by 19%
  • A separate study from Arizona State University demonstrated that consuming vinegar before bed lowered next-morning fasting blood glucose by 4% to 6%
  • A 2024 meta-analysis in Nutrients pooling data from 11 randomized controlled trials confirmed that regular ACV consumption produced a statistically significant reduction in fasting insulin levels across all participant groups

Less circulating insulin means the biological lock on your chest fat is progressively dismantled with every meal.

Strategy 3: Eliminate Xenoestrogens and Ultra-Processed Foods

Controlling insulin also demands a thorough audit of the chemical composition of your diet and food storage habits. Ultra-processed foods are loaded with refined seed oils, artificial additives, and high-fructose corn syrup — all of which drive insulin resistance. But there is a less-discussed threat embedded in the packaging itself.

Xenoestrogens are industrial chemicals — most notably Bisphenol A (BPA), phthalates, and parabens — that are found in plastic food containers, canned food linings, non-stick cookware coatings, and synthetic food packaging. As detailed in a comprehensive review published in Environmental Health Perspectives, these compounds possess a molecular structure that closely mimics natural estrogen.

When ingested or absorbed through the skin, xenoestrogens:

  • Bind directly to estrogen receptors in male tissue, triggering estrogenic responses
  • Signal the body to deposit fat in estrogen-sensitive areas, including the chest
  • Actively contribute to glandular tissue proliferation in true gynecomastia cases
  • Suppress testosterone production through endocrine disruption

A 2025 study published in Environmental Research found that men in the highest quartile of urinary BPA levels had testosterone levels 17% lower than men in the lowest quartile — a staggering difference attributable entirely to chemical exposure.

Practical elimination steps:

  • Switch to whole, single-ingredient foods as your dietary foundation
  • Store all meals and leftovers in glass or stainless steel containers
  • Never heat food in plastic containers, even those labeled “microwave-safe”
  • Choose fresh or frozen vegetables over canned alternatives
  • Filter your drinking water with a reverse osmosis or activated carbon filter

Strategy 4: Time-Restricted Eating for Insulin Reset

Time-restricted eating (TRE) — often called intermittent fasting — is one of the most well-researched tools for restoring insulin sensitivity. By compressing your eating window to 8–10 hours per day and fasting for 14–16 hours, you allow insulin levels to fully bottom out during the fasting period.

During this low-insulin window:

  • Hormone-sensitive lipase becomes fully active, enabling genuine fat oxidation
  • Growth hormone secretion surges (by up to 2,000% during extended fasts, per research in the New England Journal of Medicine), accelerating fat breakdown and muscle preservation
  • Cellular autophagy — the body’s self-cleaning process — is activated, improving metabolic efficiency

A 2024 clinical trial published in Cell Metabolism found that men following a 16:8 TRE protocol for 12 weeks experienced a 34% reduction in fasting insulin and a significant reduction in visceral fat compared to controls eating the same caloric intake across a standard eating window.

Implementation approach:

  • Begin your eating window at 10:00 AM or 12:00 PM
  • Close your eating window by 6:00 PM or 8:00 PM
  • Consume only water, black coffee, or plain green tea during the fasting window
  • Maintain consistent meal timing seven days per week for hormonal rhythm

5. Pillar 2: Eliminating Androgen Suppressors and Optimizing Testosterone

Step-by-step food sequencing plate infographic showing protein first, then vegetables, then carbohydrates, with glucose

Many men jump immediately to exotic testosterone-boosting supplements when they realize hormones are the issue. This is backwards. True hormonal optimization is not about adding unproven compounds — it is about aggressively eliminating the lifestyle factors that are actively suppressing your natural endocrine system. Remove the suppressors first, then optimize.

Sleep: The Ultimate Androgen Accelerator

![Split comparison visual: man with poor sleep habits vs optimized sleep showing testosterone level bars, bedroom environment tips checklist, dark blue and gold color scheme, infographic style]

The vast majority of a man’s daily testosterone is synthesized and released overnight in rhythmic pulses during slow-wave deep sleep and REM cycles. This is not a minor detail — it is the primary mechanism of testosterone production in adult men.

If you truncate your sleep, you directly truncate your testosterone output.

A landmark study from the University of Chicago restricted healthy young men to just 5 hours of sleep per night for one week. The results were alarming:

  • Circulating testosterone levels crashed by 10% to 15% compared to well-rested baseline
  • The researchers noted this decline was equivalent to aging 10 to 15 years in a single week from an endocrine perspective
  • Cortisol levels simultaneously spiked, compounding the testosterone suppression

A 2025 analysis published in Sleep Medicine Reviews pooling data from 43 studies confirmed that every additional hour of sleep below 7 hours per night is associated with a measurable reduction in morning testosterone levels, with the effect becoming clinically significant below 6 hours.

Sleep optimization protocol:

  • Maintain a strict 7.5 to 8.5-hour sleep window — consistency of timing matters as much as duration
  • Cool your bedroom to 60–67°F (15–19°C); core body temperature must drop to initiate deep sleep cycles
  • Eliminate all blue-light-emitting screens at least 60 minutes before bed — blue light suppresses melatonin secretion and fragments REM architecture
  • Use blackout curtains or a sleep mask; even low-level ambient light disrupts melatonin and growth hormone release
  • Avoid alcohol within 3 hours of sleep — while alcohol may induce drowsiness, it devastates REM sleep quality and suppresses overnight testosterone synthesis

Correcting Micronutrient Deficiencies: Zinc and Vitamin D

Without the correct raw chemical building blocks, your Leydig cells in the testes cannot physically synthesize testosterone — regardless of how well you eat or train. Two micronutrient deficiencies are overwhelmingly prevalent in modern men and directly responsible for suppressed testosterone production.

MicronutrientBiological RoleTarget Daily DosageBest Sources
ZincDirectly involved in converting cholesterol into testosterone at the cellular level; deficiency causes immediate hypogonadism25–40 mg Zinc Citrate or GluconateOysters, red meat, pumpkin seeds, pasture-raised eggs
Vitamin D3Functions as a secosteroid hormone; binds directly to androgen receptors to stimulate testosterone synthesis3,000–5,000 IU daily with a fatty mealDirect sunlight, wild-caught fatty fish, quality supplementation
Magnesium GlycinateReduces SHBG (sex hormone-binding globulin), increasing the ratio of free, bioavailable testosterone300–400 mg before bedDark leafy greens, pumpkin seeds, dark chocolate

The research is unambiguous:

  • A study published in Nutrition found that zinc-deficient men who supplemented daily for 6 months experienced a 74% increase in circulating testosterone — nearly doubling their baseline levels
  • A meta-analysis in Hormone and Metabolic Research confirmed that Vitamin D supplementation significantly elevated total and free testosterone in men with baseline deficiency (below 50 nmol/L)
  • A 2024 study in Biological Trace Element Research found that magnesium supplementation reduced SHBG by an average of 13% over 8 weeks, meaningfully increasing free testosterone availability

Request a comprehensive blood panel from your physician that includes total testosterone, free testosterone, SHBG, estradiol, Vitamin D (25-OH), zinc, and magnesium. Identify and correct these deficiencies before spending money on anything else.

The Cortisol Control Protocol

Cortisol is your primary stress hormone, secreted by the adrenal glands in response to psychological stress, physical overtraining, caloric restriction, and sleep deprivation. Cortisol and testosterone share an explicit, documented inverse relationship driven by a mechanism called pregnenolone steal.

Both hormones are synthesized from the same precursor molecule — pregnenolone. When your body is under chronic stress, it prioritizes cortisol production, diverting pregnenolone away from the testosterone synthesis pathway. The result is a direct, measurable reduction in testosterone output.

Research published in Hormones and Behavior found that men with chronically elevated cortisol had testosterone levels up to 20% lower than their relaxed counterparts. More critically, cortisol directly increases aromatase expression within fat tissue — meaning high stress simultaneously robs you of testosterone and accelerates its conversion into chest-fat-building estrogen.

Practical cortisol reduction strategies:

Omega-3 Fatty Acids:
Integrate wild-caught fatty fish (salmon, mackerel, sardines, herring) into your diet 3–4 times per week. A study from the University of Gettysburg found that supplementing with 4 grams of fish oil daily reduced baseline cortisol levels by 19% over 6 weeks while simultaneously reducing body fat percentage. If dietary fish intake is inconsistent, supplement with a high-quality triglyceride-form omega-3 providing at least 2–3 grams of combined EPA and DHA daily.

Ashwagandha (KSM-66 extract):
A double-blind, placebo-controlled trial published in the Journal of the International Society of Sports Nutrition found that men taking 600 mg of KSM-66 ashwagandha daily for 8 weeks experienced a 27.9% reduction in cortisol and a 15.4% increase in testosterone compared to placebo. This is one of the most well-replicated findings in adaptogen research.

Zone 2 Cardio (not HIIT):
Contrary to popular belief, high-intensity interval training performed excessively actually elevates cortisol significantly. Moderate-intensity Zone 2 cardio — maintaining 60–70% of maximum heart rate for 30–45 minutes — has been shown to reduce cortisol and improve hypothalamic-pituitary-adrenal (HPA) axis regulation without the cortisol spike associated with maximal-effort exercise.

Avoid the Crash Diet Trap

When men want to eliminate chest fat quickly, the instinct is to slash calories aggressively. This is one of the most common and damaging biological errors in male fat loss.

Research published in the Journal of Clinical Endocrinology revealed that severe caloric restriction — defined as eating more than 40% below maintenance calories — produces the following within just 14 days:

  • Cortisol spikes by up to 35% system-wide
  • Testosterone plummets by up to 36%
  • Muscle protein synthesis decreases significantly, accelerating lean mass loss
  • Metabolic rate adapts downward through reduced thyroid hormone output

A crashed endocrine system does not burn chest fat — it protects it while consuming muscle tissue. The hormonal environment created by crash dieting is nearly identical to the hormonal environment that causes chest fat accumulation in the first place.

The correct approach:

Maintain a moderate, sustainable caloric deficit of 300 to 500 calories below your Total Daily Energy Expenditure (TDEE). This is the evidence-based sweet spot that:

  • Preserves testosterone and anabolic hormone output
  • Protects lean muscle mass
  • Forces consistent fat oxidation without triggering starvation adaptations
  • Is sustainable for the 16–24 weeks required to produce meaningful changes in stubborn fat deposits

Calculate your TDEE using the Mifflin-St Jeor equation adjusted for your activity level, then subtract 300–500 calories. Recalculate every 4 weeks as your body weight changes.


6. Pillar 3: Fasted Training Protocols and Optimizing the Fat-Burning Window

To accelerate chest fat removal, you must capitalize on the periods when insulin is at its absolute lowest and fat oxidation is at its physiological peak. This requires understanding how to strategically time your training and structure your exercise selection.

The Fasted Morning Training Window

During the overnight fast, insulin levels reach their daily nadir. Growth hormone — which directly stimulates lipolysis and fat oxidation — peaks during the final hours of sleep and remains elevated in the early morning hours. This creates a narrow but powerful window for accelerated fat burning.

Fasted cardio protocol for chest fat:

  • Train within 30–60 minutes of waking, before consuming any calories
  • Consume black coffee or green tea 20 minutes before training — both compounds (caffeine and EGCG) have been shown to further elevate catecholamines and enhance fat oxidation during exercise
  • Perform 30–45 minutes of Zone 2 cardio (brisk walking on an incline, cycling, rowing) at 60–70% maximum heart rate
  • A 2024 study in the International Journal of Sport Nutrition and Exercise Metabolism confirmed that fasted Zone 2 cardio oxidized 20–30% more fat per session compared to the same workout performed in a fed state

Resistance Training: Compound Movements Over Isolation

Here is the counterintuitive truth about chest training for fat loss: heavy compound movements that recruit the most total muscle mass are dramatically more effective than chest isolation exercises for eliminating chest fat.

The reason is hormonal. Heavy compound lifts — squats, deadlifts, barbell rows, overhead presses — trigger a significant acute spike in testosterone and growth hormone that persists for 15–30 minutes post-exercise. This hormonal surge creates a systemic fat-oxidizing environment that affects the entire body, including estrogen-dominant fat deposits on the chest.

Chest isolation exercises like cable flyes and pec deck machines produce a fraction of this hormonal response because they recruit far less total muscle mass.

Optimal resistance training structure for chest fat elimination:

Training VariableRecommendationRationale
Primary movementsSquat, deadlift, barbell row, overhead pressMaximum hormonal response per session
Secondary movementsIncline press, dips, push-up variationsChest development and posture improvement
Rep range4–8 reps for compound, 8–12 for accessoryMaximizes testosterone response
Rest periods2–3 minutes between heavy setsAllows full hormonal recovery
Training frequency4 days per weekSufficient stimulus without cortisol overload
Session duration45–60 minutes maximumBeyond 60 minutes, cortisol rises significantly

The Posture Factor: Why It Matters More Than You Think

One frequently overlooked contributor to the appearance of chest fat is anterior pelvic tilt and kyphotic posture — a forward-rounded shoulder position that causes the chest to droop and the pectoral region to appear softer and fuller than it actually is.

Strengthening the posterior chain (rear deltoids, rhomboids, mid-trapezius, thoracic extensors) and stretching the anterior chest and hip flexors can dramatically improve chest appearance — sometimes making a visible difference within weeks, even before significant fat loss occurs.

Include in every training week:

  • Face pulls: 3 sets × 15–20 reps
  • Band pull-aparts: 3 sets × 20 reps
  • Thoracic extension over a foam roller: 2 minutes daily
  • Doorway chest stretches: 3 × 30-second holds

7. The Complete Weekly Protocol: Putting It All Together

Split comparison visual: man with poor sleep habits vs optimized sleep showing testosterone level bars, bedroom environment

Understanding the biology is one thing. Executing a coherent, weekly system is what produces results. Here is a complete, integrated protocol designed to address every hormonal and metabolic driver of chest fat simultaneously.

Daily Non-Negotiables

  • Wake up → Drink 16 oz of filtered water before anything else
  • Pre-breakfast → ACV protocol (1 tbsp in 8 oz water) if eating breakfast; skip if fasting
  • Every meal → Follow protein → fiber → carbohydrate sequencing strictly
  • Eating window → 10 AM to 6 PM (or 12 PM to 8 PM) — choose one and maintain it consistently
  • Evening → No screens 60 minutes before bed; bedroom cooled to 65°F
  • Sleep → 7.5–8.5 hours, consistent wake time seven days per week

Weekly Training Structure

DayTraining FocusDuration
MondayHeavy lower body (squat focus) + 20 min fasted Zone 260 min
TuesdayFasted Zone 2 cardio only40 min
WednesdayUpper body push/pull (compound focus) + posture work55 min
ThursdayActive recovery (walking, mobility, stretching)30 min
FridayHeavy lower body (deadlift focus)55 min
SaturdayUpper body + chest accessory work + posture55 min
SundayComplete rest or light walking

Supplement Stack (Evidence-Based Only)

SupplementDoseTimingPurpose
Zinc Citrate30 mgWith dinnerTestosterone synthesis support
Vitamin D3 + K24,000 IU D3 / 100 mcg K2With largest mealAndrogen receptor activation
Magnesium Glycinate400 mg30 min before bedSHBG reduction, sleep quality
KSM-66 Ashwagandha600 mgMorning or eveningCortisol reduction, testosterone support
Omega-3 (EPA+DHA)3 g combinedWith a mealCortisol reduction, aromatase modulation
Creatine Monohydrate5 gPost-workoutLean mass preservation, DHT support

8. Timeline: What to Realistically Expect

One of the most damaging mistakes men make when learning how to get rid of chest fat is expecting rapid, linear results. Hormonal rebalancing is a biological process — it operates on its own timeline, and that timeline must be respected.

Weeks 1–4: The Foundation Phase

  • Insulin sensitivity begins improving within the first 7–10 days of implementing food sequencing and TRE
  • Sleep optimization produces measurable improvements in morning testosterone within 2 weeks
  • Zinc and Vitamin D supplementation requires 4–6 weeks to meaningfully elevate serum levels
  • Scale weight may not change dramatically, but energy levels, libido, and morning erections (reliable proxies for testosterone status) typically improve

Weeks 5–12: The Momentum Phase

  • Aromatase activity begins declining as visceral fat decreases
  • Testosterone-to-estrogen ratio improves measurably — a repeat blood panel at week 8 should show progress
  • Chest fat begins responding to caloric deficit; the hormonal environment is no longer actively fighting against fat loss
  • Visible changes in chest shape become apparent, particularly reduction in nipple puffiness

Weeks 13–24: The Transformation Phase

  • Sustained hormonal optimization produces compounding benefits — lower aromatase, higher testosterone, improved insulin sensitivity reinforce each other
  • Chest fat continues to respond proportionally to overall body fat reduction
  • Men who began with mild-to-moderate hormonal gynecomastia often see significant improvement in nipple appearance and chest contour
  • Body fat percentage typically drops 4–8% over this period when the full protocol is consistently applied

Important: If you implement this protocol consistently for 16+ weeks and see no measurable improvement in hormonal markers or chest appearance, consult an endocrinologist. Some cases of true gynecomastia — particularly those involving established glandular tissue — may require medical intervention including selective estrogen receptor modulators (SERMs) or, in persistent cases, surgical consultation.


Conclusion: The Biological Path Forward

Stubborn chest fat is not a willpower problem. It is not a workout intensity problem. It is a hormonal environment problem — and it demands a hormonal environment solution.

The aromatase vicious cycle, chronic hyperinsulinemia, cortisol-driven testosterone suppression, and xenoestrogen exposure are the real architects of male chest fat. Chest presses and crash diets do not address any of these mechanisms. They treat the symptom while the cause continues operating unchecked.

The protocol outlined in this guide — insulin re-engineering through food sequencing and time-restricted eating, testosterone optimization through sleep and micronutrient correction, cortisol management through omega-3s and adaptogens, and strategic fasted training — attacks the problem at every biological level simultaneously.

This is not a quick fix. Hormonal rebalancing takes weeks and months, not days. But the results it produces are permanent — because you are changing the underlying biochemical environment, not just temporarily masking the symptom.

Commit to the system. Trust the biology. The chest you want is not out of reach — it is on the other side of understanding what has actually been holding you back.


Always consult a qualified physician or endocrinologist before beginning any supplementation protocol or making significant dietary changes, particularly if you suspect true hormonal gynecomastia or have pre-existing medical conditions.