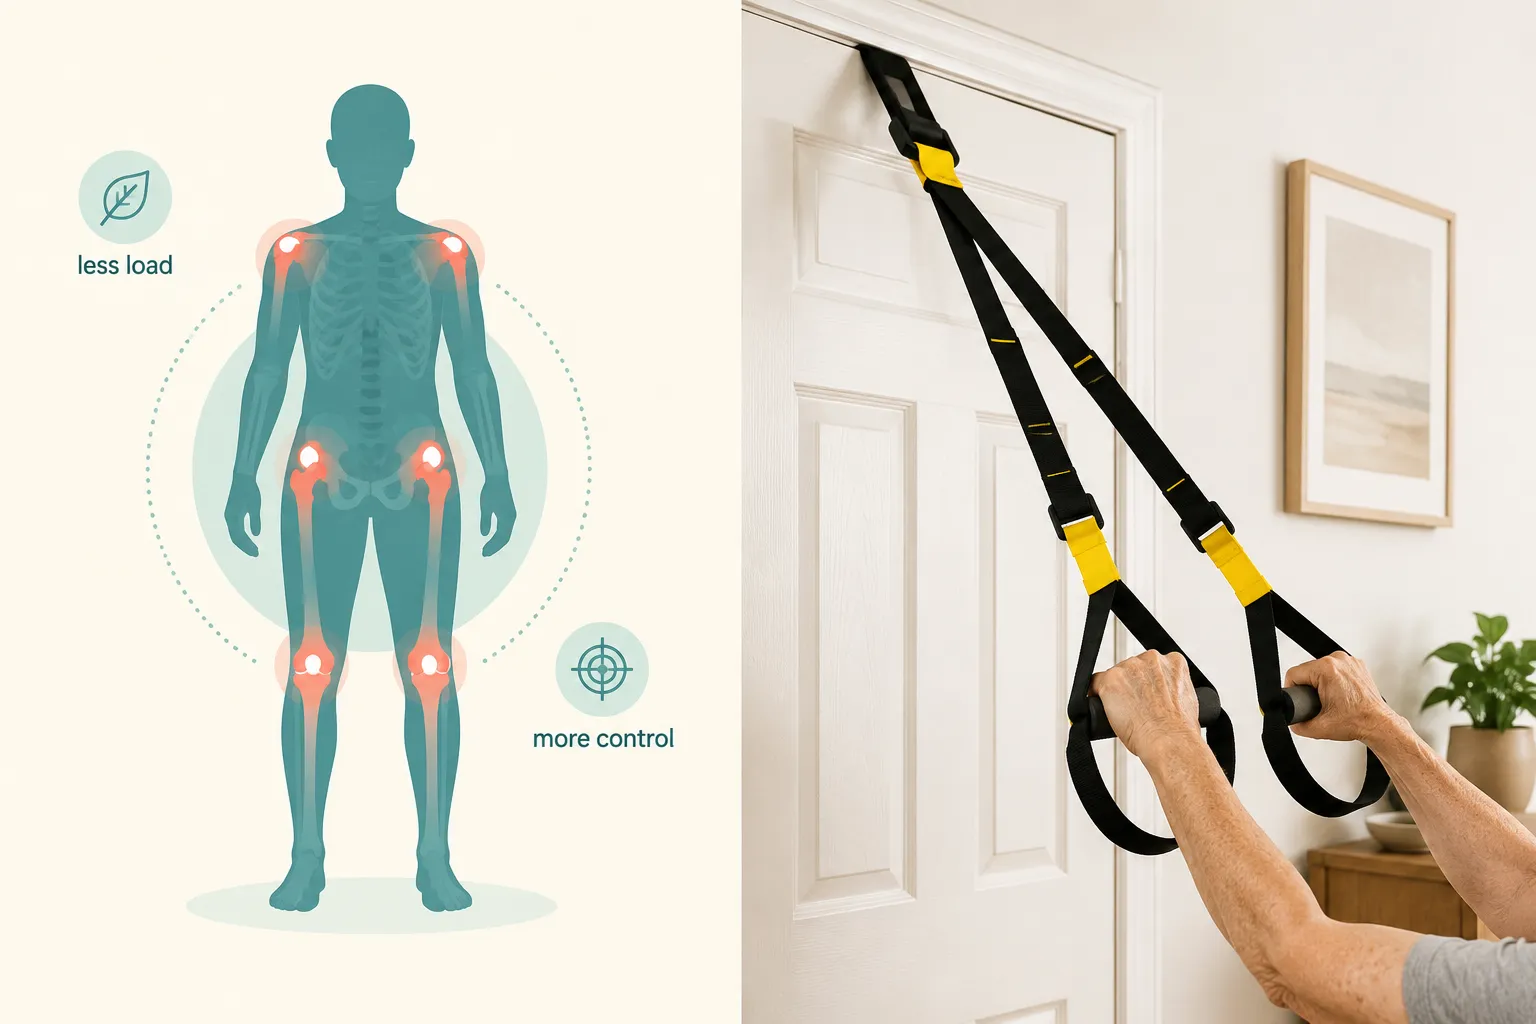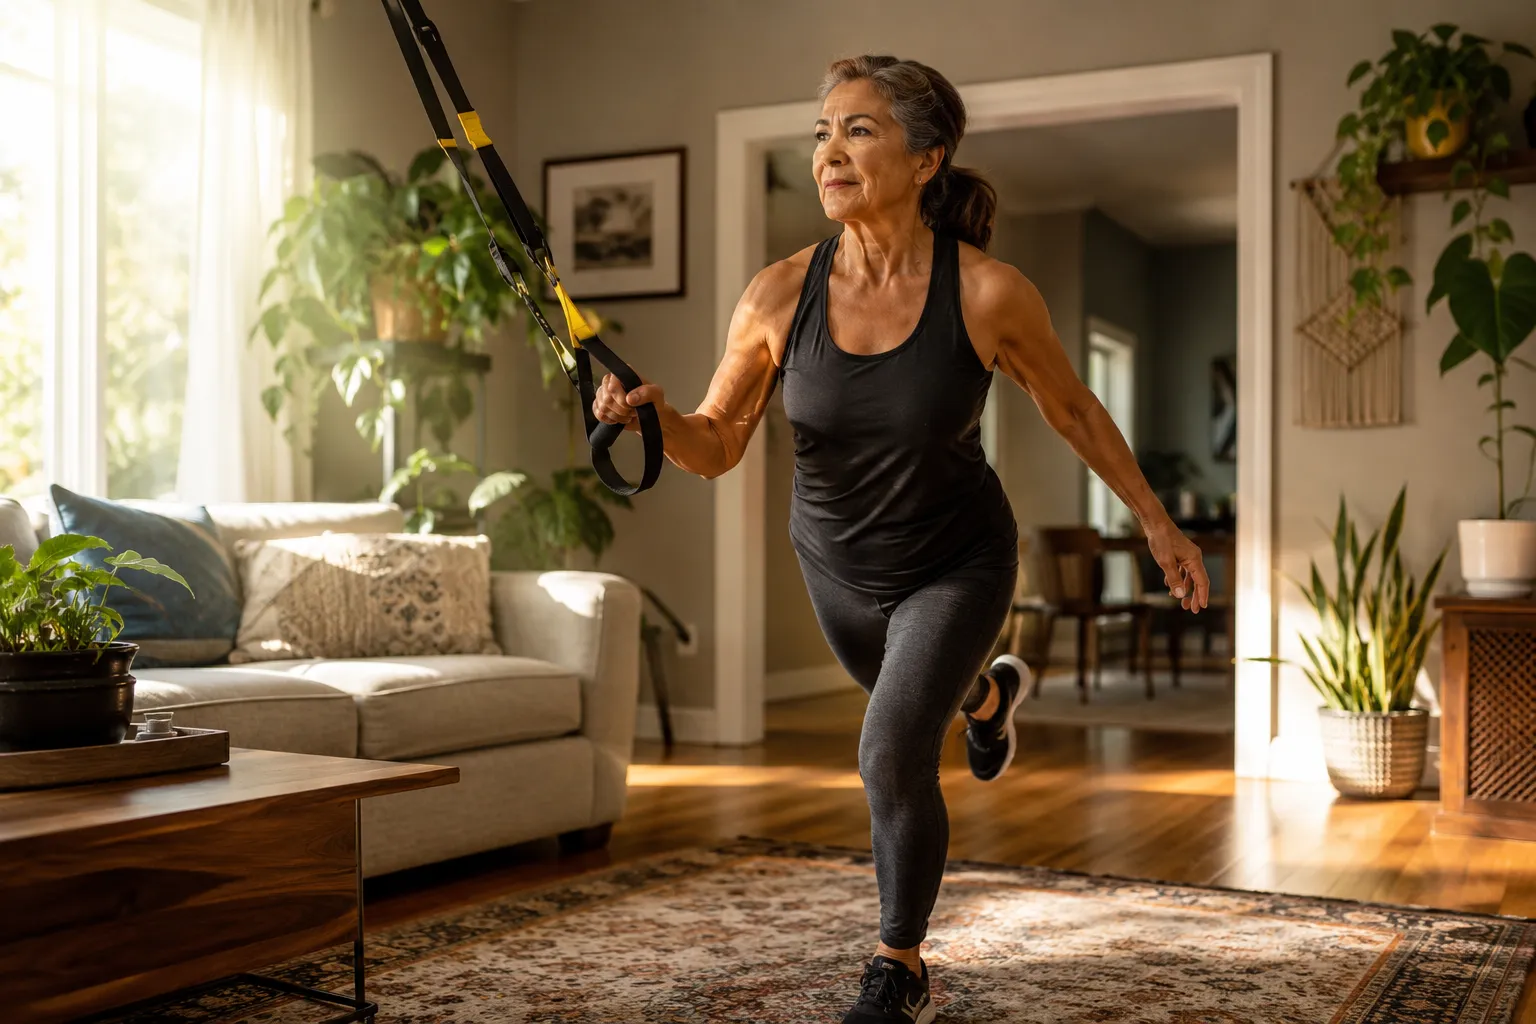
Best Home Strength Training Equipment for Seniors: Safe, Space-Saving Options Reviewed

Best Home Strength Training Equipment for Seniors: Safe, Space-Saving Options Reviewed

Last updated: August 15, 2026

Quick Answer

The best home strength training equipment for seniors combines safety, low joint impact, and small footprint. For most older adults, a starter kit of fabric resistance bands, light dumbbells (1-5 lb), a thick yoga mat, and a sturdy chair covers 90% of needs for under $55 [5][8]. Add adjustable dumbbells, a suspension trainer, or a compact cable system as strength improves. Resistance bands are widely called the "gold standard" for senior strength work because they're joint-friendly, scalable, and take up almost no space [10].

Key Takeaways

  • Start small: Bands + mat + light dumbbells cost $30,$55 and support strength, balance, and flexibility [5][8].
  • Bands beat dumbbells for most beginners due to gentler joint load and no drop risk [10].
  • Train 2 days a week minimum, hitting all major muscle groups [10].
  • Adjustable dumbbells (PowerBlock, Bowflex SelectTech) save the most space if you outgrow fixed weights [6].
  • Fabric bands over rubber, less snap risk and more comfort on skin [8].
  • Seated equipment (pedal exercisers, mini-ellipticals) works well for limited mobility [9][14].
  • Suspension trainers offer bodyweight resistance that scales with foot position, ideal for balance-focused strength.
  • Budget $150,$300 for a fully equipped senior home gym [8].
  • Consult a doctor before starting if you have heart, joint, or balance conditions [8].

What Strength Training Equipment Is Safe for Seniors?

The safest strength equipment for seniors shares three traits: low fall risk, controlled resistance, and forgiving joint load. Resistance bands, light dumbbells (1-5 lb), suspension trainers, and seated cable machines top the list because they let older adults build muscle without heavy loads dropping on feet or awkward barbell positions [1][10].

Safest categories for most seniors:

  • Fabric resistance bands, no snap risk, gentle on skin, scalable tension [8]
  • Light neoprene or hex dumbbells, coated grip, stable when set down [6]
  • Suspension trainers (TRX-style), resistance changes with body angle, no free weights overhead
  • Seated pedal exercisers and mini-ellipticals, zero fall risk, foldable [9][14]
  • Compact cable/functional trainers, guided motion path prevents form breakdown [3]

Avoid or delay: Olympic barbells, kettlebell swings, and plyo boxes over 12 inches unless you already train with a coach. The injury risk outweighs the benefit for most beginners over 65.

Best Compact Home Gym Equipment for Small Spaces

The best space-saving options for seniors fit in a closet or under a bed and still enable full-body strength work. Fabric bands, adjustable dumbbells, and door-anchored suspension trainers deliver the highest strength return per square foot [3][6].
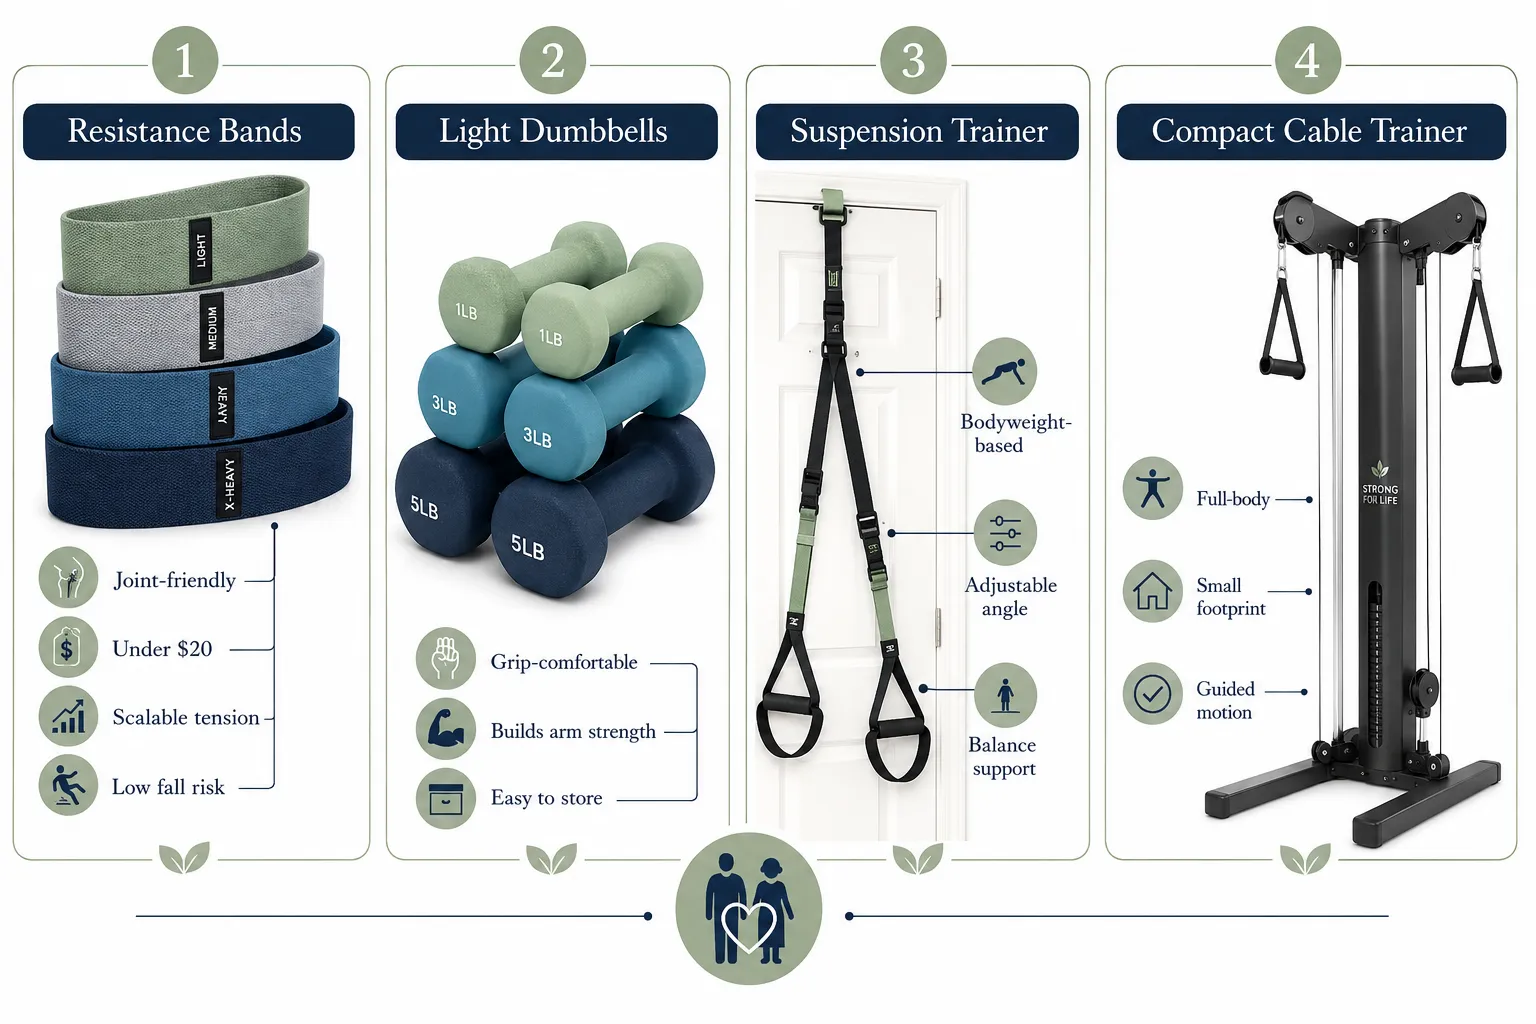
Best Compact Home Gym Equipment for Small Spaces

Top compact picks for 2026:

Equipment Footprint Price Best For
Fabric resistance band set Drawer-size $15,$25 Beginners, arthritis [8]
Amazon Basics neoprene dumbbells Shelf ~$35 Fixed light weights [6]
Yes4All adjustable dumbbells Small floor space ~$79 Progressing lifters [6]
PowerBlock Elite adjustable 1 sq ft ~$299 Serious home gym, small space [6]
Bowflex SelectTech 552 1 sq ft ~$349 Convenience-focused [6]
Compact cable trainer Corner unit $400,$900 Full-body variety [3]

If you have less than 20 square feet, prioritize bands and one pair of adjustable dumbbells. That combo covers curls, presses, rows, squats, and deadlifts without ever needing a rack.

How Much Does Home Strength Training Equipment Cost?

Expect to spend $30,$50 to start and $150,$300 for a well-equipped senior home gym [8]. You do not need to spend more than that for excellent results.

Cost breakdown by tier:

  • Bare essentials ($30,$55): 3-4 fabric bands, yoga mat, light ankle weights [5][8]
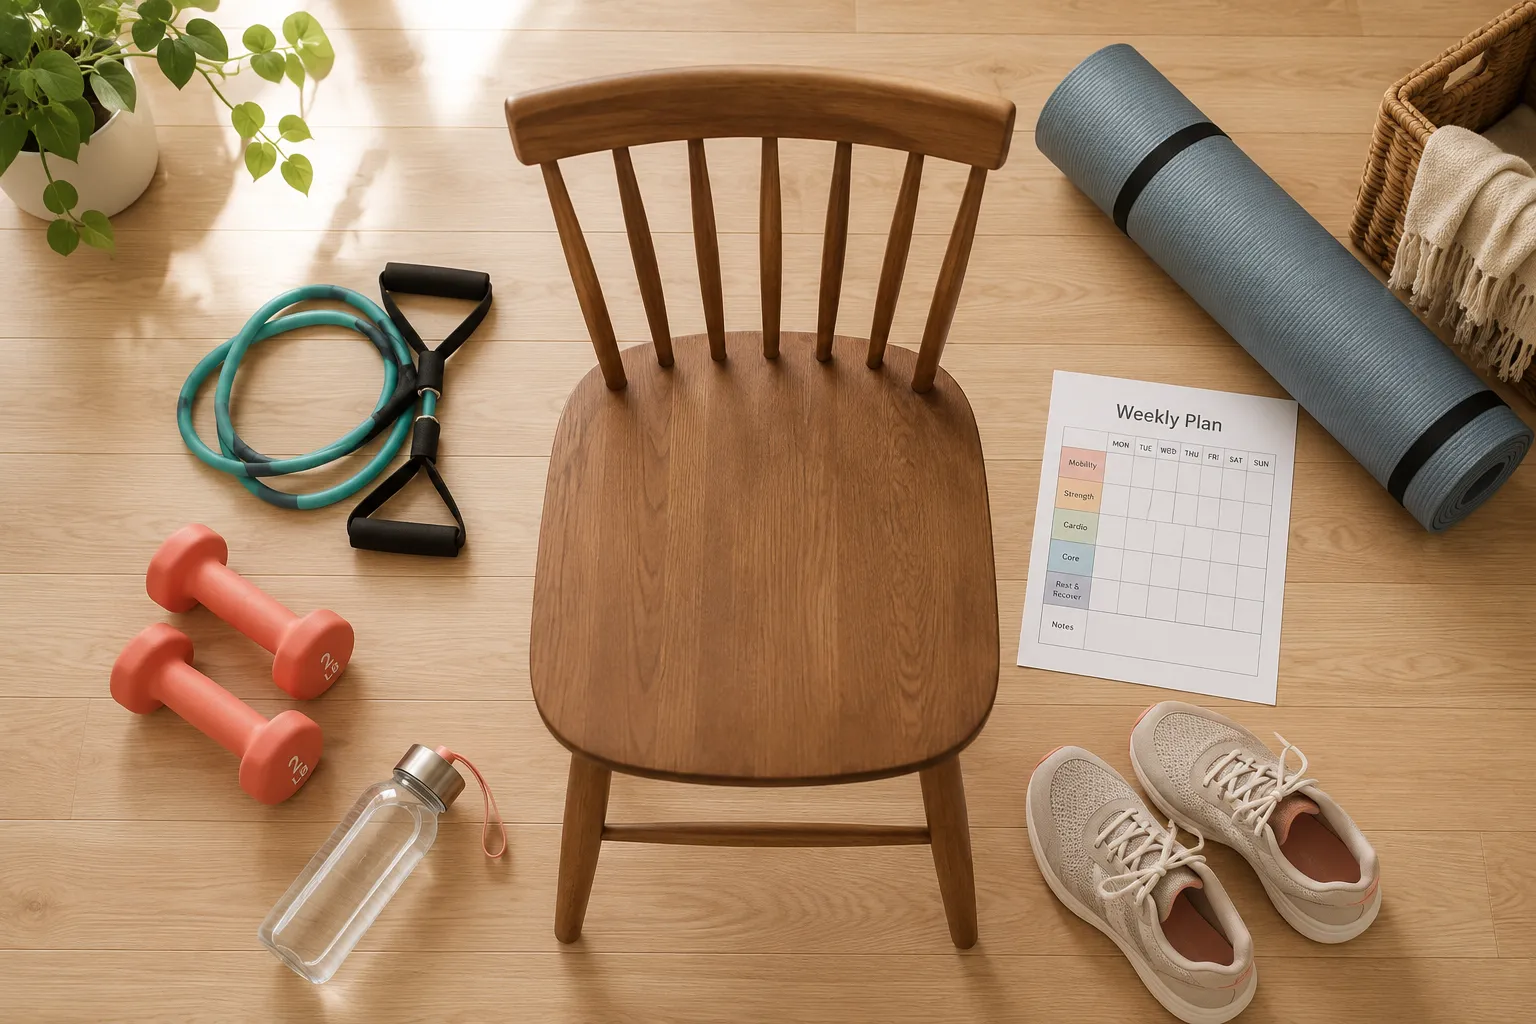
  • Starter kit ($75,$150): Add fixed dumbbells (1, 3, 5 lb pairs) and a sturdy chair
  • Complete home gym ($150,$300): Add adjustable dumbbells or a suspension trainer, plus a stability ball [8]
  • Premium compact ($300,$700): PowerBlock or Bowflex adjustables, a foldable bench, and a mini cable system [6]

Decision rule: Spend on resistance tools first, cardio second. A June 2026 budget guide called dumbbells, bands, and racks the "big rocks" that deliver the most strength benefit per dollar [13].

Resistance Bands vs Dumbbells for Seniors: Which Is Better?

For most seniors, resistance bands win on safety and cost; dumbbells win on measurable progress. The right answer for you depends on grip strength, joint health, and how you like to track progress.

Choose resistance bands if you:

  • Have arthritis, weak wrists, or grip pain
  • Live in a very small space
  • Are new to strength training
  • Want the lowest injury risk [10]

Choose dumbbells if you:

  • Have healthy joints and good grip
  • Like seeing pound-by-pound progress
  • Prefer classic exercises (curls, presses, rows)
  • Already have a sturdy shelf for storage [1]

Most experts recommend using both. Bands handle rotator cuff work, lateral raises, and rehab-style moves. Dumbbells handle heavier compound lifts as strength grows [15].

Pull quote: "Resistance bands are the gold standard for senior strength training because they are joint-friendly, scalable, and space-saving." [10]

What Weight Should Seniors Lift at Home?

Most seniors should start with 1-5 lb dumbbells and light-to-medium resistance bands, then progress based on the "last 2 reps rule": the final two reps of a set should feel challenging but doable with good form [1][15].

Starter loads by exercise:

  • Biceps curls: 2-5 lb
  • Shoulder press: 1-3 lb
  • Triceps extensions: 1-3 lb
  • Bent-over rows: 3-8 lb
  • Squats (holding weight): bodyweight first, then 3-5 lb

Progress by adding 1-2 lb only after you can do 12-15 clean reps for two sets. There is no reward for lifting heavy at the cost of form, the goal is muscle preservation and function, not a personal record.

Can Seniors Build Muscle With Bodyweight Exercises?

Yes. Seniors can absolutely build muscle with bodyweight alone, especially in the first 6-12 months of training. Sit-to-stands, wall push-ups, step-ups, glute bridges, and modified planks stimulate the same muscle fibers that dumbbells do, just at a lower absolute load.

High-value bodyweight moves for seniors:

  • Sit-to-stand from a chair (functional squat)
  • Wall push-ups (chest, shoulders, triceps)
  • Step-ups on a low, stable step (legs, balance)
  • Glute bridges on the floor or mat
  • Bird-dog (core stability)

Add a $15 resistance band to any of these and you effectively double the training options. Bodyweight is the smartest starting point when equipment budget is zero.

Best Home Strength Training Equipment for Arthritis

For seniors with arthritis, the best equipment reduces gripping force, avoids impact, and allows partial ranges of motion. Fabric bands with padded handles, foam-covered light dumbbells, and seated cable machines top the list [2][8].
Best Home Strength Training Equipment for Arthritis

Arthritis-friendly gear:

  • Fabric resistance bands with soft handles, no white-knuckle gripping
  • Neoprene-coated dumbbells, softer than iron, easier on hands [6]
  • Wrist and ankle weights, attach without gripping [5]
  • Pedal exercisers, seated, uses foot straps, not hands [14]
  • Foam rollers and stability balls, supported mobility work [2]

Skip: Kettlebells (thumb strain), thick barbell grips, and pull-up bars if you have shoulder or hand arthritis.

How to Set Up a Small Home Gym for Seniors

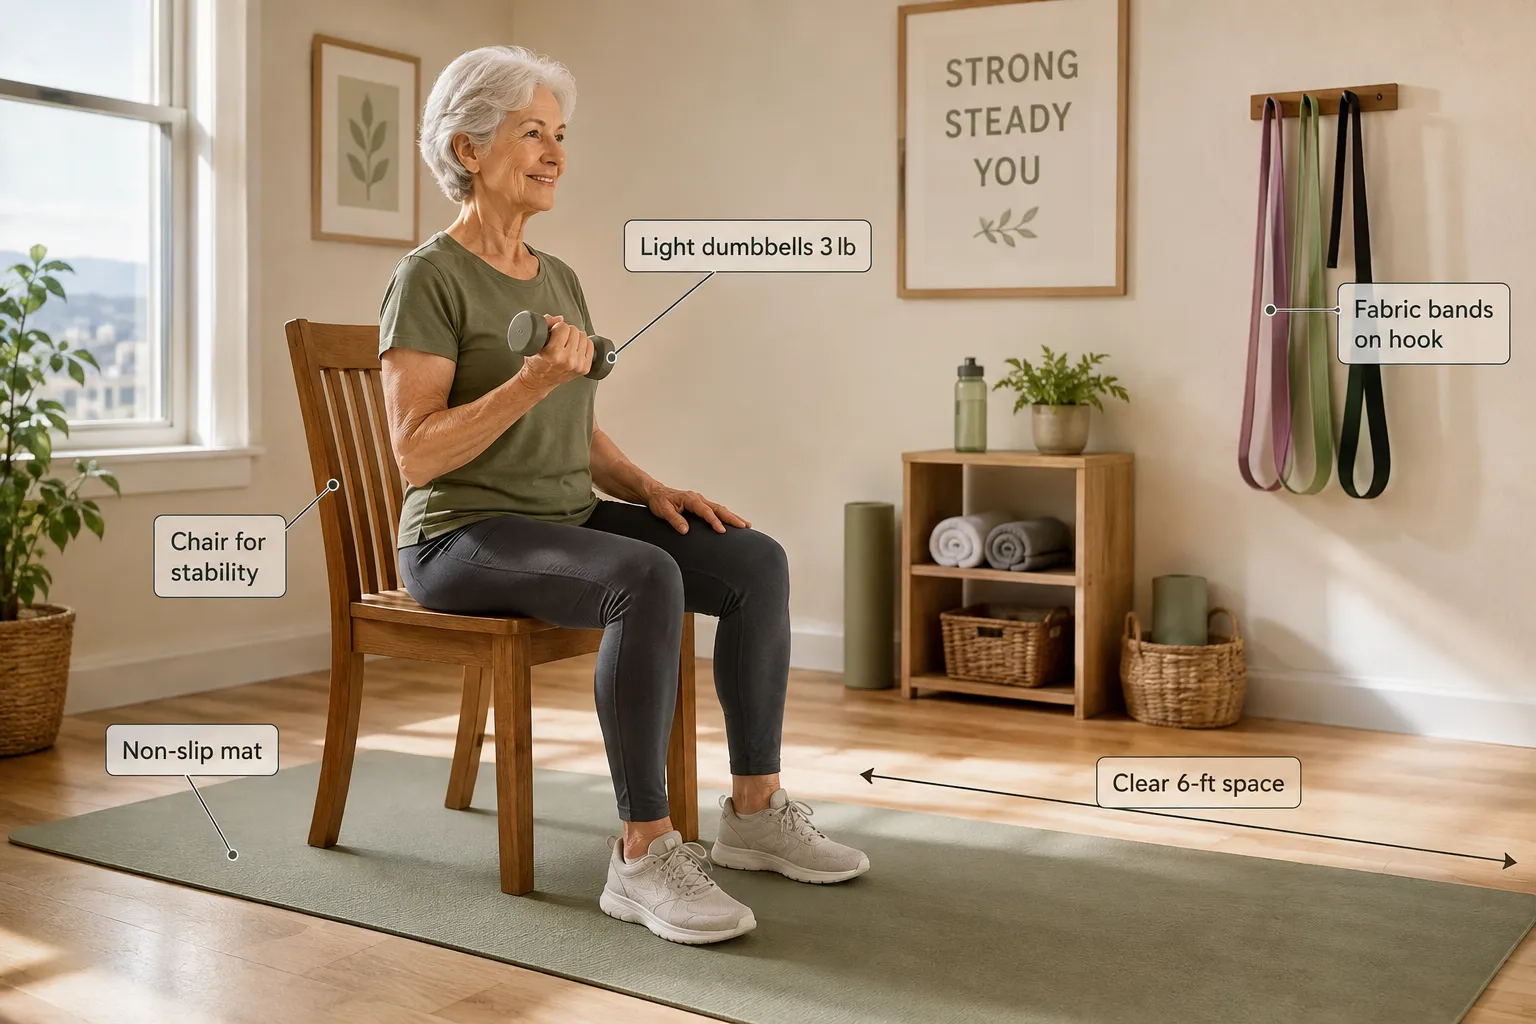
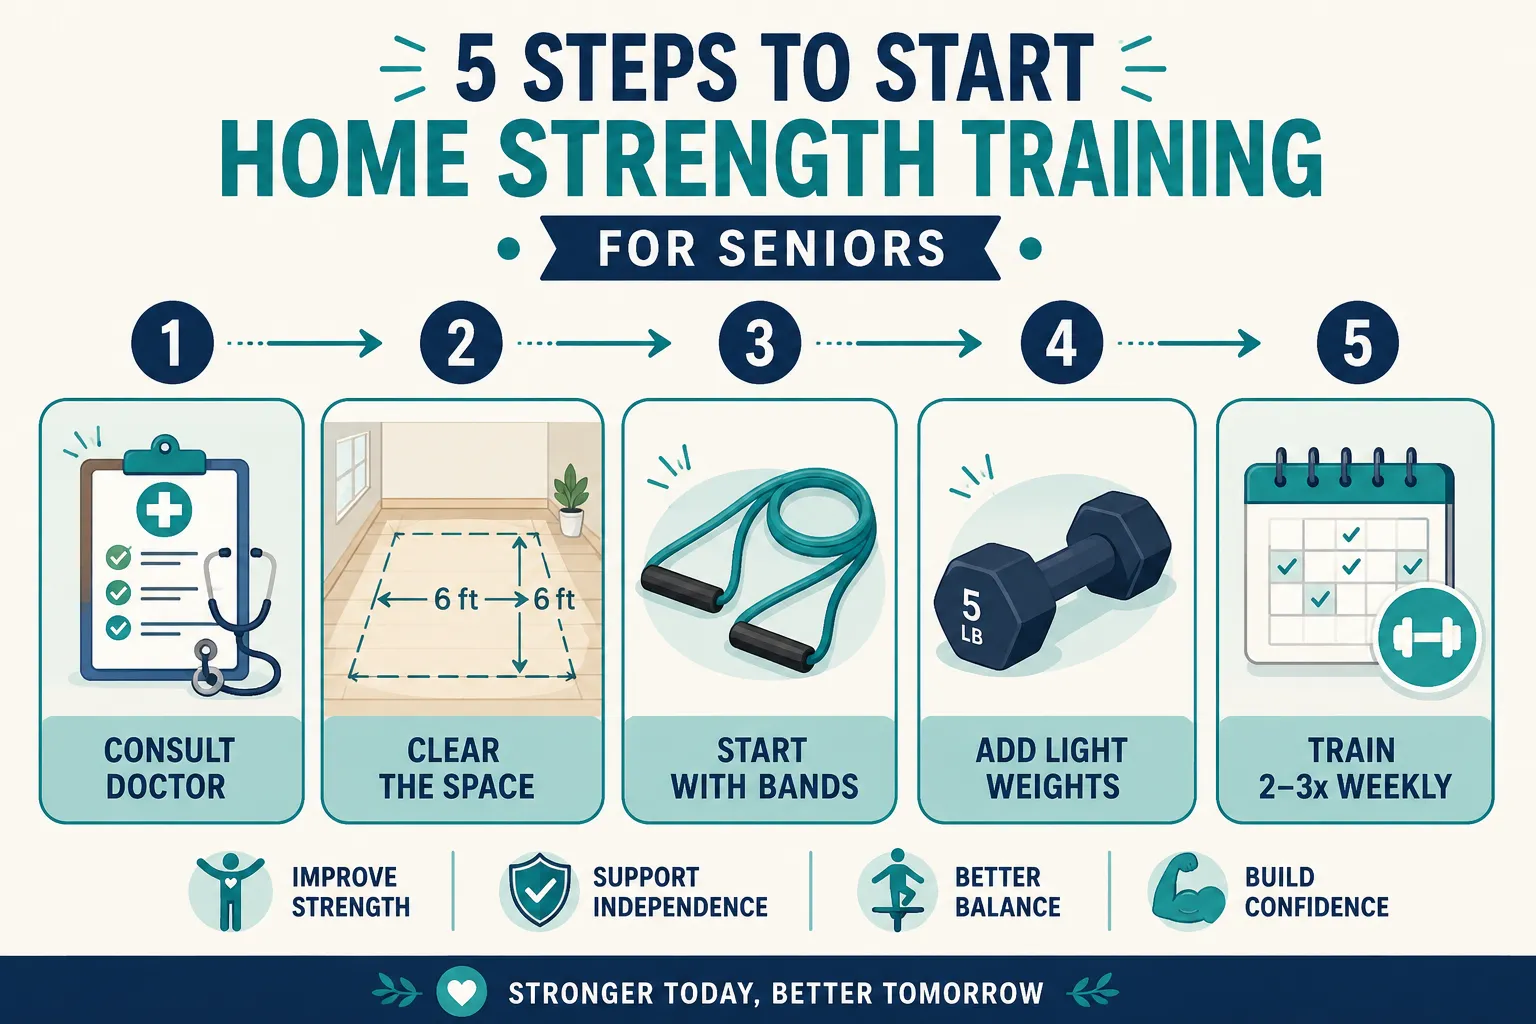
Setting up a senior home gym takes about 6 by 6 feet of floor space, good lighting, and one sturdy anchor point. Prioritize a non-slip surface and a chair for stability before adding any equipment [8].
How to Set Up a Small Home Gym for Seniors

Five-step setup checklist:

  1. Clear a 6×6 ft area with no rugs, cords, or clutter
  2. Add a non-slip mat (thick enough for floor exercises)
  3. Place a sturdy chair nearby for balance and seated exercises
  4. Install one wall hook for hanging bands and a suspension trainer
  5. Keep water and a phone within reach for hydration and safety

Lighting matters: Poor lighting causes falls. If your space is dim, add a lamp before you add equipment.

Best Home Strength Training Equipment for Seniors: Safe, Space-Saving Options Reviewed

Below are the top-rated space-saving picks for 2026, organized by budget and skill level.

Under $50, Beginner essentials:

  • Fabric resistance band set (3-4 tensions): $15,$25 [8]
  • Thick yoga mat: $20
  • Ankle weights (1-2 lb pair): $15 [5]

$50,$150, Intermediate additions:

  • Amazon Basics neoprene dumbbells (2, 3, 5 lb pairs): ~$35 [6]
  • Yes4All adjustable dumbbells: ~$79 [6]
  • CAP Barbell coated hex dumbbell set: ~$99 [6]
  • Stability ball: $25

$150,$400, Complete senior home gym:

  • PowerBlock Elite adjustable dumbbells: ~$299 (best for space saving) [6]
  • Bowflex SelectTech 552: ~$349 [6]
  • BalanceFrom foam plyo box (for step-ups): ~$100 [7]

$400+, Premium compact systems:

  • Compact cable/functional trainer: $500,$900 [3]
  • Foldable weight bench + adjustable dumbbells combo [4]

For most seniors, the best home strength training equipment for seniors: safe, space-saving options reviewed here comes down to a $150 kit, fabric bands, one pair of adjustable dumbbells, a mat, and a stability ball. That covers strength, balance, and flexibility for years.

Is Strength Training Safe for Seniors Over 70?

Yes, strength training is not just safe, it's essential, for adults over 70, provided you start light and get medical clearance if you have heart, joint, or balance issues [8][10]. Research consistently shows resistance training helps preserve independence, reduce fall risk, and maintain bone density into the 80s and beyond.

Safety rules for 70+:

  • Warm up 5 minutes before every session (marching in place works)
  • Never hold your breath during a lift, exhale on effort
  • Use a chair or wall for balance during standing exercises
  • Stop immediately if you feel chest pain, dizziness, or sharp joint pain
  • Rest 48 hours between sessions targeting the same muscles

Common Mistakes Seniors Make With Home Workouts

The most common home-workout mistakes among seniors are skipping warm-ups, choosing weights that are too heavy or too light, and training inconsistently. Each one blunts progress or invites injury.

Top mistakes to avoid:

  • Skipping warm-ups, cold muscles tear more easily
  • Ego-lifting, using 10 lb when 3 lb would be better form
  • Under-loading forever, sticking with 1 lb bands for months without progression
  • Ignoring the legs, arms get all the love, but legs prevent falls
  • Training once a week, below the 2x/week minimum for results [10]
  • No rest days, muscles grow during recovery, not during the workout
  • Poor form on squats, knees caving in, back rounding

How Often Should Seniors Do Strength Training at Home?

Seniors should strength train at least 2 days per week, targeting all major muscle groups, with 48 hours between sessions on the same body part [10]. Three sessions a week is ideal for most; four is fine if you split upper and lower body.

Sample weekly schedule:

  • Monday: Full-body strength (30 min)
  • Tuesday: Walk + balance work
  • Wednesday: Full-body strength (30 min)
  • Thursday: Rest or gentle stretching
  • Friday: Full-body strength (30 min)
  • Weekend: Active recovery (walk, garden, swim)

Each session should include 6-8 exercises, 2 sets of 10-15 reps. That's it. More is not better at this stage, consistency is.

Alternatives to Expensive Home Gym Equipment

You do not need a $2,000 rack to build strength at 65+. Effective alternatives cost under $100 combined and use household items you already own.

Household strength "equipment":

  • Full water bottles (1 liter ≈ 2.2 lb), DIY dumbbells
  • Canned goods, light hand weights for shoulder work
  • A sturdy kitchen chair, squats, step-ups, tricep dips
  • A backpack loaded with books, weighted squats and rows
  • Bath towels, DIY sliders for core work on hard floors
  • Stairs, the best free cardio and leg trainer

Pair these with a $20 band set and you have a functional home gym for under $40.

What if I Have Limited Mobility? Can I Still Strength Train at Home?

Yes. Seniors with limited mobility can build meaningful strength using seated equipment and supported exercises. Pedal exercisers, mini-ellipticals, resistance bands anchored to a chair, and light dumbbells performed while seated are all effective [9][14].

Best equipment for limited mobility:

  • RYGEO pedal exerciser (~4 lb, 5 resistance levels, arms or legs) [14]
  • Sunny or MERACH foldable mini-ellipticals (12-16 resistance levels, 300 lb capacity) [14]
  • Seated resistance band routines anchored under chair legs
  • Light dumbbells for seated curls, presses, and rows [1]

Focus on frequency over intensity. Even 10 minutes twice a day of seated resistance work preserves muscle and improves circulation.

FAQ

Q: What is the single best piece of strength equipment for a senior beginner?
A: A fabric resistance band set. It's under $25, joint-friendly, scalable, and enables 30+ exercises [8][10].

Q: Are adjustable dumbbells worth it for seniors?
A: Yes, if you plan to train for more than 6 months. PowerBlock or Bowflex adjustables replace 5-8 pairs of fixed dumbbells and save closet space [6].

Q: How long until seniors see results from home strength training?
A: Most seniors notice strength gains in 4-6 weeks and visible muscle tone in 8-12 weeks with 2-3 sessions per week.

Q: Do I need a weight bench?
A: No. A sturdy chair covers 90% of what a bench does for seniors. Add a foldable bench only if you outgrow chair-based exercises.

Q: Are smart home gyms like Tonal good for seniors?
A: They can work well for tech-comfortable seniors, but the $3,000+ price is hard to justify when a $150 kit produces similar strength results.

Q: Can I strength train if I have osteoporosis?
A: Yes, and you should, with medical clearance. Focus on controlled resistance band work and light dumbbells; avoid heavy loaded spinal flexion [8].

Q: How much space do I really need?
A: A 6×6 foot area is enough for a complete senior home gym setup.

Q: Are ankle weights safe for walking?
A: Only for exercise sets, not for daily walking. Continuous walking with ankle weights can strain hips and knees.

Conclusion

The best home strength training equipment for seniors is whatever you'll actually use twice a week. For most older adults, that starts with a $30,$55 kit of fabric bands, a mat, and light dumbbells, and grows only when you outgrow it. Adjustable dumbbells, suspension trainers, and compact cable systems are worthwhile upgrades, but they're not the entry point.

Your next steps:

  1. Clear a 6×6 ft area at home this week
  2. Order a fabric band set and one pair of light dumbbells (under $50)
  3. Schedule two 30-minute sessions on your calendar
  4. Get medical clearance if you have any chronic conditions
  5. Track your reps for 8 weeks, you'll be surprised what changes

Start light, stay consistent, and the equipment will earn its keep many times over.

References

[1] The Best Home Workout Equipment For Seniors – https://sonoffood.com/2026/04/16/the-best-home-workout-equipment-for-seniors/
[2] Best – https://www.theseniorlist.com/exercise/best/
[3] The Best Home Gym Equipment For Seniors In 2025 – https://gym-mikolo.com/blogs/home-gym/the-best-home-gym-equipment-for-seniors-in-2025
[4] Best Home Gyms – https://www.garagegymreviews.com/best-home-gyms
[5] Best Fitness Equipment Seniors – https://silverbloomhealth.com/supplements/fitness/best-fitness-equipment-seniors/
[6] 7 Best Home Gym Equipment For Seniors – https://homefitnessspace.com/7-best-home-gym-equipment-for-seniors/
[7] 14 Best Home Gyms For Older Adults In 2026 – https://babazam.com/vetted/14-best-home-gyms-for-older-adults-in-2026/
[8] Exercise Equipment For Seniors – https://vitalspage.com/articles/exercise-equipment-for-seniors
[9] Best Core Workout Equipment For Seniors – https://rebootedbody.com/best-core-workout-equipment-for-seniors/
[10] Best Home Fitness Equipment For Seniors – https://www.senioreaseguide.com/best/best-home-fitness-equipment-for-seniors
Chair and Standing Workouts for Seniors: Low-Impact Strength and Mobility When Getting Down Is Difficult

Chair and Standing Workouts for Seniors: Low-Impact Strength and Mobility When Getting Down Is Difficult

Last updated: July 30, 2026

Quick Answer

Chair and standing workouts for seniors are structured, low-impact routines that build strength, balance, and circulation without requiring you to get down to the floor. A safe weekly plan combines 2-3 seated strength sessions (leg extensions, seated marches, arm curls) with 2-3 supported standing sessions (calf raises, sit-to-stands, side leg lifts), each 15-30 minutes. Done consistently, these workouts improve posture, reduce fall risk, and preserve independence, even for adults with arthritis, balance problems, or limited mobility.[1][2][8]

Key Takeaways

  • Full-body training is possible from a chair. Seated routines can target legs, core, arms, and back with proper form and pain-free range of motion.[1]
  • Aim for 4-5 short sessions per week, mixing seated and supported-standing days for balance and strength.
  • A sturdy armless chair on a non-slip surface is the single most important piece of equipment.[1][9]
  • Supported standing exercises (holding a chair or counter) are the safest way to train balance if you're at risk of falls.[6][7]
  • Visible results appear in 4-8 weeks with consistent practice: easier sit-to-stand, better posture, less stiffness.[2]
  • Chair yoga focuses on flexibility and breath; chair aerobics raises heart rate, most seniors benefit from both.
  • Stop immediately if you feel chest pain, dizziness, or sharp joint pain, these are not "push through" workouts.

Key Takeaways

What Are Chair Exercises for Seniors With Limited Mobility?

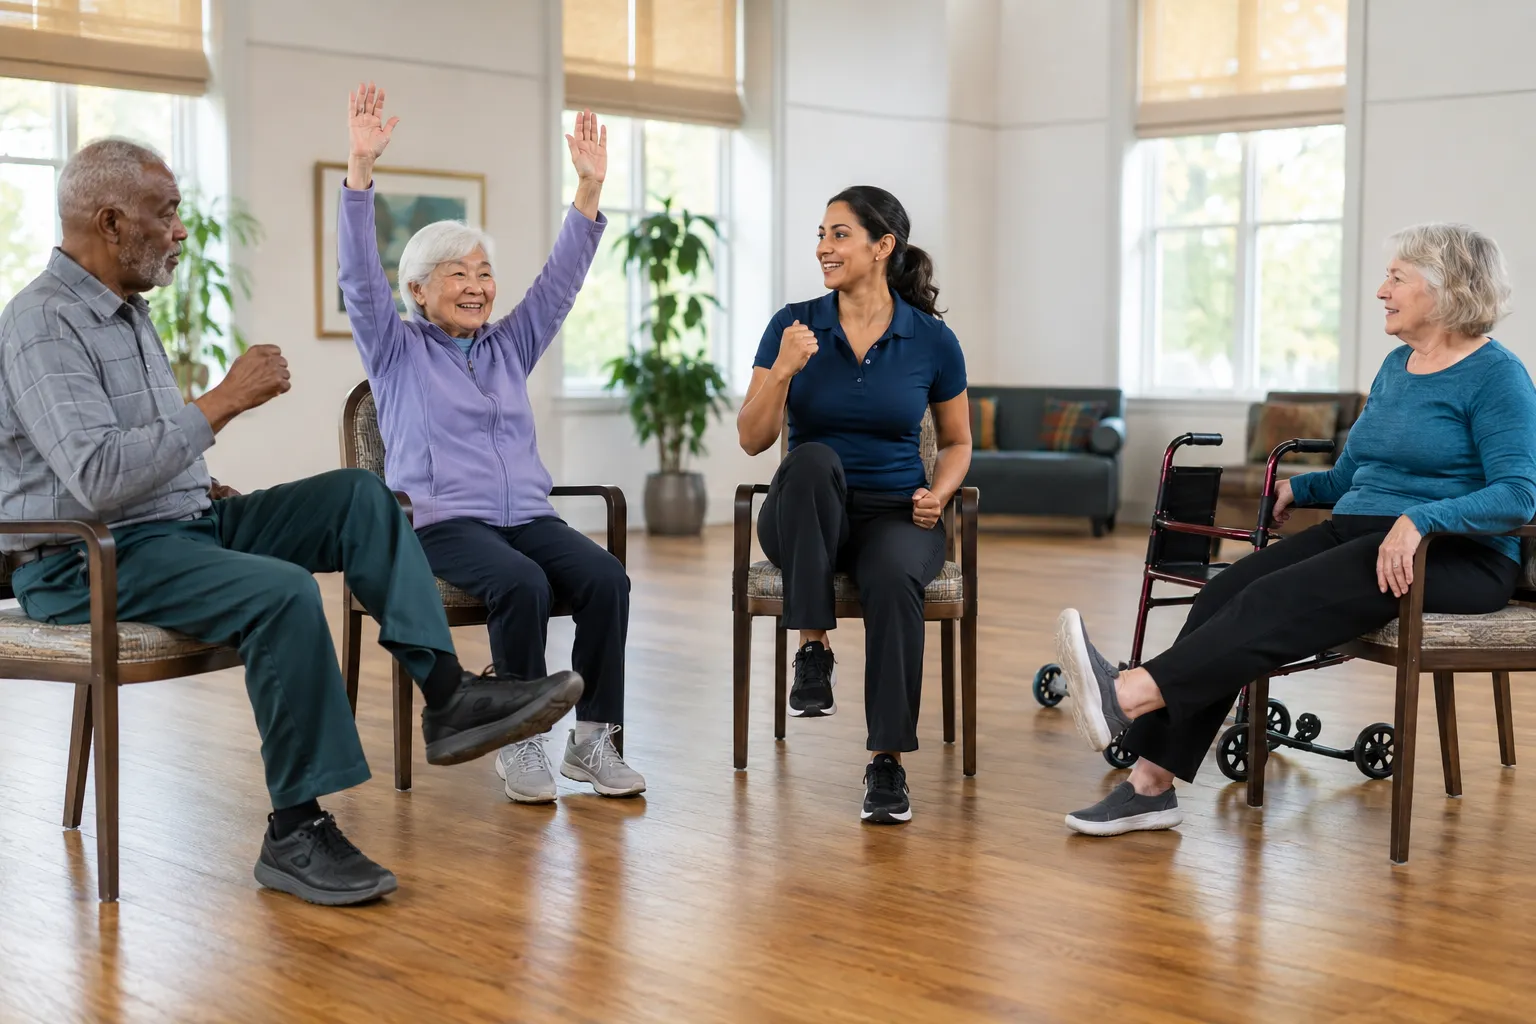
Chair exercises are strength, mobility, and cardio movements performed while seated in a sturdy chair, designed for older adults who can't safely get down to (or up from) the floor. They cover the same fitness pillars as standard workouts, muscle strength, joint mobility, cardiovascular endurance, and flexibility, just adapted so the chair provides stability and support.[1][2]

Common seated movements include:

  • Seated leg extensions, lift one leg until it's parallel to the floor, hold 2 seconds, lower slowly. 10-12 reps per leg.[1]
  • Seated marches, lift knees alternately as if walking. 30-60 seconds for a cardio burst.
  • Seated arm curls with light dumbbells or water bottles, 10-15 reps.
  • Seated trunk rotations, gentle twists to keep the spine mobile.[8]
  • Ankle circles and wrist circles, 8-12 per direction to keep joints lubricated.[8]

Choose chair-based workouts if you have knee replacements, severe arthritis, vertigo, recent surgery, or simply feel unsafe standing without support. They're also the right starting point after long periods of inactivity.

How Do You Do Standing Workouts Safely if You Have Balance Issues?

Always keep at least one hand on a sturdy anchor, the back of a heavy chair, a kitchen counter, or a wall bar, and never train standing exercises alone if you've fallen in the past year. Position yourself so you can sit down within one step at any moment.[6][7]

Safe setup checklist:

  1. Use a chair with a high back and no wheels, placed against a wall so it can't slide.
  2. Wear flat, closed-toe shoes with grip, no socks on hardwood.
  3. Clear a 3-foot radius of rugs, cords, and pets.
  4. Have water within reach and a phone nearby.
  5. Start with both hands on the chair back; progress to one hand, then fingertips, only when steady.

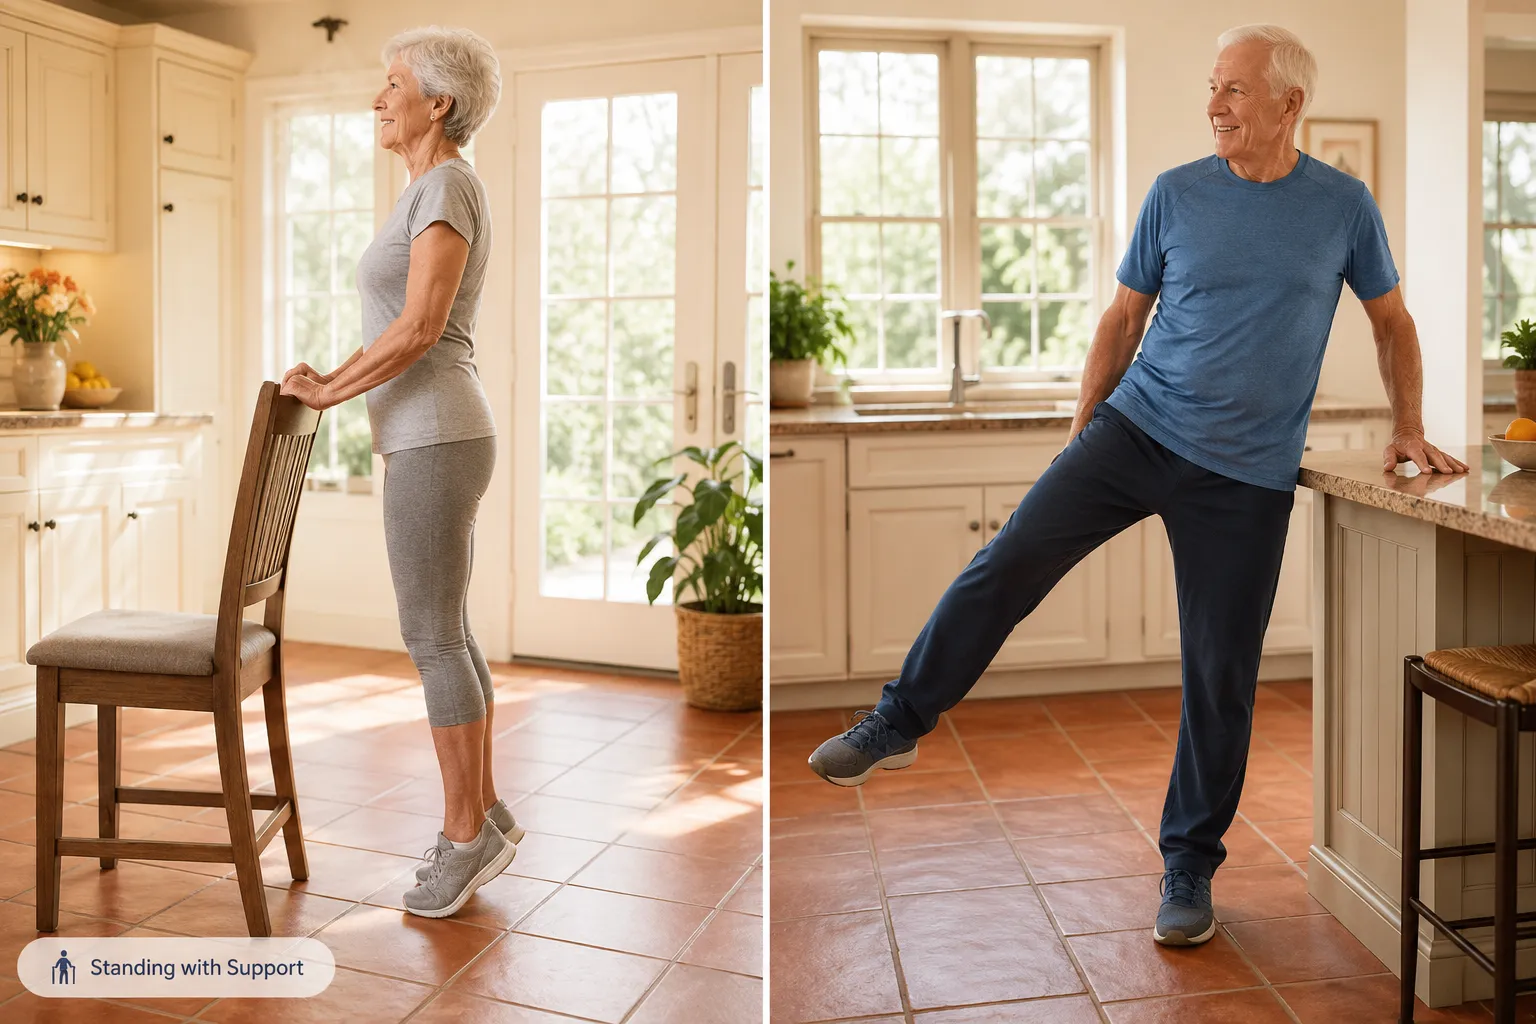
Beginner supported-standing moves:

  • Sit-to-stands, from a chair, stand up and sit down slowly. 8-10 reps. This is the single best predictor of independence in later life.
  • Standing calf raises, rise onto toes, lower with control. 10-15 reps.
  • Standing side leg lifts, lift one leg out to the side. 10 per side.
  • Standing marches, lift knees while holding the chair. 30 seconds.

Common mistake: Rushing to let go of support. Balance improves by degrees. Spend 2-4 weeks holding on with both hands before reducing support.

Can Seniors Build Muscle Strength From Chair Exercises Alone?

Yes, chair exercises can build meaningful strength, especially in the legs, core, shoulders, and arms, when they use enough resistance and are done 2-3 times per week. Muscle responds to challenge at any age, and Harvard Health confirms that seated resistance work improves strength, stamina, and daily function in older adults.[2]

To make chair work strength-building (not just movement):

  • Add resistance: light dumbbells (1-5 lb), resistance bands, or filled water bottles.
  • Slow the tempo: 2 seconds up, 2 seconds pause, 3 seconds down. Slow reps recruit more muscle.
  • Progress gradually: when 12 reps feel easy, add a set or increase weight by 1-2 lb.
  • Train opposing muscles: curls and presses, extensions and hamstring curls.

Edge case: If you have severe sarcopenia (age-related muscle loss), pair chair strength work with adequate protein, roughly 1.0-1.2 g per kg of body weight daily, or the muscle-building signal has nothing to work with.

Can Seniors Build Muscle Strength From Chair Exercises Alone?

Chair Yoga vs. Chair Aerobics: What's the Difference?

Chair yoga emphasizes slow stretching, breath control, and flexibility; chair aerobics emphasizes continuous movement to raise heart rate and improve cardiovascular fitness. Neither is "better", they train different systems, and most seniors benefit from doing both across the week.

Chair Yoga
Pace: slow · Focus: flexibility, breath, calm · Typical moves: seated cat-cow, chest openers, seated forward fold, neck stretches · Heart rate: low

Chair Aerobics
Pace: moderate to brisk · Focus: cardio, circulation, stamina · Typical moves: seated marches, punches, side taps, boxer shuffles · Heart rate: elevated

Choose chair yoga if stress, stiffness, or sleep is your main concern. Choose chair aerobics if endurance, energy, or heart health is the priority. Do both if you want a complete program.

Best Low-Impact Standing Exercises for Seniors With Arthritis

For arthritic joints, the best standing exercises use short lever arms, pain-free range, and constant chair support. Prioritize movements that strengthen muscles around the joint without loading it heavily, quad sets, hip abductions, and calf raises fit this profile.[7][10]

Arthritis-friendly standing routine (10 minutes):

  1. Warm-up marches at the counter, 60 seconds
  2. Mini sit-to-stands (halfway down only), 8 reps
  3. Standing calf raises, 12 reps
  4. Standing hip abductions (leg out to side), 10 per side
  5. Standing hamstring curls (heel toward glute), 10 per side
  6. Wall push-ups, 8-10 reps
  7. Cool-down: standing chest opener, hold 20 seconds

Rule of thumb: Pain during exercise should not exceed 3/10, and it should return to baseline within an hour of stopping. If it doesn't, reduce range or reps next session.

How Often Should Seniors Do Chair and Standing Workouts Per Week?

Aim for 4-5 sessions per week, typically 2-3 strength-focused days and 2-3 mobility or cardio days, with at least one full rest day. Sessions of 15-30 minutes are enough to produce measurable gains within two months.[2][8]

Sample weekly plan:

Day Focus Length
Monday Seated strength (legs + arms) 25 min
Tuesday Chair yoga / mobility 20 min
Wednesday Supported standing strength 20 min
Thursday Rest or gentle walk ,
Friday Seated aerobics 20 min
Saturday Supported standing balance 20 min
Sunday Chair yoga or full rest 15 min

Beginner adjustment: Start with 3 days a week for the first two weeks. Add a fourth day only when you're not sore the next morning.

Can You Lose Weight Doing Seated Exercises as a Senior?

Yes, modest weight loss is achievable with consistent seated workouts combined with dietary adjustments, but chair cardio alone burns fewer calories than walking, so the diet side matters more. Expect a slow, sustainable pace of 0.5-1 pound per week when both are aligned.

  • Calorie burn (seated aerobics): roughly 120-200 calories per 30-minute session, depending on intensity and body size.
  • Muscle mass matters: strength work raises resting metabolic rate, which helps long-term.
  • Diet lever: a 300-500 calorie daily reduction, paired with adequate protein, drives most senior weight loss.

Don't try aggressive calorie cuts. Rapid weight loss in older adults often strips muscle, which is exactly what chair workouts are trying to build.

What Equipment Do You Need for Chair Workouts at Home?

The minimum kit is a sturdy armless chair on a non-slip floor. Everything else is optional and cheap. Total starter cost: $0,$40.[1][9]

Essential:

  • Sturdy chair with a firm seat, no wheels, no arms (dining chair works)
  • Non-slip floor or yoga mat under the chair
  • Flat shoes with grip

Nice to have:

  • Light dumbbells (1, 2, 3, 5 lb set), ~$20
  • Resistance bands (light and medium), ~$10
  • Small pillow for lumbar support
  • Water bottles (double as improvised weights)

Skip: ankle weights heavier than 2 lb (they strain knees), unstable surfaces like balance discs (fall risk), and treadmill-style equipment unless supervised.

What Equipment Do You Need for Chair Workouts at Home?

How Do Chair Exercises Help With Fall Prevention in Seniors?

Chair exercises reduce fall risk by strengthening the exact muscles that catch you when you stumble, quads, glutes, hip abductors, and ankle stabilizers, and by training the sit-to-stand transition that causes many at-home falls.[1][6]

High-value fall-prevention moves:

  • Sit-to-stands, trains hip and knee power for getting out of chairs, cars, toilets.
  • Standing hip abductions, strengthens the side-hip muscles that keep you upright on one leg.
  • Heel-toe rocks (holding chair), trains ankle stability.
  • Seated marches with reach, trains hip flexors and core coordination.

Progress marker: If you can do 10 sit-to-stands in 30 seconds without using your hands, your fall risk is significantly lower than someone who can't.

Are Chair Workouts Effective for Improving Posture and Flexibility?

Yes. Regular chair-based mobility work counteracts the forward-hunched posture that develops from sitting and reduces stiffness in the shoulders, spine, and hips. The British Heart Foundation's 2026 chair mobility routine, shoulder shrugs, chest openers, and gentle trunk rotations, is specifically designed for this.[8]

Daily 5-minute posture reset:

  1. Seated shoulder rolls, 10 backward, 10 forward
  2. Chest opener (hands behind head, elbows wide), 3 breaths
  3. Seated trunk rotation, 8 per side
  4. Neck turns (chin to shoulder), 8 per side
  5. Seated cat-cow, 8 rounds

Consistency beats duration. Five minutes daily outperforms 30 minutes once a week.

What Should Seniors Avoid When Doing Standing Exercises?

Avoid unsupported balance work early on, holding your breath during strain, deep knee bends past 90 degrees, and any movement that causes sharp joint pain or dizziness. Also skip exercises done on soft surfaces (beds, thick rugs), they hide balance errors.[6][7]

Red flags, stop immediately if you feel:

  • Chest pain, tightness, or unusual shortness of breath
  • Dizziness, lightheadedness, or visual changes
  • Sharp joint pain (dull ache is usually fine)
  • Numbness or tingling down an arm or leg
  • Loss of bladder control or sudden weakness

Common mistakes to avoid:

  • Wearing socks instead of shoes
  • Locking knees at the top of standing moves
  • Rushing reps (speed hides poor control)
  • Skipping the warm-up
  • Training when severely fatigued or ill

Can Chair Exercises Help With Balance and Coordination Problems?

Yes, targeted chair-based drills improve balance by training the sensory and motor systems that keep you upright, even before you attempt full standing work. This is the safest entry point for anyone with vertigo, neuropathy, or recent falls.

Balance-building chair drills:

  • Seated weight shifts, shift weight side to side without lifting feet, 20 reps
  • Seated single-leg reaches, extend one leg and reach opposite arm forward, 8 per side
  • Head turns while marching, challenges the vestibular system, 30 seconds
  • Eyes-closed seated marches (only if steady), 20 seconds

Progress to supported standing balance work, heel raises, toe raises, tandem stance holding the chair, once seated drills feel easy.

How Long Does It Take to See Results From Senior Chair Workouts?

Most seniors notice easier daily movement within 2-3 weeks, measurable strength gains by 4-6 weeks, and clear improvements in balance and posture by 8-12 weeks of consistent training.[2]

Realistic timeline:

  • Week 1-2: less morning stiffness, better mood, slightly better sleep
  • Week 3-4: sit-to-stand feels easier, stairs less taxing
  • Week 6-8: noticeable arm and leg strength; posture improves
  • Week 12+: endurance, balance confidence, and often lower resting blood pressure

If you see nothing by week 6: you're probably under-loading (weights too light) or under-doing (fewer than 3 sessions weekly). Add resistance or a day, not more reps.

The Safest Way to Transition From Sitting to Standing During Exercise

Move slowly through three stages: scoot, plant, press. This sequence prevents the blood-pressure drop and dizziness that causes many exercise-related falls in older adults.

Step by step:

  1. Scoot to the front third of the chair seat.
  2. Plant both feet flat, hip-width apart, directly under or slightly behind your knees.
  3. Lean your chest forward over your toes ("nose over toes").
  4. Press through your heels and stand up, using the chair arms or thighs for a push if needed.
  5. Pause standing for 3-5 seconds before starting any movement, this lets blood pressure equalize.
  6. To sit: reverse the process. Feel the chair with the back of your legs before lowering.

Decision rule: If you feel dizzy standing up, sit back down immediately, breathe, and try again in 30 seconds. Never fight through lightheadedness.

Full-Body Chair and Standing Workouts for Seniors: Sample Routines

Here are two complete routines you can use today. Both are Chair and Standing Workouts for Seniors, Low-Impact Strength and Mobility When Getting Down Is Difficult in action.

Routine A: 20-Minute Seated Full-Body

  • Warm-up: seated marches + arm swings, 2 min
  • Seated leg extensions, 2 sets of 10 per leg[1]
  • Seated overhead press with light weights, 2 sets of 10
  • Seated bicep curls, 2 sets of 12
  • Seated trunk rotations, 2 sets of 10 per side[8]
  • Seated ankle circles + wrist circles, 8 each direction[8]
  • Cool-down: chest opener + slow breathing, 2 min

Routine B: 20-Minute Supported Standing

  • Warm-up: standing marches at chair, 2 min
  • Sit-to-stands, 2 sets of 8
  • Standing calf raises, 2 sets of 12
  • Standing side leg lifts, 2 sets of 10 per side
  • Standing hamstring curls, 2 sets of 10 per side
  • Wall push-ups, 2 sets of 8
  • Cool-down: standing chest opener + gentle sway, 2 min

Alternate A and B across the week for a balanced program.

FAQ

Q: Do I need a doctor's approval before starting?
A: Yes, if you have heart disease, uncontrolled blood pressure, recent surgery, or a history of falls. A quick clearance conversation is worth it.

Q: Can I do chair workouts if I use a wheelchair?
A: Absolutely. Most seated exercises transfer directly. Skip standing work and focus on resistance training and mobility.

Q: How heavy should my dumbbells be?
A: Start with 1-2 lb. If you can do 15 reps easily with perfect form, move up 1-2 lb. Most seniors work in the 2-8 lb range.

Q: Are YouTube chair workout videos safe?
A: Many are excellent, but confirm the instructor is certified in senior fitness (SilverSneakers, ACE Senior, or similar) and start with beginner-level content.[3][4]

Q: What if I get sore?
A: Mild soreness for 24-48 hours is normal for new exercisers. Sharp pain, swelling, or soreness lasting over 3 days means you overdid it, scale back.

Q: Can chair exercises replace walking?
A: They complement walking, not replace it. If you can walk safely, keep walking. Chair work fills gaps on bad-weather days or when joints flare.

Q: Is it too late to start at 80 or 90?
A: No. Strength gains have been documented in adults well into their 90s. Start smaller and progress slower, but start.

Q: How do I stay motivated?
A: Schedule sessions like appointments, track them on a paper calendar, and pair workouts with something you enjoy (music, a favorite show, a phone call).

Conclusion

Chair and standing workouts for seniors are one of the most reliable ways to preserve strength, balance, and independence when getting down to the floor isn't safe or realistic. The formula is simple: a sturdy chair, 4-5 short sessions per week, gradual added resistance, and supported standing work built in as balance improves.

Your next steps:

  1. Place a sturdy armless chair in a clear, well-lit space today.
  2. Do Routine A (seated full-body) this week, three times, 20 minutes each.
  3. Add Routine B (supported standing) in week two.
  4. Track progress with one simple metric: how many sit-to-stands you can do in 30 seconds.
  5. Reassess at week 6. Add weight, add a day, or add a new movement.

Consistency, not intensity, is what changes outcomes at this stage of life. Start smaller than you think you need to, and don't stop.

References

[1] Chair Exercises For Seniors – https://health.clevelandclinic.org/chair-exercises-for-seniors
[2] Chair Exercises For Seniors Boosting Strength Flexibility And Stamina – https://www.health.harvard.edu/exercise-and-fitness/chair-exercises-for-seniors-boosting-strength-flexibility-and-stamina
[3] Watch – https://www.youtube.com/watch?v=MmIpgD1hL30
[4] Watch – https://www.youtube.com/watch?v=mQLzNf8VOIc
[5] 7 Standing Exercises For Core Strength – https://www.silversneakers.com/blog/7-standing-exercises-for-core-strength/
[6] Standing Exercises For Seniors – https://eldercarealliance.org/blog/standing-exercises-for-seniors/
[7] Standing Exercises For Seniors – https://www.planetfitness.com/blog/articles/standing-exercises-for-seniors
[8] Chair Based Exercises – https://www.bhf.org.uk/informationsupport/heart-matters-magazine/activity/chair-based-exercises
[9] Chair Exercises For Seniors – https://www.lifeline.ca/en/resources/chair-exercises-for-seniors/
[10] Standing Exercises For Seniors – https://miravieseniorliving.com/lifestyle/standing-exercises-for-seniors/

Suspension Training for Seniors: Joint-Friendly Strength and Flexibility at Home

Suspension Training for Seniors: Joint-Friendly Strength and Flexibility at Home

Last updated: July 23, 2026

Quick Answer

Quick Answer

Suspension training uses two adjustable straps anchored overhead so you can leverage your own body weight for strength, balance, and mobility work. For adults 55+, it's one of the most joint-friendly ways to build total-body strength at home because you control the load simply by shifting your feet. A 6-week study of older adults showed significant gains in functional reach (57.2 cm to 68.6 cm) and balance scores, with 100% attendance and no dropouts [1][2]. Start with 2 sessions per week, keep the straps at chest height for beginner angles, and progress gradually.

Key Takeaways

  • Suspension training (like TRX) lets seniors adjust exercise difficulty instantly by changing foot position, no plates or dumbbells required [5].
  • Research shows measurable balance and functional reach improvements in just 6 weeks of twice-weekly training [1][2].
  • It's generally safe for arthritic joints because the straps reduce impact and let you offload weight anytime [3].
  • A quality home suspension trainer costs $30,$200, and setup takes about 5 minutes on a door or beam.
  • 91% of older participants in a German TRX study wanted to keep training after 12 weeks; 36% reported less musculoskeletal pain [4].
  • Ideal frequency: 2-3 sessions per week, 20-30 minutes each, with at least one rest day between sessions.
  • Balance and core work transfer directly to fall prevention and everyday tasks like standing from a chair [3][6].
  • You do NOT need a personal trainer to start, but one video consult or a class can prevent common form mistakes.

What is suspension training and how does it work

Suspension training is a bodyweight exercise method using two nylon straps with handles anchored to a fixed overhead point. You lean into or away from the anchor, and gravity plus your body angle create the resistance. The steeper your angle, the harder the exercise. Step your feet forward or back to make any move easier or harder in seconds.

The system was originally developed by a Navy SEAL who needed a portable way to train anywhere. Today, brands like TRX, WOSS, and Lifeline sell home-friendly kits. Because both hands (or feet) are supported by the straps, your core muscles fire on nearly every rep to stabilize you [3]. That's why it delivers strength, balance, and mobility benefits at once.

Quick example: A standing row with straps at chest height. Grip the handles, walk your feet forward until your body leans back at 45 degrees, then pull your chest to your hands. Feet farther forward equals harder. That single adjustment replaces switching to a heavier dumbbell.

Is suspension training safe for seniors with arthritis

Yes, suspension training is generally safe and often preferred for seniors with arthritis because you control the load and can offload instantly by standing more upright. Unlike free weights, there's no fixed resistance you're locked into. If a knee or shoulder flares up mid-set, you simply reduce your lean angle or step out of the strap.

)

Research supports this: In a 12-week TRX study with adults 60+, 36% of participants reported reduced musculoskeletal pain during the program [4]. The controlled range of motion and self-selected intensity make it easier on inflamed joints than machines or barbells.

Choose suspension training over free weights if: you have knee osteoarthritis, rotator cuff issues, grip weakness, or a history of dropped weights. Skip or modify if: you have severe balance impairment without a wall/chair nearby, uncontrolled blood pressure, or recent joint replacement (wait for surgeon clearance).

Common mistake: Going too deep too soon. Arthritic knees don't need full range on day one. Work in a pain-free 30-60 degree squat and expand as tolerated.

Can you do suspension training at home without equipment

You cannot do true suspension training without straps, but you can replicate many of the same movement patterns using a sturdy table, a towel over a closed door, or a chair for support. These substitutes work for a few weeks while you decide whether to buy a system.

Home substitutes that work:

  • Sturdy dining table for inverted rows (grip the edge, walk feet under).
  • Two firm chair backs placed hip-width apart for supported squats and dips.
  • Thick bath towel looped over a solid door hinge side (test carefully) for beginner rows.
  • Kitchen counter for angled push-ups and single-leg balance drills.

That said, a real suspension trainer is more versatile and safer than jury-rigged setups, and entry-level units cost less than one month of a gym membership.

Suspension training vs resistance bands for older adults

Both are joint-friendly, but they solve different problems. Suspension straps train stability, balance, and total-body coordination because your core stabilizes on every rep. Resistance bands train isolated strength with steady tension and are easier to travel with.

Factor Suspension Trainer Resistance Bands
Best for Balance, core, full-body Isolated muscles, rehab
Learning curve Moderate Low
Space needed Overhead anchor None
Cost $30,$200 $15,$50
Balance training Excellent Limited
Grip demand High Low, moderate

Choose suspension straps if balance and fall prevention are your top goals. Choose bands if you have weak grip strength or want ultra-portable equipment. Many seniors use both, bands for arms and glutes, straps for compound moves and balance.

How often should seniors do suspension training per week

Two to three sessions per week is the sweet spot for most adults 55+, with at least 48 hours between sessions to allow recovery. The 6-week research protocol that produced significant balance and functional reach gains used twice-weekly sessions [1][2].

Sample weekly schedule:

  • Monday: 25 min suspension session (full body, moderate)
  • Wednesday: Walking or gentle mobility
  • Friday: 25 min suspension session (focus on balance and core)
  • Other days: Rest, walking, or light stretching

Beginners should start with once per week for the first two weeks, then add a second session. Soreness in the first sessions is normal; sharp joint pain is not.

Best suspension training exercises for balance and fall prevention

Best suspension training exercises for balance and fall prevention

The most effective fall-prevention moves combine single-leg stance, hip strength, and core stability. Suspension straps let you practice these safely by giving you handles to grab if you lose balance. This is a major advantage over doing single-leg drills unassisted [6].

Top 5 balance and fall-prevention exercises:

  1. Assisted single-leg stand: Hold both handles lightly, lift one foot, hold 20-30 seconds. Progress by using one hand, then fingertips.
  2. Suspended split squat: Rear foot in the strap, front foot forward, gentle knee bend. Trains hip stability and unilateral strength.
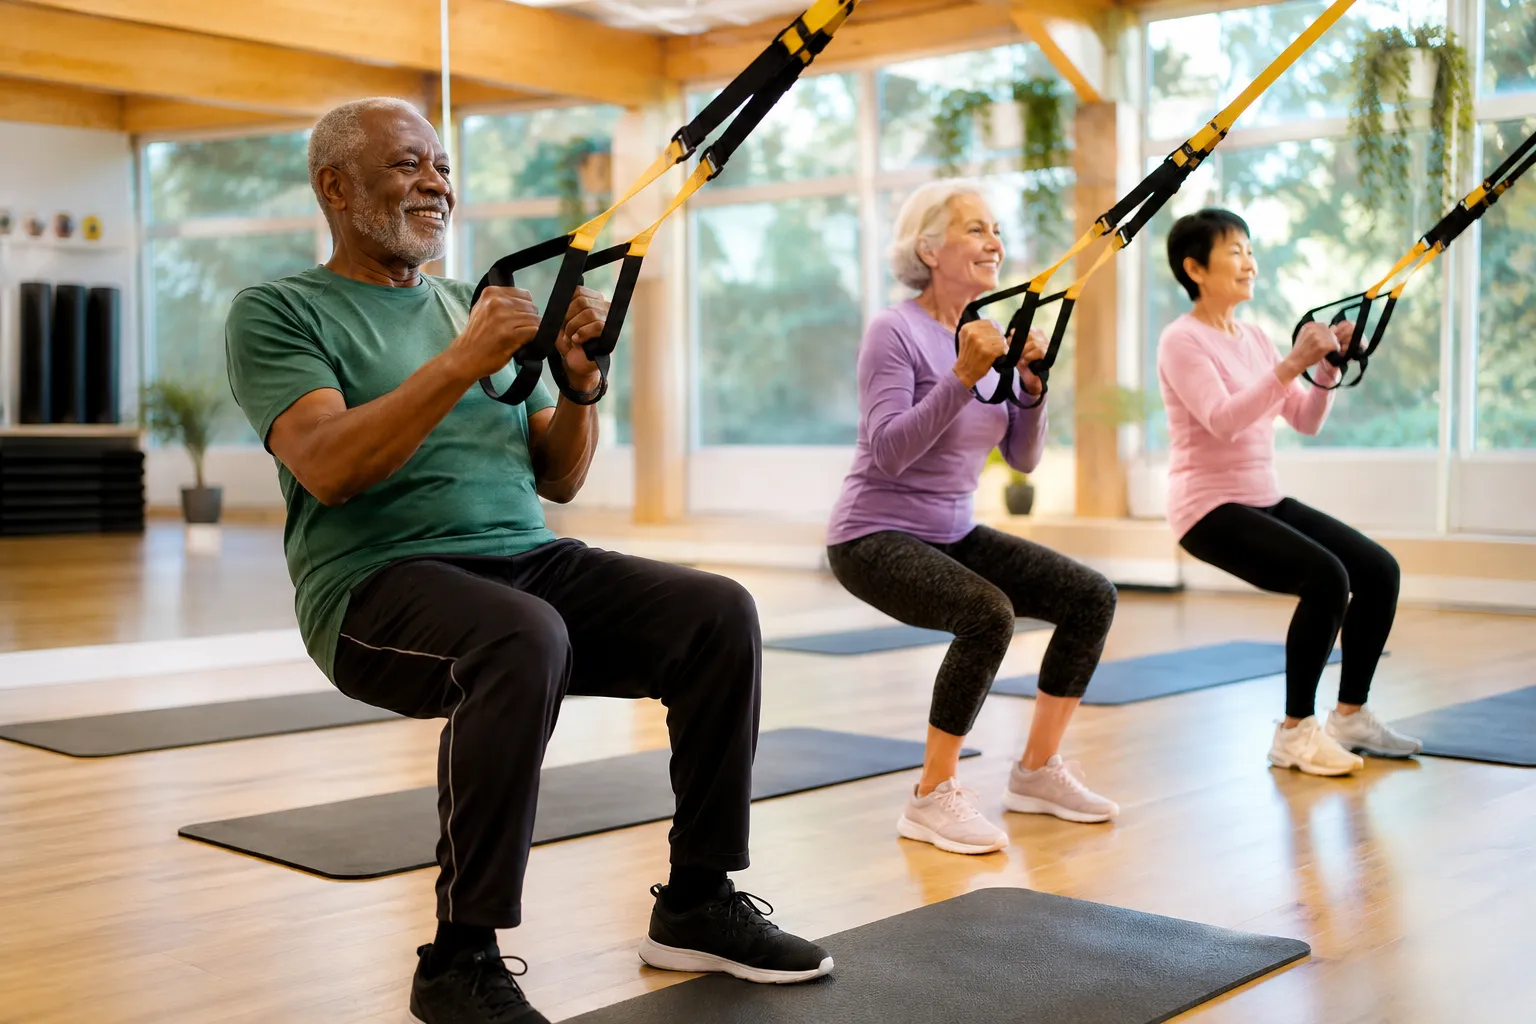
  3. Squat to stand: Hold handles at chest height, sit back into a squat, drive up. Builds the exact pattern of standing from a chair.
  4. Standing hip abduction: Hold handles, lift one leg out to the side. Strengthens the glute medius, the main hip stabilizer.
  5. Chest-height row: Trains the postural muscles that keep you upright and prevent forward-leaning falls.

Quick example progression: Start every session with 60 seconds of assisted single-leg stands per side. In four weeks, most seniors can hold 30 seconds hands-free.

Suspension training for seniors with bad knees or shoulders

For bad knees, the straps let you assist yourself out of squats and lunges, drastically reducing knee load. For sensitive shoulders, keep the arms below shoulder height and avoid overhead pulling until strength returns.

)

Knee-friendly modifications:

  • Shorten squat depth to a comfortable range (often 45-60 degrees).
  • Use the straps to unload 20-30% of your weight on the way down.
  • Skip jumping or plyometric variations entirely.

Shoulder-friendly modifications:

  • Keep hands below chin level for the first month.
  • Use a neutral grip (palms facing each other) instead of overhand.
  • Avoid "Y" and "T" raises until a physical therapist clears full overhead motion.

Edge case: After a total knee replacement, most surgeons approve gentle suspension work at 8-12 weeks post-op, but always get individual clearance first.

How much does a suspension trainer cost

A quality home suspension trainer costs $30 to $200. The official TRX Home2 kit runs around $150,$200. Reliable budget brands like WOSS Attack, Lifeline Jungle Gym, and Bodyweight Warrior sell solid units for $30,$60.

What you actually need:

  • The strap system with handles and foot cradles
  • A door anchor (usually included)
  • Optional: a beam anchor or ceiling hook for permanent setup ($10,$20)

Skip the extras. You don't need branded mats, apps, or premium subscriptions to start. YouTube has hundreds of free senior-focused suspension routines.

Total realistic startup cost: $40,$180 including anchor, one time. That's cheaper than 1-3 months of most gyms.

Can suspension training improve flexibility in seniors

Yes. Suspension straps double as a mobility tool because the handles give you something to hold onto during deep stretches, which allows a greater range of motion than unassisted stretching. Seniors often reach positions on the straps they cannot access on the floor.

Effective mobility uses:

  • Assisted hip flexor stretch: Rear foot in strap, front knee forward, sink hips down.
  • Chest opener: Grip handles behind you, step forward, feel the stretch across the chest and biceps.
  • Assisted squat hold: Hold handles, sit deep, let the straps support your weight. Improves ankle and hip mobility.
  • Hamstring stretch: Foot in strap, gently raise leg while lying on the floor.

Combined with strength work, this addresses the flexibility deficits that limit daily tasks like reaching, dressing, and getting off the floor [3].

What mistakes do older adults make with suspension training

The most common mistakes are going too hard too soon, ignoring strap length, and skipping the warm-up. Each is fixable with a bit of attention.

Top mistakes and fixes:

  1. Straps too long or uneven. Both handles should sit at exactly the same height. Check every session.
  2. Feet placed too aggressively. Beginners often start at 45 degrees when 20 degrees is plenty. Start upright, progress weekly.
  3. Holding breath during pulls. Exhale on effort, inhale on return.
  4. Sagging hips in planks and rows. Squeeze the glutes to keep a straight line from ear to ankle.
  5. Skipping the warm-up. Five minutes of marching, arm circles, and gentle squats prevents most tweaks.
  6. Death-gripping the handles. A relaxed grip reduces forearm fatigue and blood pressure spikes.

Suspension training for seniors with limited mobility

Suspension training is one of the few strength methods that works well for adults with limited mobility because you can perform every exercise seated or standing at partial range. The straps provide external support that reduces the balance demand.

Seated adaptations:

  • Seated rows from a sturdy chair
  • Seated chest press (facing away from anchor)
  • Seated overhead reach for shoulder mobility

Standing with support:

  • Chair placed within arm's reach for extra security
  • Wall two feet behind you as a safety backstop
  • Caregiver or spouse spotting the first few sessions

Start with 5-10 minute sessions, twice weekly, and add two minutes per week. The 6-week study population included older adults with typical age-related limitations, and all 11 participants completed the program with no dropouts [2].

Do you need a trainer to start suspension training

Do you need a trainer to start suspension training

You don't strictly need a personal trainer, but a single 30-minute consultation with a certified trainer (ideally one with a NASM Senior Fitness Specialist or ACE credential) can save you months of trial and error. Many offer virtual sessions for $40,$80.

Alternatives to a personal trainer:

  • Reputable YouTube channels focused on senior fitness
  • Local senior center TRX classes (often free with membership)
  • One-time posture check with a physical therapist
  • The instruction manual and app that come with most kits

Choose a trainer if: you have a recent injury, chronic condition, or feel nervous about form. Self-teach if: you're generally healthy, comfortable following videos, and willing to start conservatively.

Suspension training vs traditional weight lifting for seniors

Both build strength, but they work differently. Traditional lifting uses fixed external loads (dumbbells, machines) and is excellent for measurable strength gains. Suspension training uses body weight at variable angles and builds strength alongside balance, coordination, and core stability [6].

)

Traditional lifting advantages: Precise progression in small increments, better for pure muscle mass building, easier to isolate specific muscles.

Suspension training advantages: Lower joint impact, portable, no dropped-weight risk, built-in balance training, one piece of equipment covers 100+ exercises [5].

Best approach for most seniors: Combine both. Use suspension straps 2 days per week for full-body and balance, and dumbbells 1 day per week for targeted work like biceps curls and calf raises.

How long does it take to see results from suspension training

Balance and coordination improvements typically show up in 2-3 weeks. Strength gains follow at 4-6 weeks. Visible body composition changes take 8-12 weeks with consistent training and reasonable nutrition.

The published 6-week study showed statistically significant balance and functional reach improvements after just 12 sessions (twice weekly for 6 weeks) [1][2]. Participants also reported subjective gains in confidence and daily function.

Realistic month-by-month expectations:

  • Weeks 1-2: Learning positions, mild soreness, feeling steadier
  • Weeks 3-4: Notable balance improvement, easier to stand from chairs
  • Weeks 5-8: Clear strength gains, better posture, deeper squats
  • Weeks 9-12: Meaningful changes in stamina, muscle tone, and confidence

A simple 20-minute starter routine

Do this twice per week with at least one rest day between sessions. Adjust strap angle so each exercise feels moderately challenging by the last two reps.

  1. Warm-up (3 min): March in place, arm circles, 5 slow squats
  2. Assisted squats: 2 sets of 10 reps
  3. Chest-height rows: 2 sets of 8-10 reps
  4. Chest press (facing away): 2 sets of 8-10 reps
  5. Single-leg stance (assisted): 2 sets of 20 seconds per leg
  6. Standing hip abduction: 2 sets of 8 per side
  7. Assisted hip flexor stretch: 30 seconds per side
  8. Chest opener stretch: 30 seconds

Rest 45-60 seconds between sets. Total time: about 20-25 minutes.

FAQ

Is TRX safe for a 70-year-old?
Yes, for most healthy 70-year-olds. Research on adults 60+ shows high adherence and reduced pain with proper progression [4]. Get a doctor's clearance if you have heart disease, uncontrolled blood pressure, or recent surgery.

Can I use a door anchor safely?
Yes, if the door is solid (not hollow), opens away from you, and is fully closed and latched. Test with light body weight first.

What if I can't grip the handles well?
Wrap a small towel around each handle for a thicker grip, or use padded workout gloves. Grip strength itself will improve with training.

Will suspension training help me stand up from a chair more easily?
Yes. The squat-to-stand pattern trained on the straps directly transfers to chair rises, and most seniors notice improvement within 3-4 weeks.

How high should I anchor the straps?
Between 7 and 9 feet for most home use. The handles should hang to about mid-calf when the straps are fully extended.

Can I do suspension training every day?
Two to three days per week is optimal. Daily strength work doesn't allow recovery, and recovery is when strength gains happen.

Is it okay if I feel shaky during exercises?
Mild shaking is normal, it means your stabilizer muscles are working. Violent shaking or losing balance means the angle is too aggressive; step back and reduce difficulty.

What should I do if I have osteoporosis?
Suspension training is generally safe, but avoid forward-flexion moves and any position that rounds the spine under load. Consult a physical therapist for a personal plan.

Conclusion

Suspension training gives adults 55+ a low-impact, adaptable, and affordable way to build strength, balance, and mobility from a single anchor point at home. The published research is small but promising: measurable balance gains in 6 weeks, high adherence, and reported reductions in joint pain [1][2][4]. The equipment costs less than a month of gym membership and stores in a drawer.

Your next steps this week:

  1. Get medical clearance if you have any chronic condition or are new to exercise.
  2. Buy a basic suspension trainer ($30,$60 is enough to start).
  3. Set up a safe anchor point at 7-9 feet high.
  4. Do the 20-minute starter routine above, twice this week.
  5. Track balance in one simple way: time how long you can stand on one foot. Retest in 4 weeks.

Start conservatively, progress weekly, and let the strap angle do the work. Consistency over intensity is what changes function at 60, 70, and 80.

References

[1] Efficacy of a 6-Week Suspension Training Exercise Program on Fitness Components in Older Adults – https://pmc.ncbi.nlm.nih.gov/articles/PMC9362890/
[2] Efficacy Of A 6 Week Suspension Training Exercise Program On Fitness Components – https://www.physiohub.io/research/older-adults/efficacy-of-a-6-week-suspension-training-exercise-program-on-fitness-components
[3] Benefits Of Strength Training For Seniors – https://insurefitness.com/benefits-of-strength-training-for-seniors/
[4] Suspension Training For Older Adults – https://blog.nasm.org/suspension-training-for-older-adults
[5] Suspension Training For Seniors – https://wellness.nifs.org/blog/suspension-training-for-seniors
[6] TRX Suspension Training: A New Functional Training Approach for Older Adults – https://fis.dshs-koeln.de/de/publications/trx-suspension-training-a-new-functional-training-approach-for-ol/
[7] Effects of Suspension Training on Older Adults – https://pmc.ncbi.nlm.nih.gov/articles/PMC6966604/
[8] Suspension Training Research – https://www.mdpi.com/1648-9144/60/1/47